35
•
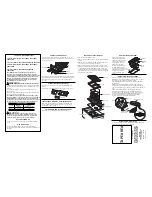
CORRECT POSITIONING
Your appliance should be built into the surface of a
support cabinet that is a minimum of three cm
thick, made of a material that resists heat or that is
covered with such a material.
To ensure that cooking utensils can be handled
safely, a minimum of 30 cm either side of the hob
should be kept free from any obstructions (cabinets
or walls).
If a horizontal divider wall is positioned under the
hob, it should be placed between 10 cm and 15 cm
away from the top of the work top. In any event, do
not store aerosol cans or containers under pressure
in any compartment that may exist under the hob
(See
“Safety Recommendations” chapter).
BEFORE INSTALLING
your hob, and to ensure there are no leaks between
the unit and the work surface, make sure that you
use the sealant strip provided
(Fig. 02).
—
Remove the pan supports, the burner covers and
burner heads, noting their positions.
—
Turn the hob over and carefully place it on top of
the opening in the cabinet so as not to damage the
knobs and spark plugs.
—
Glue the foam seal, supplied with the appliance,
to the outside edge of the frame
. This strip will
ensure the join between the glass and the work
surface is properly sealed.
—
Place your hob in the opening of the support unit,
carefully centring it in the cut-out.
—
Reposition the pan supports, burner covers and
burner heads.
—
Connect the hob’s power cable to your kitchen’s
electricity supply (see “
Electric connection
section).
—
Connect your appliance to the gas supply (see
“
Gas connection
” section).
•
48 cm m
ini
3 cm mini
30 cm mini
56 cm / 26,5 cm
30 cm
mini
5,8 cm mini
70 cm mini
Fig. 01
Fig. 02
Housing
Seal
APPLIANCE
EN
2
2 // INSTALLING YOUR APPLIANCE
Width
Depth
Thickness
Model
For standard
cabinet
56 cm
49 cm
depending
on cabinet
60 cm
For standard
cabinet
26.5 cm
49 cm
depending
on cabinet
30 cm
Total
dimensions
above the
work top
71 cm
52.2 cm
5 cm
60 cm
31 cm
51 cm
5 cm
30 cm
Total
dimensions
below the
work top
55.4 cm
47 cm
5.1 cm
60 cm
26 cm
47 cm
5.1 cm
30 cm


