16
KD2 Pro Operator’s Manual
3. The Menus
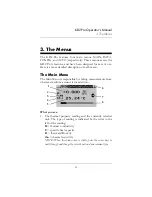
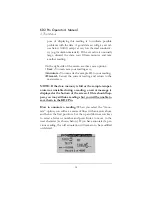
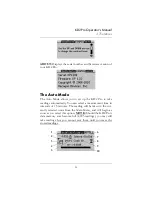
2. Icon showing connected sensor type.
3. Indicator for high power mode (HPM) or low power
mode (LPM).
4. The currently connected sensor type and sensor name.
5. The measurement temperature in °C or °F.
6. Indicates the length of the reading in minutes
7. Indicates the status of a reading.
8. Progress bar that displays elapsed time.
The purpose of the Main Menu is to take measurements. The
next section will explain how to do this.
Taking a Measurement
It is easy to take measurements with the KD2 Pro. Do the fol-
lowing to make a measurement:
NOTE:
If the temperature of the sample is different from
the temperature of the needle, the needle must equilibrate
to the surrounding temperature before beginning a read-
ing.
1. Attach appropriate sensor then turn on the KD2 Pro.
2. Properly insert the sensor into the material to be mea-
sured. (See “Installing the sensors” in this chapter for
instructions.)

