CBT36K Assembly Manual
Page
63
of 89
Of course, you can continue with the following
steps without restoring the crossover to its
factory state but some of the following steps
may not apply exactly. What does count in this
case however is that the appropriate parameter
values themselves get entered correctly in the
proper locations. In this situation, presumably
you are experienced with operating the
DCX2496 and may not require as much
handholding.
The DCX2496 is reset to its factory condition by
turning it on while simultaneous pushing and
holding both PAGE buttons on the front
panel.
This will
immediately
invoke
a
confirmation warning on the front panel to either
accept or reject the reset. To reset the
crossover, press OK.
Note that this reset operation automatically
loads factory preset number one which initializes
the crossover to a stereo three-way
configuration with both stereo channels linked
together. This means that you only need to enter
the parameters in one channel and the data is
replicated in the other channel.
Also note that loading this preset mutes all
outputs. After all the following data entry steps
are accomplished, the last step will instruct you
to un-mute all outputs (including the sub
channels whether their active or not) in
preparation for connecting the crossover in your
system. In the final system check phase, the
output mutes can be used selectively to easily
check proper operation of each mid and tweeter
channel.
Note to experienced users:
If you didn’t reset the
crossover as instructed above, preset one must
be loaded first before the next steps are
accomplished (assuming you didn’t modify it
before).
12.1.10.4. Step Two, Turn on INPUT “A” EQ:
The following step turns on the equalization
(EQ) for the left channel input “A”. Due to the
linking, this also turns the EQ on for the right
channel input “B.” Remember that the third input
“C” is not used.
Navigate to input A, page 3 of 5 - Press
[INPUT A] [PAGE>] [PAGE>] and use the knob
to turn the [EQ:ON].
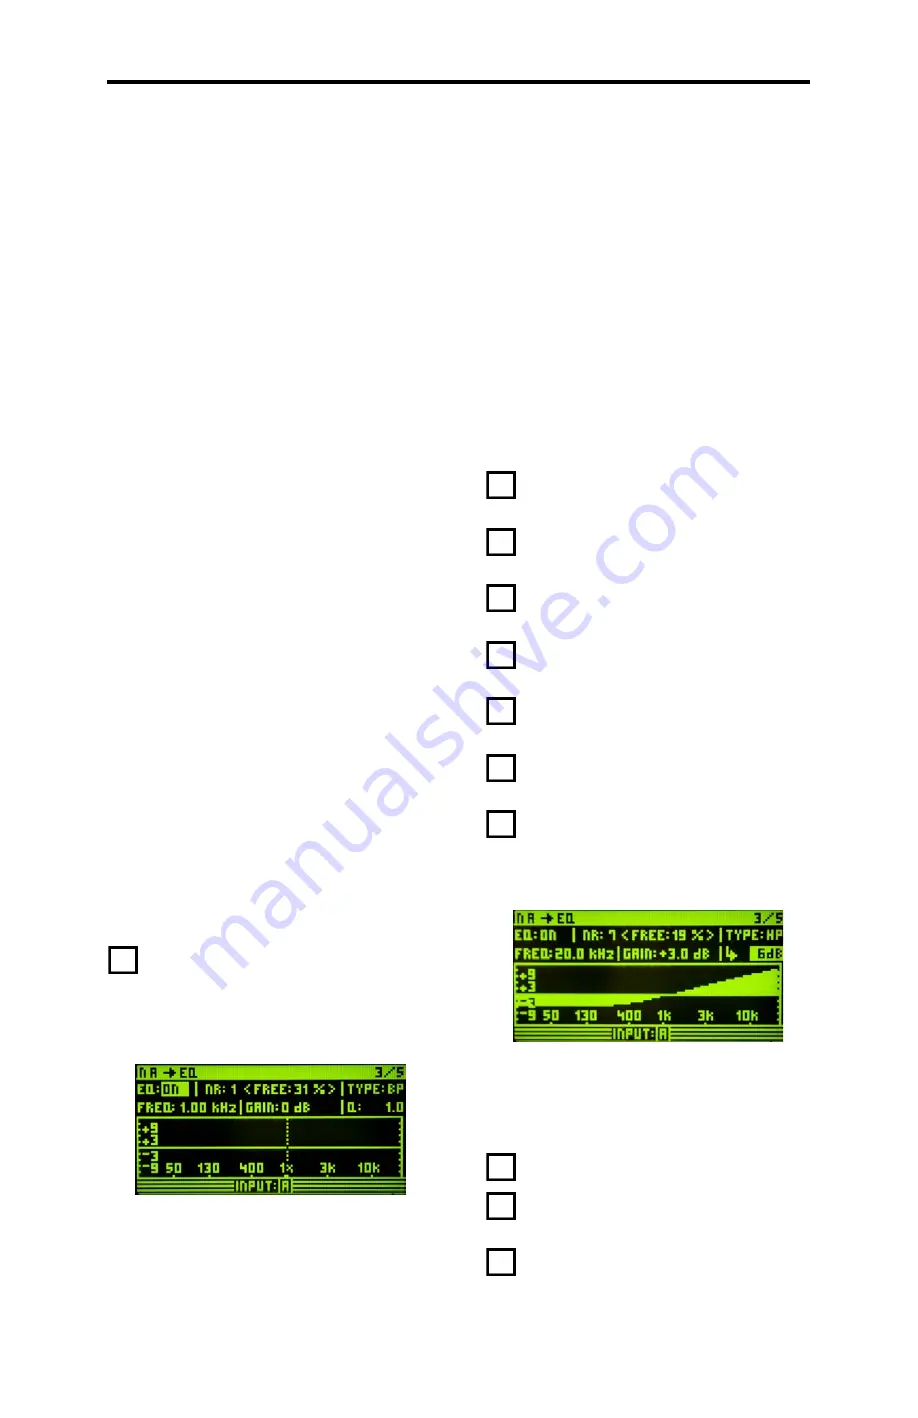
The following photo shows the DCX2496 front
panel display after the EQ is turned on:
For the next several entries you will use a
combination of the [PARAM] key and the Knob
to change [NR] [TYPE] [FREQ] [GAIN] [> xxdB]
etc. The [PARAM] key cycles through each of
the input fields looping back to the beginning
when you reach the last entry. [PARAM>] moves
the curser to the right and [<PARAM] moves the
curser to the left. The short hand notation “NR”
means number and preceeds the number of the
filter in this input channel.
12.1.10.5. Step Three, Enter the 3dB/octave CD
Correction Filter:
See Appendix 2: “Theory of Operation” section
14.2.13 for an explanation of why this filter is
necessary. Some may prefer a slight downward
tilt in the frequency response because the sound
may be perceived to be too bright, particularly in
live environments.This is easily accomplished by
replacing all instances of “3.0” dB with either
“2.0” dB or “2.5” dB in filter numbers 1 to 7 (
[NR: 1 through NR: 7]), i.e. -3.0 dB turns into
-2.0 dB (or -2.5 dB) and +3.0 dB turns into +2.0
dB (or +2.5 dB), etc.
(See section 14.2.13.7)
The following steps setup the EQ for the seven
input filters for both channels:
[NR: 1] [TYPE: LP] [FREQ: 401Hz] [GAIN:
-3.0dB] [>6dB]
[NR: 2] [TYPE: LP] [FREQ: 805Hz] [GAIN:
-3.0dB] [>6dB]
[NR: 3] [TYPE: HP] [FREQ: 1.60kHz]
[GAIN: 3.0dB] [>6dB]
[NR: 4] [TYPE: HP] [FREQ: 3.24kHz]
[GAIN: 3.0dB] [>6dB]
[NR: 5] [TYPE: HP] [FREQ: 6.43kHz]
[GAIN: 3.0dB] [>6dB]
[NR: 6] [TYPE: HP] [FREQ: 12.8kHz]
[GAIN: 3.0dB] [>6dB]
[NR: 7] [TYPE: HP] [FREQ: 20.0kHz]
[GAIN: 3.0dB] [>6dB]
After you enter the seventh EQ filter (NR: 7), the
screen will look like the following photo.
12.1.10.6. Step Four, Set Up the Mid-Bass
Channel:
The following steps set up the crossover filter
type and frequency for the mid-bass channel on
output two (and with linking channel five).
Press [OUTPUT 2] [PAGE>]
Set the high-pass filter parameters to:
[TYPE: BUT24] [FREQ: 20Hz].
Set the low-pass filter parameters to:
[TYPE: L-R24] [FREQ: 1.00kHz].


