


8. Once the installation is completed, restart your machine.
Note: If you previously performed a clean install of the Mac OS system software you
can now move items from the Previous System Folder into the System Folder. Files
that you may wish to copy back into the System Folder include Control Panels,
Extensions and Preference files. Be sure not to copy older versions of the system
software from the Previous System Folder over new files in the System Folder.
If your machine does not operate properly or your performance decreases after plac-
ing Control Panels or Extensions back into the System Folder, remove the files and
add them one at a time, booting up after each, until you find the problematic file.
Once you find the file, remove it and continue adding the other files until all such
files have been removed from the System Folder. Some conflicts can be overcome by
changing the first character in the file name, which changes the order in which the
files load. If you continue to have problems with specific files, contact the developer
for assistance.
Performing an Custom Install
1. Turn off Genesis MP.
2. Insert your Genesis MP Boot Disk into the floppy drive and turn on your Genesis MP.
3. Insert your Genesis MP CD-ROM into the CD-ROM player.
4. Open Genesis MP Installer and click Continue.
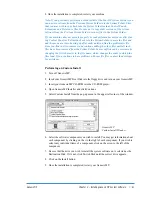
5. Select Custom Install from the pop-up menu in the upper left corner of the window.
Genesis MP
Custom Install Window
6. Select the software components you wish to install. You may get information about
each component by clicking on the i to the right of each component. If you wish to
select only individual items of a component, click on the arrow to the left of the
component.
7. Be sure that the drive you wish to install the system software on is selected as the
Destination Disk. If it’s not, click Switch Disk until the correct drive appears.
8. Click on the Install button.
9. Once the installation is completed, restart your Genesis MP.
Genesis MP
Chapter 4 – Installing Genesis MP System Software
◆
61