13
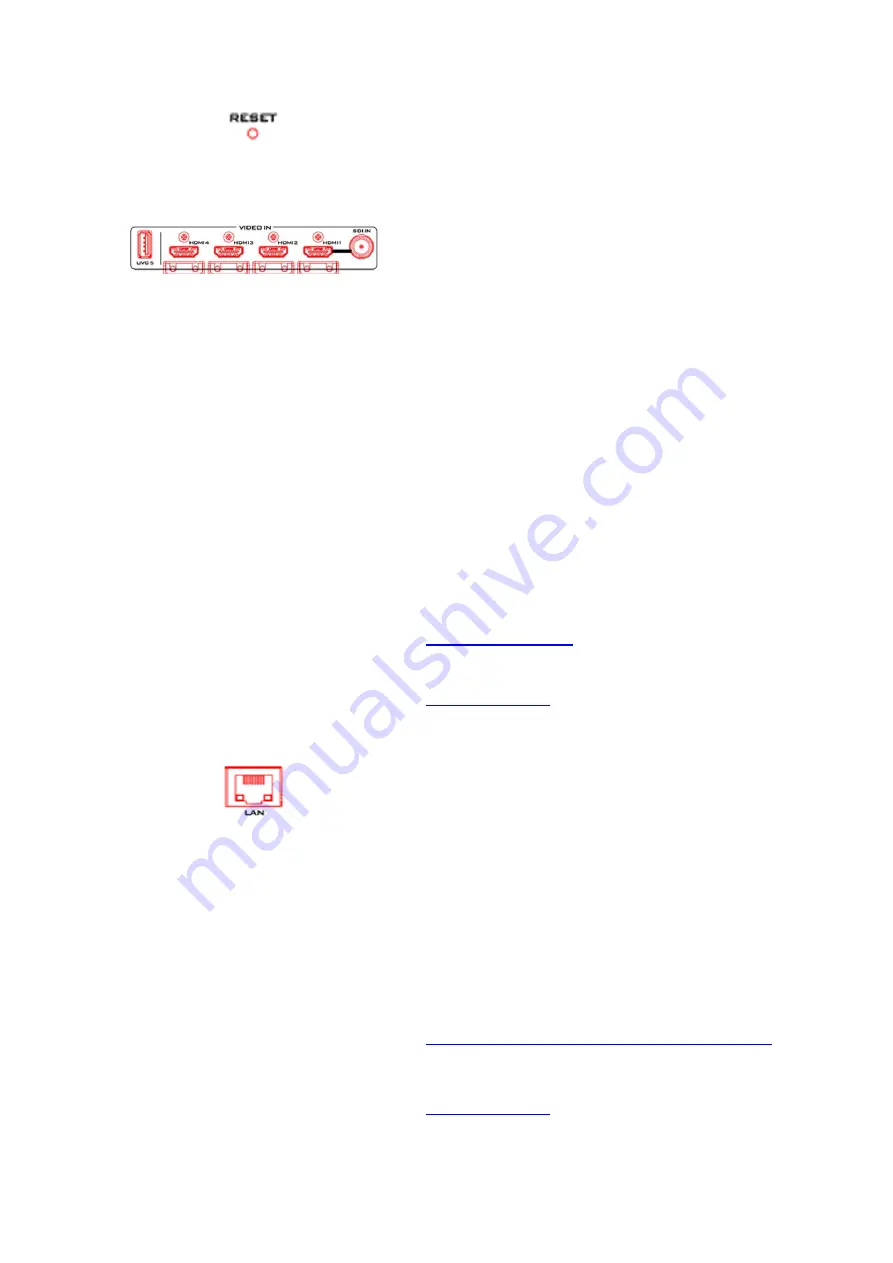
4. Reset Hole
Insert a needle into the reset hole to press and hold the
internal button. The device should reset itself after a few
seconds.
5. Video Input Ports
The video input ports consist of one 3G/HD/SDI-SDI port,
four HDMI 1.4 ports, one USB 3.0 port and two Ethernet
ports (LAN and WAN ports) and can be assigned to input
video channels in different combinations.
The available video source types for each input video
channel are summarized below:
Input Video Channel 1: SDI, HDMI, IP Stream, NDI and
WebRTC
Note: SDI is only available on Channel 1. Pressing the
Input 1 button on the front panel allows you to switch
between SDI and HDMI video source types.
Input Video Channel 2: HDMI, IP Stream, NDI and WebRTC
Input Video Channel 3: HDMI, IP Stream, NDI and WebRTC
Input Video Channel 4: HDMI, IP Stream, NDI and WebRTC
Input Video Channel 5: UVC
Note: The USB 3.0 port (UVC 5) is designed for
connecting a document camera.
See
for assigning an appropriate video
source type to input channels.
6. LAN Port
The LAN port allows you to connect your iCast 10NDI to
any networks. The LAN port is a bidirectional stream port
capable of accepting video streams from multiple video
sources that are on the same network as iCast 10NDI or
streaming videos from iCast 10NDI to local and remote
client devices. Source and destination devices can be any
NDI, IP or WebRTC devices.
The LAN port allows the user to establish direct
connection between the PC and the iCast 10NDI in order
to access the Web UI for accessing the device’s internal
stream and record settings.
See
Section 5.1 Network Connection and Device Search
for instructions on how you can establish direct
connection with iCast 10NDI.
for assigning an NDI, IP stream or
WebRTC video source type to input channels. Please note
Содержание iCast 10NDI
Страница 1: ...1 STREAMING SWITCHER 5 CHANNEL ALL IN ONE iCast 10NDI Instruction Manual...
Страница 10: ...10 1 2 System Diagram...
Страница 11: ...11...
Страница 35: ...35 7 Enter the login credentials Username admin Password 000000 to log in to the web UI shown below...
Страница 60: ...60 5 7 Multiview Connect an HDMI monitor to the Multiview port then select a layout for the Multiview screen...
Страница 73: ...73...
Страница 91: ...91 Appendix 4 Dimensions All measurements in millimeters mm...
Страница 94: ...94 Notes...
Страница 95: ...95 Notes...


