


6-10
Magellan
TM
8500Xt Scanner
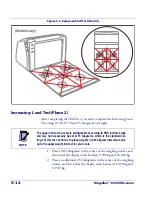
Increasing- Load Test (Phase 2)
After completing the Shift Test, you must complete the Increasing Load
Test using 8.0, 10.0 and 12.0 pounds of weight.
NOTE
The upper limit of the scale is configurable according to the POS
interface type and may not necessarily be set at 30 pounds, which is
the standard setting. For this test, continue to place weights in two
pound increments only up to the upper weight limit set for your scale.
1. With the scale starting at zero, place 8.0 pounds in the center of
the weighing surface and check that the display reads between
7.995 and 8.005 lb.
2. Place an additional two pounds (10 pounds total) in the center of
the weighing surface. Check that the display reads between 9.995
and 10.005 lb.
3. Place an additional two pounds in the center of the weighing sur-
face increasing the load to 12.0 pounds and check that the display
reads between 11.995 and 12.01 lb.
4. Place an additional five pounds (fifteen pounds total) on the cen-
ter of the weighing surface. Verify that the Remote Display reads
between 14.99 and 15.01. Remove the weights and verify that the
display reads 0.00.
5. You have completed the Increasing-Load Test (Phase 3).
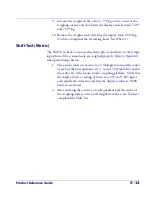
Shift Test (10 Pounds)
The Shift Test checks to ensure that items placed anywhere on the weigh-
ing surface of the scanner/scale are weighed properly. Refer to
Figure 6-2
when performing this test.
1. Place and remove, in succession, a ten-pound load on the center
of each of the four quadrants: 1, 2, 3, and 4, (as shown in
Figure 6-2
) of the scanner/scale’s weigh platter. Verify that a read-
ing of between 9.99 and 10.01 lb. registers, under load, in each
quadrant tested. Check that the display returns to 0.00 between
each load.
Содержание Magellan 8500Xt
Страница 1: ...MagellanTM 8500Xt Product Reference Guide...
Страница 14: ...12 MagellanTM 8500Xt Scanner NOTES...
Страница 70: ...2 40 MagellanTM 8500Xt Scanner NOTES...
Страница 88: ...3 18 MagellanTM 8500Xt Scanner Figure 3 6 Removing Replacing the Gasketed DLC Window a b c d...
Страница 93: ...Product Reference Guide 4 5 Figure 4 1 7 Segment LED Display 7 Segment Display Models vary...
Страница 102: ...4 14 MagellanTM 8500Xt Scanner NOTES...
Страница 138: ...6 20 MagellanTM 8500Xt Scanner NOTES...
Страница 416: ...7 278 MagellanTM 8500Xt Scanner NOTES...
Страница 428: ...A 12 MagellanTM 8500Xt Scanner...
Страница 448: ...D 2 MagellanTM 8500Xt Scanner NOTES...
Страница 462: ...E 14 MagellanTM 8500Xt Scanner NOTES...
Страница 477: ...Product Reference Guide F 15 NOTES...
Страница 478: ...F 16 MagellanTM 8500Xt Scanner NOTES...