


reading template.
Patch Reading Template:
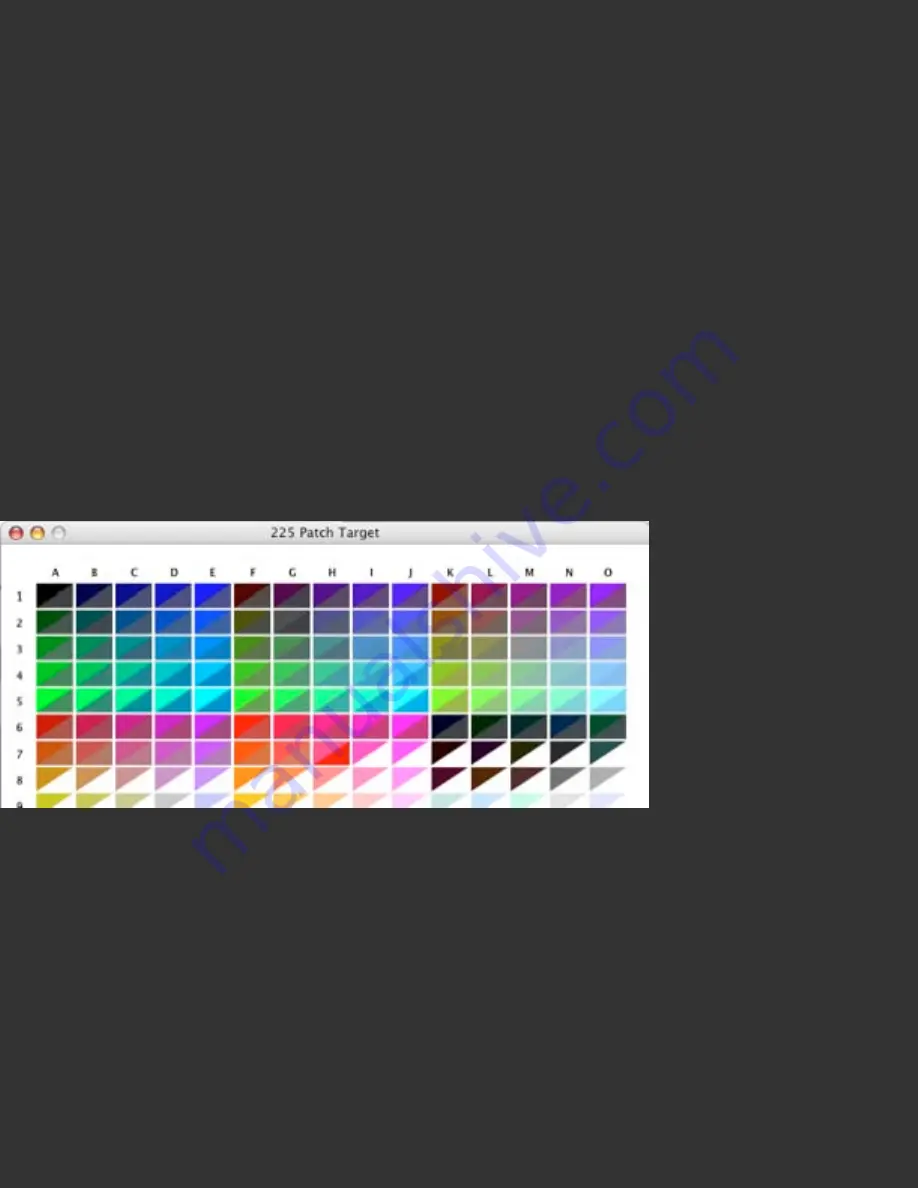
The patch reading template displays a rectangle for each
correlating color patch in the printed target. Each rectangle is divided diagonally into
an upper left section and a lower right section. The upper left section displays the pure
color value for this patch. The lower right section displays white, until a measurement
for the patch occurs, then displays that measured value. The pure and measured
values will not be identical, but the relative relationship between them is useful for
checking measurements. Multipage templates will have page buttons at the bottom
center to allow navigating from one page to another.
Patch Reading Navigation:
At any time, the user can move to a different patch by
using the arrow keys on the keyboard. This allows for moving backwards to reread a
misread patch, or navigating throughout a target to view the values of measured
patches.
Portion of a target in Split Display mode, with patches measured through patch 7G;
patch 7H will be measured on the next click of the Spectro button.
Patch Display Modes:
The popdown list in the lower right hand corner of the
Template allows the user to fill the entire square with either the pure or the measured
values. The pure RGB values will show the target as it displayed when sent to the
printer for printing. The measured values will show the L* a* b* values measured by
the Spectro for each patch. Selecting the Measured Display mode is useful to obtain a
clearer view of measurements to detect any errors in patch reading. It is
recommended that measurements be made in the Split mode, and reviewed in the
Measured mode prior to finalization. Toggling between Pure to Measured mode, using
Содержание Spyder3Print
Страница 70: ......
Страница 115: ...Datacolor products be sure to visit our website http www datacolor com Spyder3 ...


