Wall Ceiling Counter
NOTE:
For ceiling installation, position the antenna as high
as the ceiling allows. See the"Ceiling" mounting position in
the figure above.
To Install the Cameras
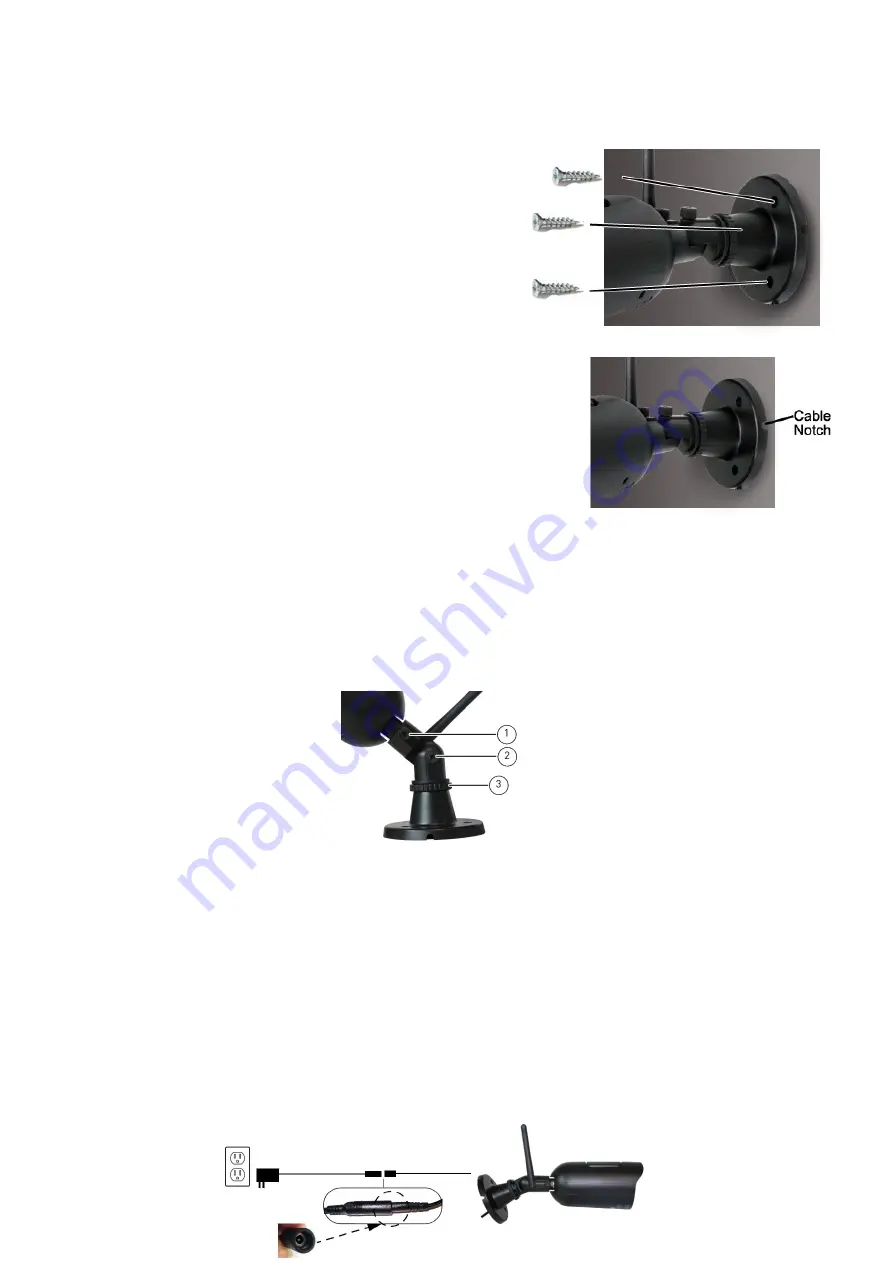
1. Use the included mounting screws to mount the camera to
the mounting surface:
· Mark the positions of the screw holes on the mounting
surface.
· Drill holes and insert the drywall plugs (included) as needed.
· Firmly attach the camera to the mounting surface using the included
screws.
NOTE (1):
If you are running the power cable through the mounting
surface, connect power before firmly attaching the camera to the
mounting surface.
NOTE (2):
If you run the power cable along the mounting surface, the
cable must go through the cable notch on the camera base. This will
keep the camera base flush to the mounting surface.
NOTE (3):
The camera can also be placed on a flat surface, such as a Table or Shelf, and no mounting
hardware is required.
2. Loosen the thumbscrews (1, 2) and the adjustment ring (3) by turning them counter clockwise.
3. Adjust the angle of the camera until the desired view is set. Tighten the thumbscrews and the
adjustment ring to secure the camera’s position.
NOTE:
You can install additional cameras (maximum of 4 cameras). When adding cameras that were
not included in the original box, you will need to pair up the cameras with the receiver. Refer to the
camera pairing section of this manual.
4. Connect the power cable from the camera to the weatherproof power connector. Plug the power
adapter into a power outlet or surge protector.


