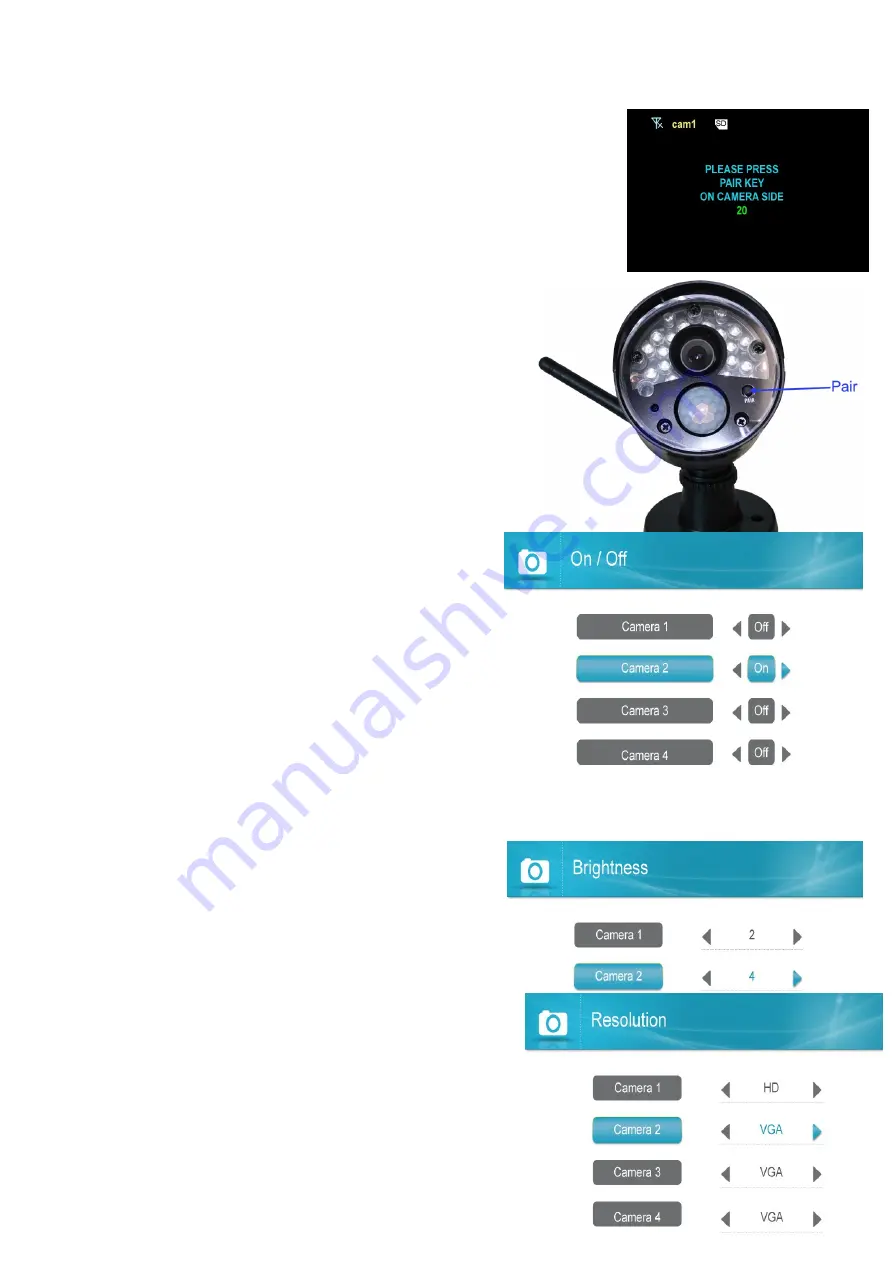
5. A message will be displayed on the receiver screen.
The receiver will count down from 30~0 – you must press the
Pair
button on
the camera during this time to successfully pair the camera. If the button on
the camera is not pressed, the receiver will return to the view screen, and no
pairing will take place.
6. Following the on-screen prompt, press the
Pair
button on the back of the
camera. You have 30 seconds to press the Pair button on the
camera, once paired, after 3s will see the live video on monitor .
-Camera On/Off :
Select a camera by moving the joystick up/down, then
move the joystick left/right to switch on or switch off the
camera.
Push the joystick to confirm the change and exit.
NOTE:
The currently selected camera will have On/Off
highlighted in Green. Any disabled channels will be
blacked out in Quad mode when you pair 4 cameras.
-Brightness:
To adjust camera brightness:
1. Press
Menu
then select Camera. Push the joystick to
confirm.
2. Select Brightness.
3. Move the joystick up/down to select the camera you
wish to configure brightness for.
4. Move the joystick to the right to increase the brightness
level for the selected camera, or left to decrease
brightness. Camera brightness is measured on a scale of
1-6 where1 is the darkest and 6 is the brightest. Push the
joystick to save changes. ( default 3)
5. Press the button to exit.
6. Repeatsteps1~4 to configure your other cameras as


