Unit Location
1.
Console water source heat pumps are designed to
be installed in a controlled environment.
2.
All units are to be installed against a wall.
3.
Each unit should be located on the architectural
plans. The supply, return, and condensation piping
should be located accordingly, making sure the
piping will fit into the confines of the subbase and
cabinet.
Installing the Unit
WARNING
Installation and maintenance are to be performed by qualified
personnel who are familiar with local codes and Regulations, and
experienced with this type of equipment.
CAUTION
Sharp edges can cause personal injury. Avoid contact with them.
1.
Consult job blueprints for unit location. Clean
area where unit is to be installed, removing all
construction dirt and debris.
IMPORTANT
Clean unit mounting area of all construction debris. Check that
the floor is level and at 90 degrees to the wall. Daikin McQuay
recommends the placement of a sound absorbing mat beneath
the unit footprint before continuing to the next installation step.
2.
Remove unit from shipping carton and save the
carton. Remove the front panel by removing a screw
on each end of the cabinet. Lift the cabinet up,
forward and off.
3.
Each chassis is mounted to cabinet backwrap and
subbase assembly by six screws for shipment.
Remove four screws, two on each side of the
chassis at the subbase.
STOP!
If an outside air damper kit is to be installed, refer
to “Field Installed Outside Air Damper (Acces-
sory)” on page
21
for the manual damper or
the motorized damper kit and install it now.
4.
Position cabinet backwrap and subbase against the
wall where unit is to be installed. Ensure adequate
room exists for piping and electrical connection in
the subbase by checking the connection end of the
subbase.
5.
Using a carpenter’s square and level, make sure
unit is level and that it is at a 90-degree angle with
the wall and floor.
Note:
If the floor and wall are not at right angles, it will
be necessary to shim the subbase for proper
installation. Daikin will not accept responsibility
for units that may need to be shimmed. Poor or
inadequate installation could create noisy unit
operation.
6.
The cabinet backwrap has slots on the back
flange to mount the assembly to the wall. It is the
contractor’s responsibility to select the correct
fastener for each unit, using a minimum of three (3)
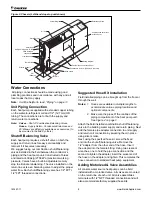
fasteners, Figure 1.
7.
After securing the subbase and backwrap assembly
in place, insert the chassis if it has been removed.
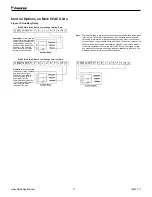
Next, the electrical connection should be made,
Figure 2 on page
8
Figure 1: Cabinet backwrap & subbase
Subbase
Backwrap
10.0"*
(245mm)
A
C
B
Table 2: Dimensions in inches (mm)
Unit Type
Unit Size
A
B
C
Standard
Height
009-012
46 (1168)
45 (1143)
25 (635)
015-019
54 (1372)
53 (1346)
25 (635)
Note:
*Total unit is 10-3/4″ (273mm) deep. The cabinet extends beyond the
subbase 1/4″ (6mm) in the back and 1/2″ (14mm) in the front.
www.DaikinApplied.com
7
IM 447-11
Содержание WAA
Страница 2: ......
Страница 35: ...Notes Comments Form WS CTS 00 01 Rev 4 14 www DaikinApplied com 35 IM 447 11...

