


English
45
5.
Upon completion, click the “
” button on the Pattern
change dialog box (Screen 2). To cancel your entry, click
the “
” button.
Return to the Schedule Setup screen (Screen 1).
6.
Repeat the steps 1 to 5 in this procedure if other extra
schedule patterns should be set up.
7.
In the Schedule Setup screen the schedule pattern bar in
the figure (Screen 3) appears. For the description of each
mark, see the “Creating Regular Schedule Patterns” sec-
tion.
If the setting is satisfactory, associate each Ex schedule
pattern with a specific date. See the following (Screen 1).
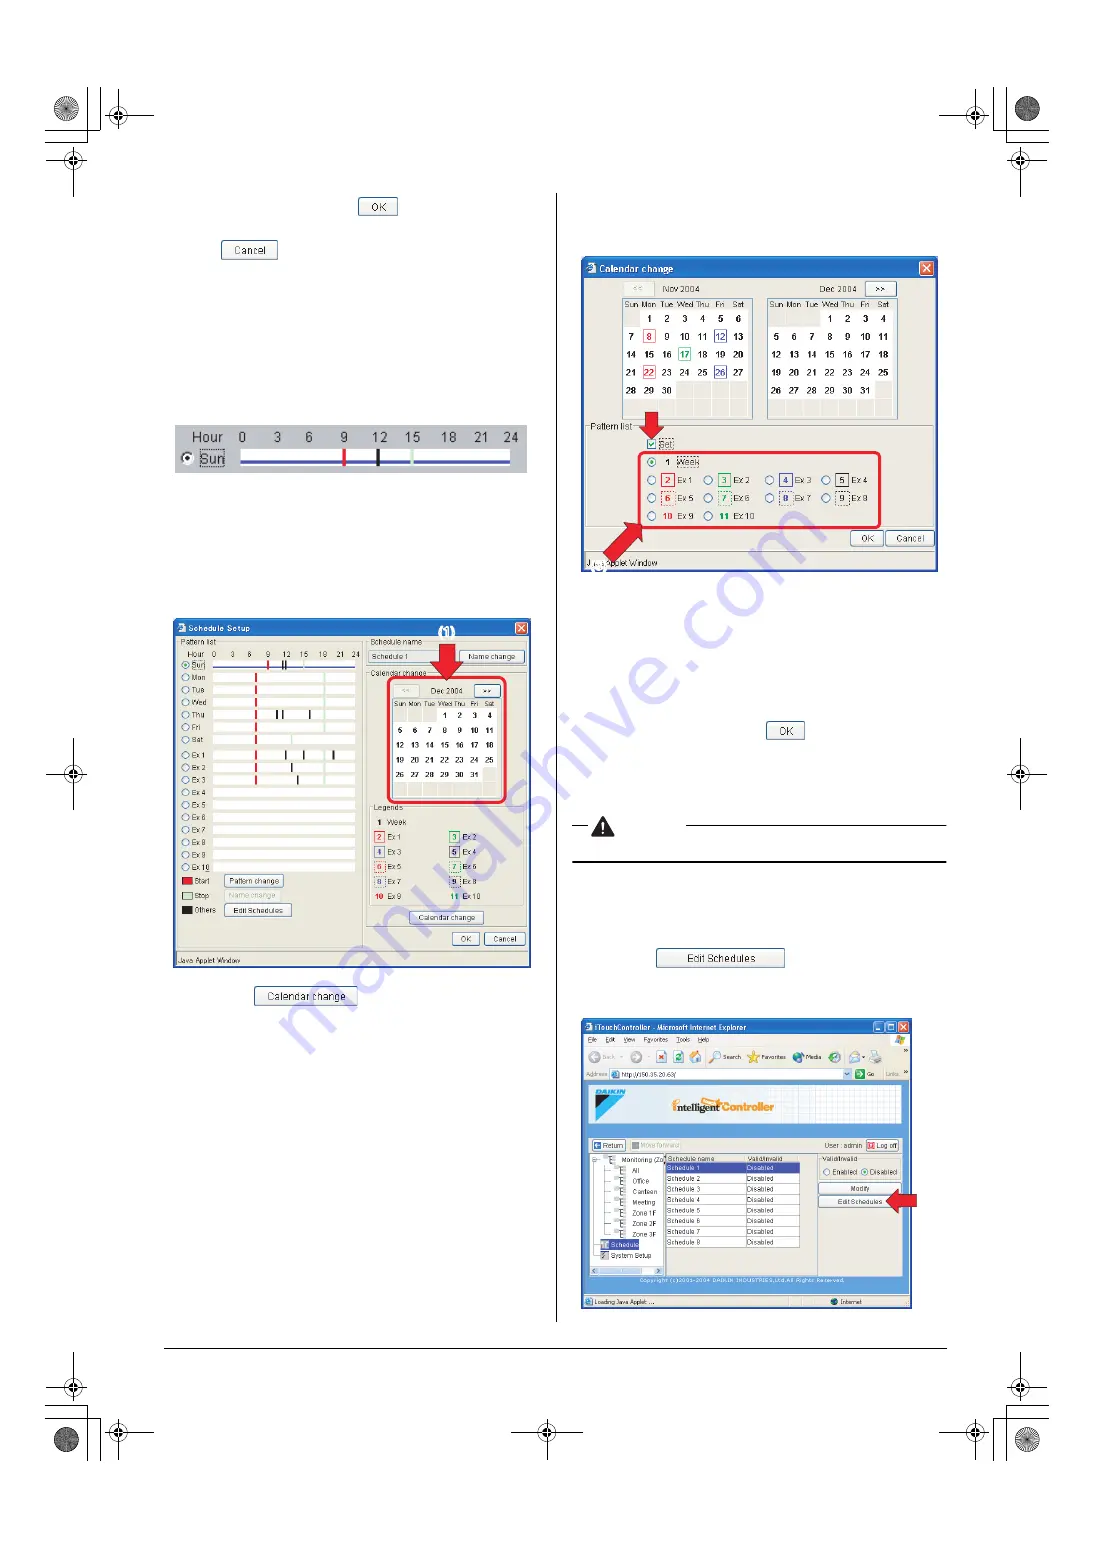
8.
Then mark the dates on the calendar to indicate when the
Ex schedule events should occur. As shown in the figure, by
default no Ex schedule is associated (1). (Regular schedule
patterns are applied to all the dates.)
Click the “
” button.
9.
The Calendar change screen (Screen 2) appears. Click the
Set checkbox (2).
10.
Click the appropriate radio button to select the Ex schedule
pattern to be set.
11.
With the Ex schedule pattern radio button selected, click a
date on the calendar to assign that date to the Ex schedule
pattern.
To deselect an Ex-schedule-pattern-assigned date, select
the Week radio button and then click the date.
12.
Upon completion, click the “
” button to return to the
main scheduling screen.
In this screen you can enable the schedule program just
created. By default it is disabled. Click the Enable radio but-
ton to enable it.
CAUTION
•
Disabled schedule programs do not work.
The extra schedule patterns are now created.
8-6 Copying or Deleting a Schedule Program
■
■
■
■
To copy or delete a schedule program
1.
Click the “
” button (1) in the main
scheduling screen (Screen 1).
Screen 3: Pattern bar
(1)
Screen 1: Schedule Setup screen
(2)
(3)
Screen 2: Calendar change screen
(1)
Screen 1: Main scheduling screen
01_EN_EM05A059.fm Page 45 Wednesday, October 19, 2005 7:13 PM


