


28
English
[Procedure]
1.
On Screen 1 Monitoring, select a zone or a group from the
pull-down menu (1).
Select a zone or a group of which the fan direction or volume
is to be reset (2).
To change the setting for all the devices in a group, select the
zone including the group from the zone tree area (1), and
select the group from the main display area (2).
2.
Press the
. Screen 2 Operation appears.
[When Selecting a Zone Including HRVs]
When selecting a zone including HRVs, the Zone Setup screen
(Screen 2) appears.
(3) Click the “
” button to display the HRV setting
screen (Screen 3). You can set up the following two items.
(4)
Ventilation mode
In this frame the Ventilation mode can be changed. Select
the Set checkbox, and check a desired radio button.
(5)
Ventilation amount
In this frame the Ventilation amount setting can be changed.
Select the Set checkbox, and check a desired radio button.
Upon completion, click the “
” button (6) and return to the
Main screen.
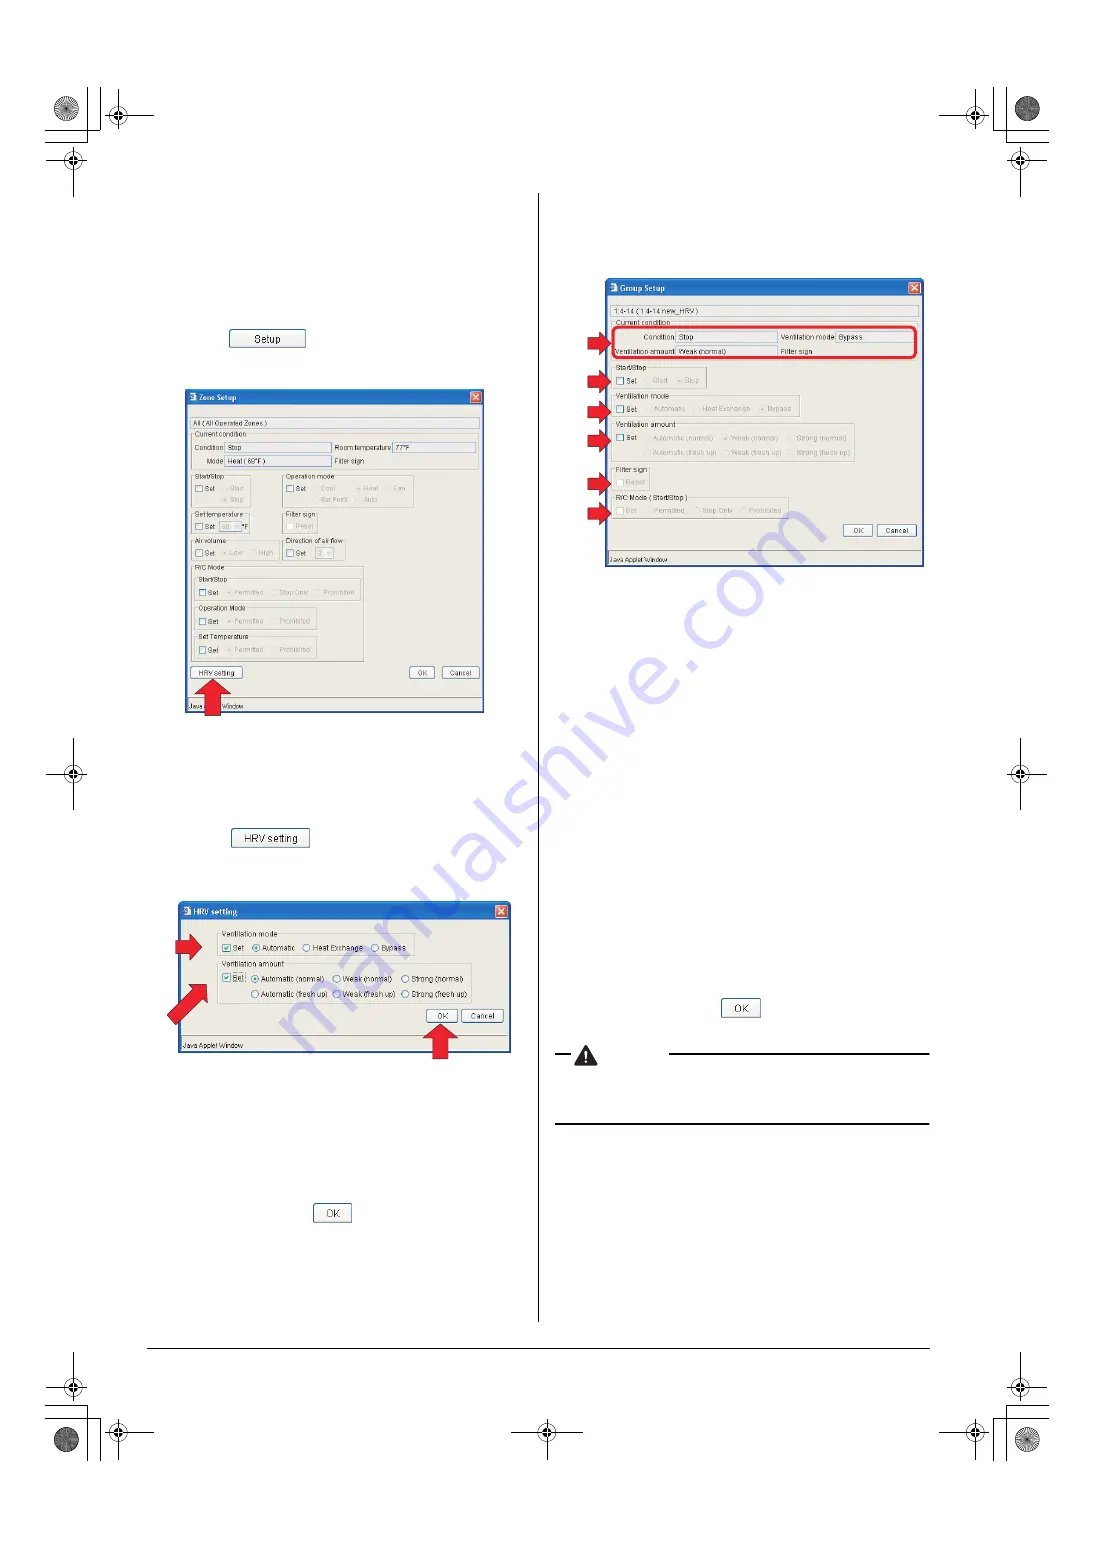
[When Selecting an HRV Group]
When selecting an HRV group, the Group setup screen
(Screen 4) appears. This dialog box offers the following items.
(7)
Current Condition
Displays the current HRV status. The following four data
items are provided.
• Start/Stop state
• Ventilation mode
• Ventilation amount
• Filter sign
(8)
Start/Stop
In this frame you can start or stop the devices. Select the
Set checkbox and check a desired radio button.
(9)
Ventilation mode
In this frame you can select a Ventilation mode. Select the
Set checkbox and check a desired radio button.
(10)
Ventilation amount
In this frame you can select a Ventilation amount setting.
Select the Set checkbox and check a desired radio button.
(11)
Filter sign
When the Reset indicator is not grayed out, one or more fil-
ter signs illuminate. In the Screen 2 the indicator tells that
no sign illuminates.
To reset the filter signs, select the Reset checkbox.
(12)
R/C Mode (Start/Stop)
In this frame you can permit or prohibit the start/stop oper-
ation through remote controllers. Select the Set checkbox
and check a desired radio button.
Upon completion, click the “
” button on each screen and
return to the Main screen.
CAUTION
• Some HRV models may not support the Freshen up and/
or Ventilation amount setting options. In this case unavail-
able buttons are grayed out.
6-10 Permitting/Prohibiting Remote Controller
Operations
■
■
■
■
Procedure for permitting/prohibiting remote controller
operations
Permit or prohibit operations through remote controllers.
On the Monitoring screen, operation is allowed with either Icon
or List as the display type.
See next page in the figure (Screen 1) the devices are displayed
in the Icon display mode.
(3)
Screen 2: Zone Setup screen
Screen 3: HRV setting screen
(4)
(5)
(6)
Screen 4: Group setup screen
(7)
(8)
(9)
(10)
(11)
(12)
01_EN_EM05A059.fm Page 28 Wednesday, October 19, 2005 7:13 PM


