


40
English
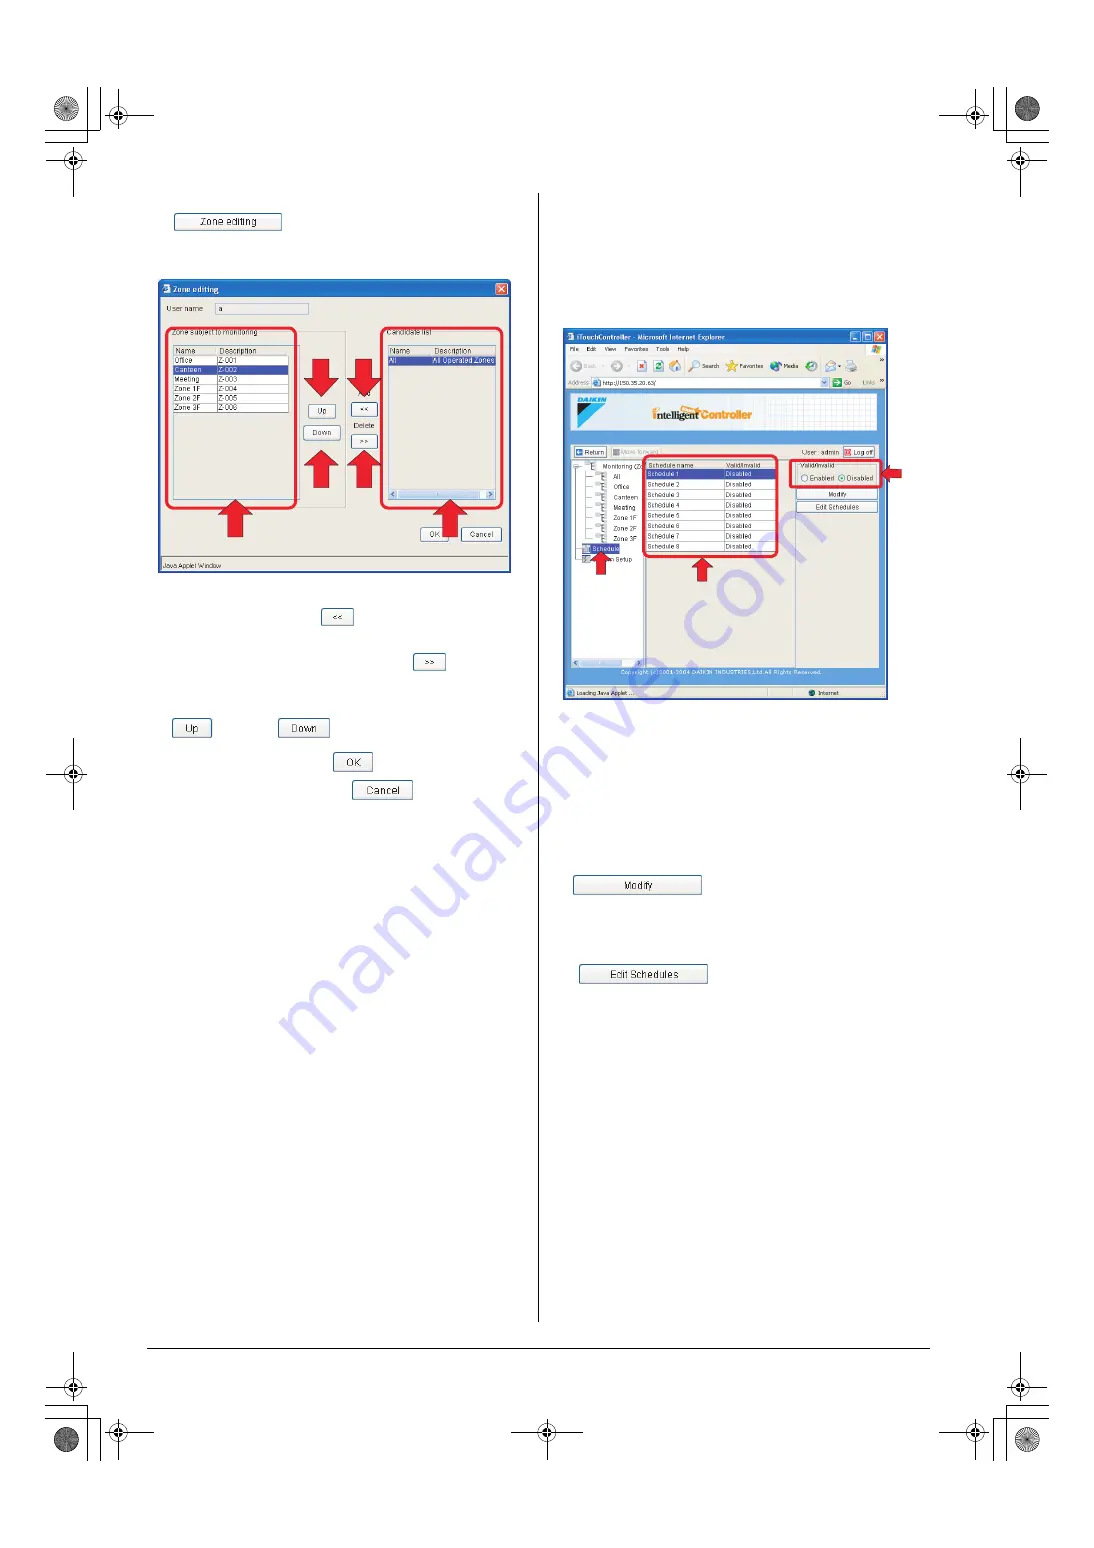
3.
Select the zone you want to assign or remove and click the
“
” button (3). The Zone editing dialog box
(Screen 3) appears.
4.
Select a zone to be assigned to the selected user from the
right list (5) and click the “
” button (6). The zone is
moved to the left list (4). To remove an assigned zone, select
the zone from the left list (4) and click the “
” button (7).
The zone is removed from the list.
5.
To change the order of items in the left list (4), use the
“
” (8) and “
” (9) buttons.
6.
Upon completion, click the “
” button.
To cancel your entry, click the “
” button.
8.
CREATING SCHEDULES
8-1 Main Scheduling Screen
This section describes the components of the main sched-
uling screen.
When selecting the “Schedule” node (1) from the zone tree
area, you will see the following screen (the “main scheduling
screen”).
(1)
Schedule node in the zone tree area
Selecting this node displays the main scheduling screen.
(2)
Schedule program list
Lists the name and status (Enabled/disabled) for each
schedule program.
(3)
Enable/Disable radio buttons
Displays the status of the program selected in the list. You
can enable or disable it using these buttons.
Displays the Schedule Setup screen.
For more information on the Schedule Setup screen layout,
see the next page.
Displays the Edit Schedule screen.
For the description of how to use this button,
see the page 45.
(4)
(5)
(9)
(7)
(8)
(6)
Screen 3: Zone editing dialog box
(1)
(2)
(3)
01_EN_EM05A059.fm Page 40 Wednesday, October 19, 2005 7:13 PM


