139
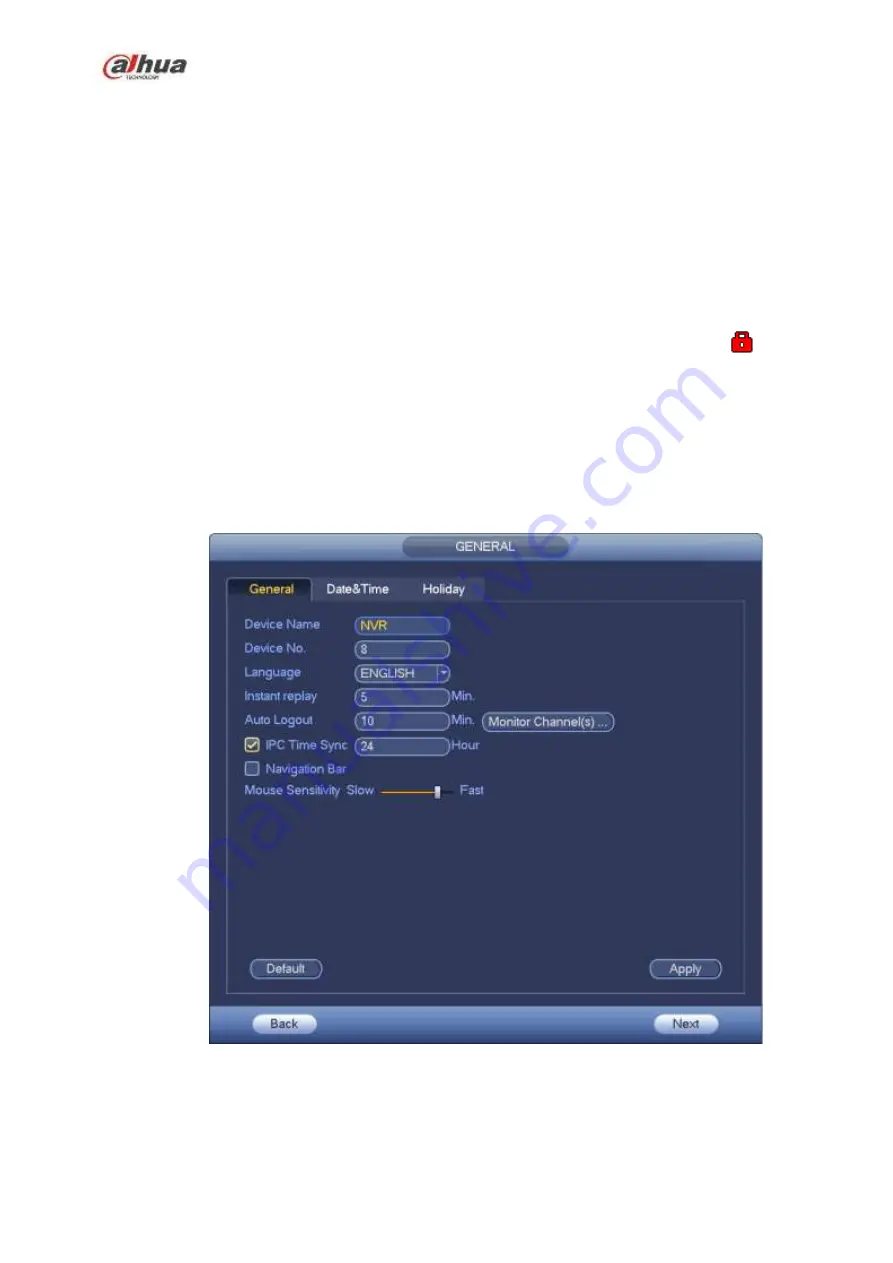
HDD full: Here is for you to select working mode when hard disk is full. There are two
options: stop recording or rewrite old files.
Pack duration: Here is for you to specify record duration. The value ranges from 1 to 120
minutes. Default value is 60 minutes.
Realtime play: It is to set playback time you can view in the preview interface. The value
ranges from 5 to 60 minutes.
Auto logout: Here is for you to set auto logout interval once login user remains inactive for a
specified time. Value ranges from 0 to 60 minutes.
Monitor channels when logout: Here you can set channels you want to view when your
account has logged out. Click the button and then cancel the channel name box, you need
to login to view the corresponding video. The channel window displays
in preview
interface.
Navigation bar: Check the box here, system displays the navigation bar on the interface.
IPC Time Sync: You can input an interval here to synchronize the NVR time and IPC time.
Startup wizard: Once you check the box here, system will go to the startup wizard directly
when the system restarts the next time. Otherwise, it will go to the login interface.
Mouse sensitivity: You can set double click speed via dragging the slide bard. You can Click
Default button to restore default setup.
Figure 4-11
Step 4 Click Apply button to save settings.
4.1.4.1.2 Date and Time
Содержание NVR1A-4P Series
Страница 1: ...Dahua Network Video Recorder User s Manual V 4 3 0 ...
Страница 138: ...124 Figure 3 5 3 6 6 NVR42N Series Please refer to Figure 3 6 for connection sample Figure 3 6 ...
Страница 142: ...128 Figure 3 11 3 6 12 NVR42V 8P Series Please refer to Figure 3 12 for connection sample ...
Страница 143: ...129 Figure 3 12 ...
Страница 157: ...143 Figure 4 15 Step 2 Click device display edit interface See Figure 4 16 ...
Страница 220: ...206 Figure 4 93 Figure 4 94 ...
Страница 240: ...226 Figure 4 110 Figure 4 111 Figure 4 112 ...
Страница 251: ...237 Figure 4 123 Figure 4 124 ...
Страница 253: ...239 Figure 4 126 Click draw button to draw the zone See Figure 4 127 ...
Страница 257: ...243 Figure 4 130 Click Draw button to draw a zone See Figure 4 131 Figure 4 131 ...
Страница 262: ...248 Figure 4 136 Click draw button to draw the zone See Figure 4 137 ...
Страница 275: ...261 Figure 4 148 Figure 4 149 ...
Страница 276: ...262 Figure 4 150 Figure 4 151 ...
Страница 387: ...373 Figure 5 60 Figure 5 61 ...
Страница 388: ...374 Figure 5 62 Figure 5 63 ...
Страница 412: ...398 Figure 5 96 Figure 5 97 ...
Страница 418: ...404 Figure 5 106 5 10 4 4 Record Control The interface is shown as in Figure 5 107 Figure 5 107 ...


