106
Name
Function
+12V
/
+12V power output port. It can provide the power to
some peripheral devices such as the camera or the
alarm device. Please note the supplying power
shall be below 1A.
Network port
One 10M/100M/1000Mbps self-adaptive Ethernet
port. Connect to the network cable.
eSATA
eSATA port
External SATA port. It can connect to the device of
the SATA port. Please jump the HDD when there is
peripheral connected HDD.
USB port
USB port. Connect to mouse, USB storage device,
USB burner and etc.
RS-232
RS-232
debug
COM.
It is for general COM debug to configure IP address
or transfer transparent COM data.
HDMI
High
Definition
Media Interface
High definition audio and video signal output port. It
transmits uncompressed high definition video and
multiple-channel data to the HDMI port of the
display device. HDMI version is 1.4.
VGA
VGA video output
port
VGA video output port. Output analog video signal.
It can connect to the monitor to view analog video.
PoE
PORTS
PoE port
Built-in Switch. Support PoE.
For PoE series product, you can use this port to
provide power to the network camera.
2.3 Alarm Connection
2.3.1
Alarm Port
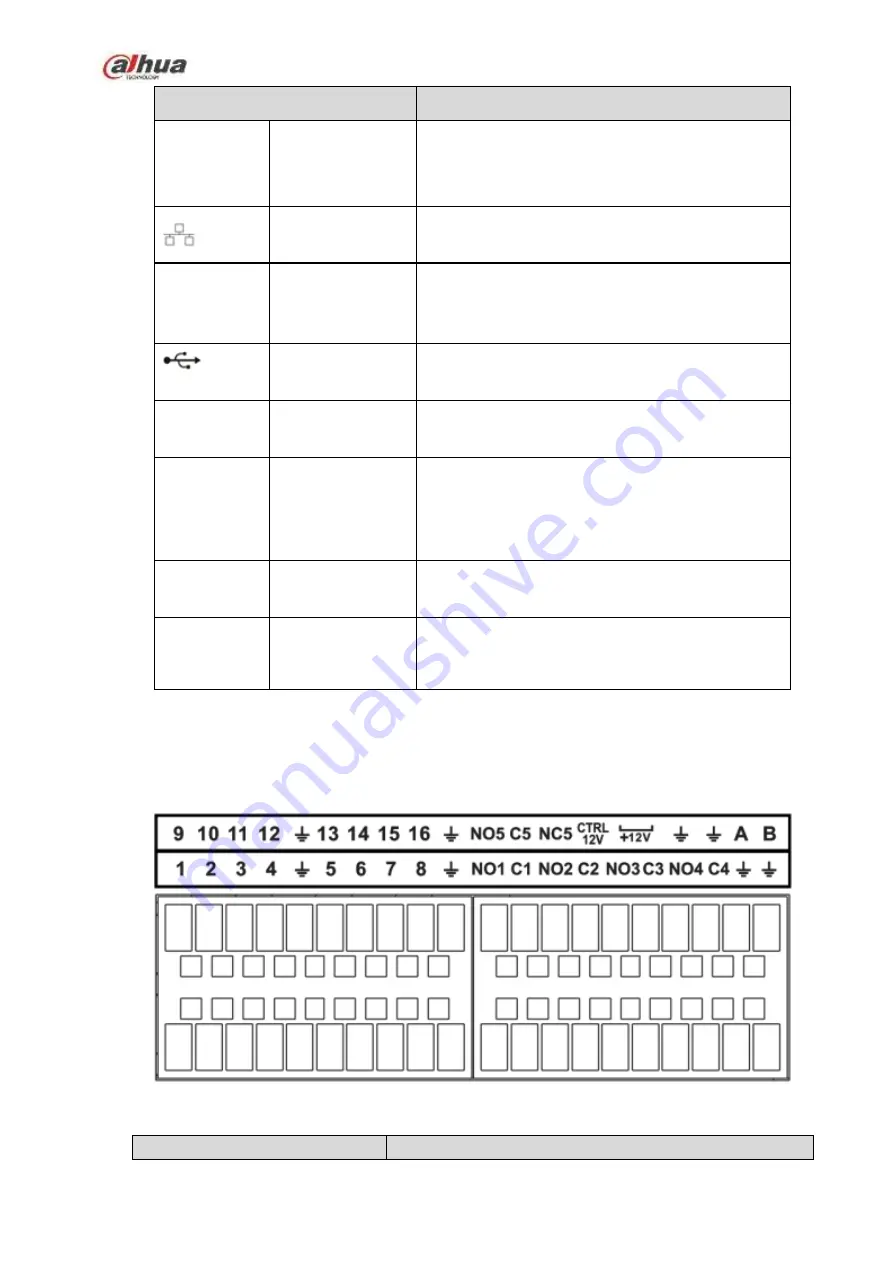
The alarm port is shown as below. See Figure 2-65. The following figure for reference only.
Figure 2-65
Icon
Function
Содержание NVR1A-4P Series
Страница 1: ...Dahua Network Video Recorder User s Manual V 4 3 0 ...
Страница 138: ...124 Figure 3 5 3 6 6 NVR42N Series Please refer to Figure 3 6 for connection sample Figure 3 6 ...
Страница 142: ...128 Figure 3 11 3 6 12 NVR42V 8P Series Please refer to Figure 3 12 for connection sample ...
Страница 143: ...129 Figure 3 12 ...
Страница 157: ...143 Figure 4 15 Step 2 Click device display edit interface See Figure 4 16 ...
Страница 220: ...206 Figure 4 93 Figure 4 94 ...
Страница 240: ...226 Figure 4 110 Figure 4 111 Figure 4 112 ...
Страница 251: ...237 Figure 4 123 Figure 4 124 ...
Страница 253: ...239 Figure 4 126 Click draw button to draw the zone See Figure 4 127 ...
Страница 257: ...243 Figure 4 130 Click Draw button to draw a zone See Figure 4 131 Figure 4 131 ...
Страница 262: ...248 Figure 4 136 Click draw button to draw the zone See Figure 4 137 ...
Страница 275: ...261 Figure 4 148 Figure 4 149 ...
Страница 276: ...262 Figure 4 150 Figure 4 151 ...
Страница 387: ...373 Figure 5 60 Figure 5 61 ...
Страница 388: ...374 Figure 5 62 Figure 5 63 ...
Страница 412: ...398 Figure 5 96 Figure 5 97 ...
Страница 418: ...404 Figure 5 106 5 10 4 4 Record Control The interface is shown as in Figure 5 107 Figure 5 107 ...


