background image

xStack® DGS-3120 Series Layer 3 Managed Gigabit Ethernet Switch Web UI Reference Guide 

378 


Figure 8-72 Enable Admin window 


When this window appears, click the 

Enable Admin

 button revealing a window for the user to enter authentication 

(password, username), as shown below. A successful entry will promote the user to Administrator level privileges 
on the Switch. 


Figure 8-73 Log-in Page 


Authentication Policy Settings 

Users can enable an administrator-defined authentication policy for users trying to access the Switch. When 
enabled, the device will check the Login Method List and choose a technique for user authentication upon login. 

To view this window, click 

Security > Access Authentication Control > Authentication Policy Settings 

as 

shown below: 


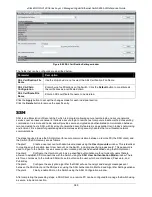
Figure 8-74 Authentication Policy Settings window 


The fields that can be configured are described below: 

Parameter 

Description 

Authentication Policy 

Use the drop-down menu to enable or disable the authentication policy on the Switch. 

Authentication Policy 
Encryption 

Use the drop-down menu to enable or disable authentication policy encryption. 

User Attempts (1-255) 

This command will configure the maximum number of times the Switch will accept 
authentication attempts. Users failing to be authenticated after the set amount of 
attempts will be denied access to the Switch and will be locked out of further 
authentication attempts. Command line interface users will have to wait 60 seconds 

Содержание xStack DGS-3120 Series

Страница 1: ......

Страница 2: ...ermission of D Link Corporation is strictly forbidden Trademarks used in this text D Link and the D LINK logo are trademarks of D Link Corporation Microsoft and Windows are registered trademarks of Microsoft Corporation Other trademarks and trade names may be used in this document to refer to either the entities claiming the marks and names or their products D Link Corporation disclaims any propri...

Страница 3: ...a Type 19 Port Auto Negotiation Information 20 Jumbo Frame Settings 20 EEE Settings 21 PoE DGS 3120 24PC and DGS 3120 48PC Only 21 PoE System Settings 22 PoE Port Settings 23 Serial Port Settings 25 Warning Temperature Settings 25 Trap Settings 26 System Log Configuration 26 System Log Settings 26 System Log Server Settings 27 System Log 28 System Log Trap Settings 28 System Severity Settings 29 T...

Страница 4: ... Settings 60 SNMP Traps Settings 61 SNMP Linkchange Traps Settings 61 SNMP View Table Settings 62 SNMP Community Table Settings 63 SNMP Group Table Settings 64 SNMP Engine ID Settings 65 SNMP User Table Settings 65 SNMP Host Table Settings 66 SNMP v6Host Table Settings 67 RMON Settings 68 SNMP Community Encryption Settings 68 SNMP Community Masking Settings 68 Telnet Settings 69 Web Settings 69 Po...

Страница 5: ...10 Static FDB Settings 110 MAC Notification Settings 111 MAC Address Aging Time Settings 112 MAC Address Table 113 ARP FDB Table 114 L2 Multicast Control 115 IGMP Proxy RI Mode Only 115 IGMP Snooping 116 MLD Proxy RI Mode Only 125 MLD Snooping 127 Multicast VLAN 135 Multicast Filtering 142 IPv4 Multicast Filtering 142 IPv6 Multicast Filtering 144 Multicast Filtering Mode 146 ERPS Settings RI and E...

Страница 6: ... Routing Protocol RI Mode Only 221 IGMP 221 MLD 224 DVMRP 227 PIM 229 VRRP RI Mode Only 247 VRRP Global Settings 247 VRRP Virtual Router Settings 248 VRRP Authentication Settings 249 IP Route Filter RI Mode Only 250 IP Standard Access List Settings 250 Route Map Settings 251 MD5 Settings RI Mode Only 253 IGMP Static Group Settings RI Mode Only 254 Chapter 6 QoS 255 802 1p Settings 256 802 1p Defau...

Страница 7: ... 319 802 1X Global Settings 322 802 1X Port Settings 323 802 1X User Settings 324 Guest VLAN Settings 325 Authenticator State 326 Authenticator Statistics 326 Authenticator Session Statistics 327 Authenticator Diagnostics 328 Initialize Port based Port s 329 Initialize Host based Port s 330 Reauthenticate Port based Port s 330 Reauthenticate Host based Port s 331 RADIUS 331 Authentication RADIUS S...

Страница 8: ...tries 367 ARP Spoofing Prevention Settings 368 BPDU Attack Protection 368 Loopback Detection Settings 370 RPC PortMapper Filter Settings 371 NetBIOS Filtering Settings 371 Traffic Segmentation Settings 372 DHCP Server Screening 373 DHCP Server Screening Port Settings 373 DHCP Offer Permit Entry Settings 374 Filter DHCPv6 Server 375 Filter ICMPv6 376 Access Authentication Control 376 Enable Admin 3...

Страница 9: ...gs RI and EI Mode Only 416 SMTP Settings 417 SNTP 418 SNTP Settings 419 Time Zone Settings 419 UDP 421 UDP Helper 421 Flash File System Settings 422 Chapter 10 OAM 425 CFM RI and EI Mode Only 425 CFM Settings 425 CFM Port Settings 431 CFM MIPCCM Table 431 CFM Loopback Settings 432 CFM Linktrace Settings 432 CFM Packet Counter 433 CFM Fault Table 434 CFM MP Table 435 Ethernet OAM RI and EI Mode Onl...

Страница 10: ...ols 463 Save Configuration Log 463 License Management 463 Stacking Information EI and SI Mode Only 464 Download Firmware 465 From TFTP 465 From HTTP 466 Upload Firmware 466 To TFTP 466 To HTTP 467 Download Configuration 467 From TFTP 467 From HTTP 468 Upload Configuration 468 To TFTP 468 To HTTP 469 Upload Log File 470 To TFTP 470 To HTTP 470 Reset 471 Reboot System 471 Appendix Section 473 Append...

Страница 11: ... also indicate system messages or prompts appearing on screen For example You have mail Bold font is also used to represent filenames program names and commands For example use the copy command Boldface Typewriter Font Indicates commands and responses to prompts that must be typed exactly as printed in the manual Initial capital letter Indicates a window name Names of keys on the keyboard have ini...

Страница 12: ...y with the Switch using the HTTP protocol Login to the Web Manager To begin managing the Switch simply run the browser installed on your computer and point it to the IP address you have defined for the device The URL in the address bar should read something like http 123 123 123 123 where the numbers 123 represent the IP address of the Switch NOTE The factory default IP address is 10 90 90 90 This...

Страница 13: ... 1 2 Mixed Stacking message Click OK to continue Web based User Interface The user interface provides access to various Switch configuration and management windows allows you to view performance statistics and permits you to graphically monitor the system status Areas of the User Interface The figure below shows the user interface Three distinct areas divide the user interface as described in the ...

Страница 14: ...ained within them to display menus Click the D Link logo to go to the D Link website Area 2 Presents a graphical near real time image of the front panel of the Switch This area displays the Switch s ports console and management port showing port activity Some management functions including save reboot download and upload are accessible here Area 3 Presents switch information based on user selectio...

Страница 15: ...able to configure features regarding the Layer 3 functionality of the Switch QoS In this section the user will be able to configure features regarding the Quality of Service functionality of the Switch ACL In this section the user will be able to configure features regarding the Access Control List functionality of the Switch Security In this section the user will be able to configure features reg...

Страница 16: ...ajor functions for the Switch It appears automatically when you log on to the Switch To return to the Device Information window after viewing other windows click the DGS 3120 Series link The Device Information window shows the Switch s MAC Address assigned by the factory and unchangeable the Boot PROM Version Firmware Version Hardware Version and many other important types of information This is h...

Страница 17: ...xStack DGS 3120 Series Layer 3 Managed Gigabit Ethernet Switch Web UI Reference Guide 7 Figure 2 1 Device Information window RI Mode Only Figure 2 2 Device Information window EI Mode Only ...

Страница 18: ...g the Switch To view the following window click System Configuration System Information Settings as shown below Figure 2 4 System Information Settings window The fields that can be configured are described below Parameter Description System Name Enter a system name for the Switch if so desired This name will identify it in the Switch network System Location Enter the location of the Switch if so d...

Страница 19: ...ndow is used to configure the action that will occur for specific ports when an exceeding alarm threshold or warning threshold event is encountered To view the following window click System Configuration Port Configuration DDM DDM Settings as shown below Figure 2 5 DDM Settings window The fields that can be configured are described below Parameter Description Trap State Specify whether to send the...

Страница 20: ...igure 2 6 DDM Temperature Threshold Settings window The fields that can be configured are described below Parameter Description Unit Select the unit to be configured EI Mode Only From Port To Port Select a range of ports to be configured High Alarm 128 127 996 This is the highest threshold for the alarm When the operating parameter rises above this value action associated with the alarm will be ta...

Страница 21: ...the unit to be configured EI Mode Only From Port To Port Select a range of ports to be configured High Alarm 0 6 5535 This is the highest threshold for the alarm When the operating parameter rises above this value action associated with the alarm will be taken Low Alarm 0 6 5535 This is the lowest threshold for the alarm When the operating parameter falls below this value action associated with th...

Страница 22: ... To Port Select a range of ports to be configured High Alarm 0 131 This is the highest threshold for the alarm When the operating parameter rises above this value action associated with the alarm will be taken Low Alarm 0 131 This is the lowest threshold for the alarm When the operating parameter falls below this value action associated with the alarm will be taken High Warning 0 131 This is the h...

Страница 23: ...the highest threshold for the alarm When the operating parameter rises above this value action associated with the alarm will be taken Low Alarm 0 6 5535 This is the lowest threshold for the alarm When the operating parameter falls below this value action associated with the alarm will be taken High Warning 0 6 5535 This is the highest threshold for the warning When the operating parameter rises a...

Страница 24: ... Alarm 0 6 5535 This is the lowest threshold for the alarm When the operating parameter falls below this value action associated with the alarm will be taken High Warning 0 6 5535 This is the highest threshold for the warning When the operating parameter rises above this value action associated with the warning will be taken Low Warning 0 6 5535 This is the lowest threshold for the warning When th...

Страница 25: ...et Switch Web UI Reference Guide 15 Figure 2 11 DDM Status Table window Port Settings This window is used to configure the details of the switch ports To view the following window click System Configuration Port Configuration Port Settings as shown below ...

Страница 26: ...ps devices in full or half duplex except 1000 Mbps which is always full duplex The Auto setting allows the port to automatically determine the fastest settings the device the port is connected to can handle and then to use those settings The other options are 10M Half 10M Full 100M Half 100M Full 1000M Full_Master and 1000M Full_Slave There is no automatic adjustment of port settings with any opti...

Страница 27: ...ed ports When Enabled destination and source MAC addresses are automatically listed in the forwarding table When address learning is Disabled MAC addresses must be manually entered into the forwarding table This is sometimes done for reasons of security or efficiency See the section on Forwarding Filtering for information on entering MAC addresses into the forwarding table The default setting is E...

Страница 28: ...he Medium Type defines the type of transport medium to be used whether Copper or Fiber Description Users may then enter a description for the chosen port s Click the Apply button to implement changes made Port Error Disabled The following window displays the information about ports that have been disconnected by the Switch when a packet storm occurs or a loop was detected To view the following win...

Страница 29: ...e following window click System Configuration Port Configuration Port Media Type as shown below Figure 2 15 Port Media Type window The fields that can be configured or displayed are described below Parameter Description Unit Select the unit you wish to configure EI and SI Mode Only Port Display the port number Type Displays the port media type Vendor Name OUI Displays the name of the SFP vendor an...

Страница 30: ...mation window The fields that can be configured are described below Parameter Description Unit Select the unit you wish to configure EI and SI Mode Only Jumbo Frame Settings The Switch supports jumbo frames Jumbo frames are Ethernet frames with more than 1 518 bytes of payload The Switch supports jumbo frames with a maximum frame size of up to 13312 bytes To view the following window click System ...

Страница 31: ...shown below Figure 2 18 EEE Settings window The fields that can be configured are described below Parameter Description Unit Select the unit you wish to configure EI and SI Mode Only From Port To Port Select the appropriate port range used for the configuration here State Select to enable or disable the state of this feature here Click the Apply button to implement changes made PoE DGS 3120 24PC a...

Страница 32: ...llowing classification Class Maximum power available to PD Class Max power used by PSE 0 12 95W 0 15 4W 1 3 84W 1 4W 2 6 49W 2 7W 3 12 95W 3 15 4W 4 29 5W User define 35W To configure the PoE features on the Switch click System Configuration PoE The PoE System Settings window is used to assign a power limit and power disconnect method for the whole PoE system To configure the Power Limit for the P...

Страница 33: ...e the drop down menu to select a Power Disconnect Method The default Power Disconnect Method is Deny Next Port Both Power Disconnection Methods are described below Deny Next Port After the power limit has been exceeded the powered port with the highest port number will be denied regardless of its priority If Power Disconnection Method is set to Deny Next Port the system cannot utilize out of its m...

Страница 34: ...ected Critical High and Low When multiple ports happen to have the same level of priority the port ID will be used to determine the priority The lower port ID has higher priority The setting of priority will affect the order of supplying power Whether the disconnect method is set to deny low priority port the priority of each port will be used by the system to manage the supply of power to ports P...

Страница 35: ...isplayed are described below Parameter Description Baud Rate Specify the baud rate for the serial port on the Switch There are four possible baud rates to choose from 9600 19200 38400 and 115200 For a connection to the Switch using the console port the baud rate must be set to 115200 which is the default setting Auto Logout Select the logout time used for the console interface This automatically l...

Страница 36: ...ng Click the Apply button to implement changes made Trap Settings This window is used to configure the fan and power trap state To view the following window click System Configuration Trap Settings as shown below Figure 2 23 Trap Settings window The fields that can be configured are described below Parameter Description Fan Trap State Use the drop down menu to enable or disable the fan traps Power...

Страница 37: ...a log event occurs on the Switch Click the Apply button to accept the changes made for each individual section System Log Server Settings The Switch can send System log messages to up to four designated servers using the System Log Server To view the following window click System Configuration System Log Configuration System Log Server Settings as shown below Figure 2 25 System Log Server Settings...

Страница 38: ...Notice Informational and Debug To view all information in the log simply tick the All check box Module List When selecting Module List the module name must be manually entered Available modules are MSTP ERROR_LOG CFM_EXT and ERPS Attack Log When selecting Attack Log all attacks will be listed Index A counter incremented whenever an entry to the Switch s history log is made The table displays the l...

Страница 39: ...rt triggers either a log entry or a trap message can be set as well Use the System Severity Settings window to set the criteria for alerts The current settings are displayed below the System Severity Table To view the following window click System Configuration System Log Configuration System Severity Settings as shown below Figure 2 28 System Severity Settings window The fields that can be config...

Страница 40: ...le and associated rule to be enabled during this time range Hours This parameter is used to set the time in the day that this time range is to be enabled using the following parameters Start Time Use this parameter to identify the starting time of the time range in hours minutes and seconds based on the 24 hour time system End Time Use this parameter to identify the ending time of the time range i...

Страница 41: ...ollowing window click System Configuration Time Settings as shown below Figure 2 31 Time Settings window The fields that can be configured are described below Parameter Description Date DD MM YYYY Enter the current day month and year to update the system clock Time HH MM SS Enter the current time in hours minutes and seconds Click the Apply button to accept the changes made User Accounts Settings ...

Страница 42: ...password for the Switch Confirm Password Re type in a new password for the Switch Access Right Specify the access right for this user Encryption Specify that encryption will be applied to this account Option to choose from are Plain Text and SHA 1 Click the Apply button to accept the changes made Click the Edit button to re configure the specific entry Click the Delete button to remove the specifi...

Страница 43: ...load Configuration Trap Use the drop down menu to enable or disable sending the trap by the SNMP agent when successfully downloading configuration Click the Apply button to accept the changes made Stacking EI and SI Mode Only From firmware release v1 00 of this Switch the Switch now supports switch stacking where a set of six switches can be combined to be managed by one IP address through TELNET ...

Страница 44: ...en will assign that switch as the Backup Master if all priorities are the same The Backup master are physically displayed by the seven segment LED to the far right on the front panel of the switch where this LED will flash between its given Box ID and h Slave Slave switches constitute the rest of the switch stack and although not Primary or Backup Masters they can be placed into these roles when t...

Страница 45: ...P will be cleared as well If the Backup Master has been hot removed a new Backup Master will be chosen through the election process previously described Switches in the stack will clear the configurations of the unit removed and dynamically learned databases such as ARP will be cleared as well Then the Backup Master will begin backing up the Primary Master when the database synchronization has bee...

Страница 46: ... the Current Box ID field The user may choose any number between 1 and 6 to identify the switch in the switch stack Auto will automatically assign a box number to the switch in the switch stack Priority 1 63 Displays the priority ID of the Switch A lower number denotes a higher priority The box switch with the lowest priority number in the stack is the Primary Master switch The Primary Master swit...

Страница 47: ...the Apply button to accept the changes made Click the Delete button to clear all the information entered in the fields Turn on LEDs This window is used to turn all the ports LEDs on for a specific period of time To view this window click System Configuration Turn on LEDs as shown below Figure 2 40 Turn on LEDs window The fields that can be configured or viewed are described below Parameter Descrip...

Страница 48: ...d in the ARP table When static entries are defined a permanent entry is entered and is used to translate IP addresses to MAC addresses To view the following window click Management ARP Static ARP Settings as shown below Figure 3 1 Static ARP Settings window The fields that can be configured are described below Parameter Description ARP Aging Time 0 65535 The ARP entry age out time in minutes The d...

Страница 49: ... proxy ARP if the source IP and destination IP are in the same interface To view the following window click Management ARP Proxy ARP Settings as shown below Figure 3 2 Proxy ARP Settings window Click the Edit button to re configure the specific entry and select the proxy ARP state of the IP interface By default both the Proxy ARP State and Local Proxy ARP State are disabled ARP Table Users can dis...

Страница 50: ...ed an ARP request packet that is sent by an IP address that match the system s own IP address In this case the system knows that somebody out there uses an IP address that is conflict with the system In order to reclaim the correct host of this IP address the system can send out the gratuitous ARP request packets for this duplicate IP address Gratuitous ARP Learning Normally the system will only l...

Страница 51: ...name of the Layer 3 interface Select All to enable or disable gratuitous ARP trap or log on all interfaces Interval Time 0 65535 Enter the periodically send gratuitous ARP interval time in seconds 0 means that gratuitous ARP request will not be sent periodically By default the interval time is 0 Click the Apply button to accept the changes made for each individual section IPv6 Neighbor Settings Th...

Страница 52: ...u to select All Address Static or Dynamic When the user selects address from the drop down menu the user will be able to enter an IP address in the space provided next to the state option Click the Add button to add a new entry based on the information entered Click the Find button to locate a specific entry based on the information entered Click the Clear button to clear all the information enter...

Страница 53: ...a BOOTP server to provide it with this information before using the default or previously entered settings The following table will describe the fields that are about the System Interface Parameter Description Interface Name Display the System interface name Management VLAN Name This allows the entry of a VLAN name from which a management station will be allowed to manage the Switch using TCP IP i...

Страница 54: ...face Settings window The fields that can be configured are described below Parameter Description Interface Name Enter the name of the IP interface to search for Click the Find button to locate a specific entry based on the information entered Click the IPv4 Edit button to edit the IPv4 settings for the specific entry Click the Add button to add a new entry based on the information entered Click th...

Страница 55: ...ept the changes made Click the Back button to discard the changes made and return to the previous page Click the IPv4 Edit button to see the following window Figure 3 10 IPv4 Interface Settings Edit window RI Mode Only Figure 3 11 IPv4 Interface Settings Edit window EI and SI Mode Only The fields that can be configured are described below Parameter Description IP Directed Broadcast Select to enabl...

Страница 56: ...ate IPv6 Network Address Here the user can enter the neighbor s global or link local address DHCPv6 Client Use the drop down menu to enable or disable DHCPv6 client DHCPv6 Client Rapid Commit Use the drop down menu to enable or disable DHCPv6 client rapid commit This provides a two message exchange in order to configure the client faster NS Retransmit Time Enter the Neighbor solicitation s retrans...

Страница 57: ...cal IP interface which is always active until a user disables or deletes it It is independent of the state of any physical interfaces To view the following window click Management IP Interface Loopback Interface Settings as shown below Figure 3 15 Loopback Interface Settings window The fields that can be configured are described below Parameter Description Interface Name Enter an interface name Cl...

Страница 58: ...nstructed to receive a configuration file from a TFTP server which will set the Switch to become a DHCP client automatically on boot up To employ this method the DHCP server must be set up to deliver the TFTP server IP address and configuration file name information in the DHCP reply packet The TFTP server must be up and running and hold the necessary configuration file stored in its base director...

Страница 59: ...nd hold the necessary configuration file stored in its base directory when the request is received from the Switch Length Detection State Enable or disable the length detection power saving mode on the physical ports The switch port will reduce the power feed for shorter cables Password Encryption State Password encryption will encrypt the password configuration in configuration files Password enc...

Страница 60: ...he same IP subnet broadcast domain however a single switch can only belong to one group If multiple VLANs are configured the SIM group will only utilize the default VLAN on any switch SIM allows intermediate devices that do not support SIM This enables the user to manage switches that are more than one hop away from the CS The SIM group is a group of switches that are managed as a single entity Th...

Страница 61: ...rediscover member switches that have left the SIM group either through a reboot or web malfunction This feature is accomplished through the use of Discover packets and Maintenance packets that previously set SIM members will emit after a reboot Once a MS has had its MAC address and password saved to the CS s database if a reboot occurs in the MS the CS will keep this MS information in its database...

Страница 62: ...tch to be configured for SIM Group Name Enter a Group Name in this textbox This is optional This name is used to segment switches into different SIM groups Discovery Interval 30 90 The user may set the discovery protocol interval in seconds that the Switch will send out discovery packets Returning information to a Commander Switch will include information about other switches connected to it Ex MS...

Страница 63: ... Local Port Display the number of the physical port on the MS or CaS that the CS is connected to The CS will have no entry in this field Speed Display the connection speed between the CS and the MS or CaS Remote Port Display the number of the physical port by which the MS or CaS connects to the CS The CS will have no entry in this field MAC Address Display the MAC Address of the corresponding Swit...

Страница 64: ...ch Layer 2 commander switch Member switch of other group Layer 3 commander switch Layer 2 candidate switch Commander switch of other group Layer 3 candidate switch Layer 2 member switch Unknown device Non SIM devices Tool Tips In the Topology view window the mouse plays an important role in configuration and in viewing device information Setting the mouse cursor over a specific device in the topol...

Страница 65: ...rt Speed Utilizing the Tool Tip Right Click Right clicking on a device will allow the user to perform various functions depending on the role of the Switch in the SIM group and the icon associated with it Group Icon Figure 3 24 Right Clicking a Group Icon The following options may appear for the user to configure Collapse To collapse the group that will be represented by a single icon Expand To ex...

Страница 66: ...witch Remote Port No Display the number of the remote physical port by which the MS or CaS connects to the CS The CS will have no entry in this field Local Port No Display the number of the physical port on the MS or CaS that the CS is connected to The CS will have no entry in this field Port Speed Display the connection speed between the CS and the MS or CaS Click the Close button to close the pr...

Страница 67: ...lapse the group that will be represented by a single icon Expand To expand the SIM group in detail Add to group Add a candidate to a group Clicking this option will reveal the following dialog box for the user to enter a password for authentication from the Candidate Switch before being added to the SIM group Click OK to enter the password or Cancel to exit the dialog box Figure 3 29 Input passwor...

Страница 68: ...are Upgrade This screen is used to upgrade firmware from the Commander Switch to the Member Switch Member Switches will be listed in the table and will be specified by Port port on the CS where the MS resides MAC Address Model Name and Version To specify a certain Switch for firmware download click its corresponding check box under the Port heading To update the firmware enter the Server IP Addres...

Страница 69: ...o read and modify the settings of gateways routers switches and other network devices Use SNMP to configure system features for proper operation monitor performance and detect potential problems in the Switch switch group or network Managed devices that support SNMP include software referred to as an agent which runs locally on the device A defined set of variables managed objects is maintained by...

Страница 70: ... Authentication Failure Topology Change and Broadcast Multicast Storm MIBs The Switch in the Management Information Base MIB stores management and counter information The Switch uses the standard MIB II Management Information Base module Consequently values for MIB objects can be retrieved from any SNMP based network management software In addition to the standard MIB II the Switch also supports i...

Страница 71: ...escribed below Parameter Description SNMP Traps Enable this option to use the SNMP Traps feature Authentication Traps Enable this option to use the SNMP Authentication Traps feature Linkchange Traps Enable this option to use the SNMP Link Change Traps feature Coldstart Traps Enable this option to use the SNMP Cold Start Traps feature Warmstart Traps Enable this option to use the SNMP Warm Start Tr...

Страница 72: ...d ending ports to use State Use the drop down menu to enable or disable the SNMP link change Trap Click the Apply button to accept the changes made SNMP View Table Settings Users can assign views to community strings that define which MIB objects can be accessed by a remote SNMP manager The SNMP Group created with this table maps SNMP users identified in the SNMP User Table to the views created in...

Страница 73: ... accept the changes made Click the Delete button to remove the specific entry SNMP Community Table Settings Users can create an SNMP community string to define the relationship between the SNMP manager and an agent The community string acts like a password to permit access to the agent on the Switch One or more of the following characteristics can be associated with the community string An Access ...

Страница 74: ... SNMP Group created with this table maps SNMP users identified in the SNMP User Table to the views created in the previous window To view the following window click Management SNMP Settings SNMP Group Table Settings as shown below Figure 3 41 SNMP Group Table Settings window The fields that can be configured are described below Parameter Description Group Name Type an alphanumeric string of up to ...

Страница 75: ...n the Switch To view the following window click Management SNMP Settings SNMP Engine ID Settings as shown below Figure 3 42 SNMP Engine ID Settings window The fields that can be configured are described below Parameter Description Engine ID To change the Engine ID type the new Engine ID value in the space provided The SNMP engine ID displays the identification of the SNMP engine on the Switch The ...

Страница 76: ...Encryption field has been checked This field will require the user to enter a password SHA Specify that the HMAC SHA authentication protocol will be used This field is only operable when V3 is selected in the SNMP Version field and the Encryption field has been checked This field will require the user to enter a password Priv Protocol None Specify that no authorization protocol is in use DES Speci...

Страница 77: ...ply button to accept the changes made Click the Delete button to remove the specific entry SNMP v6Host Table Settings Users can set up SNMP trap recipients for IPv6 To view the following window click Management SNMP Settings SNMP v6Host Table Settings as shown below 3 45 SNMP v6Host Table Settings The fields that can be configured are described below Parameter Description Host IPv6 Address Type th...

Страница 78: ... Alarm Trap Enable this option to use the RMON Falling Alarm Trap feature Click the Apply button to accept the changes made SNMP Community Encryption Settings This window is used to enable or disable SNMP community encryption state To view the following window click Management SNMP Settings SNMP Community Encryption Settings as shown below Figure 3 47 SNMP Community Encryption Settings window The ...

Страница 79: ... characters that is used to identify members of an SNMP community This string is used like a password to give remote SNMP managers access to MIB objects in the Switch s SNMP agent Enter the community again for confirmation Re type the community Click the Apply button to accept the changes made Telnet Settings Users can configure TELNET Settings on the Switch To view the following window click Mana...

Страница 80: ...b protocol is 80 Click the Apply button to accept the changes made Power Saving LED State Settings This window is used to configure the port LED state To view the following window click Management Power Saving LED State Settings as shown below Figure 3 51 LED State Settings window The fields that can be configured are described below Parameter Description LED State Click the radio buttons to enabl...

Страница 81: ... the radio buttons to enable or disable port state When enabled the ports will be shut down during the configured time range Power Saving Mode Hibernation State Click the radio buttons to enable or disable hibernation state When enabled the Switch will go into a low power state and be idle during the configured time range It will shut down all the ports all network function telnet ping etc will no...

Страница 82: ...hat can be configured are described below Parameter Description Unit Select the unit you wish to configure EI and SI Mode Only From Port To Port Select the appropriate port range used for the configuration Action Use the drop down menu to add or delete the schedule Time Range Name Specify the name of the schedule Click the Apply button to accept the changes made for each individual section Click t...

Страница 83: ...the following window click Management SD Card Management SD Card Execute Settings as shown below Figure 3 56 SD Card Execute Settings window The fields that can be configured are described below Parameter Description File Name The filename of the configuration on file system Increment If this option is specified the current configuration will not be reset before executing the configuration Reset I...

Страница 84: ...fied end users whose data transmissions warrant special consideration The Switch allows you to further tailor how priority tagged data packets are handled on your network Using queues to manage priority tagged data allows you to specify its relative priority to suit the needs of your network There may be circumstances where it would be advantageous to group two or more differently tagged packets i...

Страница 85: ... packet Untagging The act of stripping 802 1Q VLAN information out of the packet header Ingress port A port on a switch where packets are flowing into the Switch and VLAN decisions must be made Egress port A port on a switch where packets are flowing out of the Switch either to another switch or to an end station and tagging decisions must be made IEEE 802 1Q tagged VLANs are implemented on the Sw...

Страница 86: ...s Their presence is indicated by a value of 0x8100 in the EtherType field When a packet s EtherType field is equal to 0x8100 the packet carries the IEEE 802 1Q 802 1p tag The tag is contained in the following two octets and consists of 3 bits of user priority 1 bit of Canonical Format Identifier CFI used for encapsulating Token Ring packets so they can be carried across Ethernet backbones and 12 b...

Страница 87: ... VLANs are defined on the Switch all ports are then assigned to a default VLAN with a PVID equal to 1 Untagged packets are assigned the PVID of the port on which they were received Forwarding decisions are based upon this PVID in so far as VLANs are concerned Tagged packets are forwarded according to the VID contained within the tag Tagged packets are also assigned a PVID but the PVID is not used ...

Страница 88: ...rt transmits it to its attached network segment If the packet is not tagged with VLAN information the ingress port will tag the packet with its own PVID as a VID if the port is a tagging port The switch then determines if the destination port is a member of the same VLAN has the same VID as the ingress port If it does not the packet is dropped If it has the same VID the packet is forwarded and the...

Страница 89: ...erefore receive VLAN 2 packets If Port 10 is not a member of VLAN 2 then the packet will be dropped by the Switch and will not reach its destination If Port 10 is a member of VLAN 2 the packet will go through This selective forwarding feature based on VLAN criteria is how VLANs segment networks The key point being that Port 1 will only transmit on VLAN 2 802 1Q VLAN Settings The VLAN List tab list...

Страница 90: ...to configure EI and SI Mode Only Port Display all ports of the Switch for the configuration option Tagged Specify the port as 802 1Q tagging Clicking the radio button will designate the port as tagged Click the All button to select all ports Untagged Specify the port as 802 1Q untagged Clicking the radio button will designate the port as untagged Click the All button to select all ports Forbidden ...

Страница 91: ...VID List Enter a VLAN ID List that can be added deleted or configured Advertisement Enabling this function will allow the Switch to send out GVRP packets to outside sources notifying that they may join the existing VLAN Port List Allows an individual port list to be added or deleted as a member of the VLAN Tagged Specify the port as 802 1Q tagged Use the drop down menu to designate the port as tag...

Страница 92: ... string of up to 32 characters Protocol This function maps packets to protocol defined VLANs by examining the type octet within the packet header to discover the type of protocol associated with it Use the drop down menu to toggle between Ethernet II IEEE802 3 SNAP and IEEE802 3 LLC Protocol Value 0 FFFF Enter a value for the Group The protocol value is used to identify a protocol of the frame typ...

Страница 93: ... is specified packets accepted by the Switch that match this priority are forwarded to the CoS queue specified previously by the user Click the corresponding box if you want to set the 802 1p default priority of a packet to the value entered in the Priority 0 7 field which meets the criteria specified previously in this command before forwarding it on to the specified CoS queue Otherwise a packet ...

Страница 94: ...be required would be if the client was on a distinct IP subnet or if there was some confidentiality related need to segregate traffic between the clients To view this window click L2 Features VLAN Asymmetric VLAN Settings as shown below Figure 4 10 Asymmetric VLAN Settings window Click Apply to implement changes GVRP GVRP Global Settings Users can determine whether the Switch will share its VLAN c...

Страница 95: ... The fields that can be configured are described below Parameter Description Unit Select the unit you want to configure EI and SI Mode Only From Port To Port Select the starting and ending ports to use PVID 1 4094 This field is used to manually assign a PVID to a VLAN The Switch s default is to assign all ports to the default VLAN with a VID of 1 The PVID is used by the port to tag outgoing untagg...

Страница 96: ...onfigured are described below Parameter Description MAC Address Specify the MAC address VID 1 4094 Select this option and enter the VLAN ID VLAN Name Select this option and enter the VLAN name of a previously configured VLAN Priority Specify the priority that assigns to untagged packets Click the Find button to locate a specific entry based on the information entered Click the Add button to add a ...

Страница 97: ...r to configure the private VLAN parameters To view the following window click L2 Features VLAN Private VLAN Settings as shown below Figure 4 14 Private VLAN Settings window The fields that can be configured are described below Parameter Description VLAN Name Enter a VLAN name VID 2 4094 Enter a VID value VLAN List Enter a list of VLAN ID Click the Add button to add a new entry based on the informa...

Страница 98: ...iple pages exist PVID Auto Assign Settings This window is used to configure the PVID auto assign status To view the following window click L2 Features VLAN PVID Auto Assign Settings as shown below Figure 4 16 PVID Auto Assign Settings window The fields that can be configured are described below Parameter Description PVID Auto Assign State Click to enable or disable the PVID auto assign state The d...

Страница 99: ... page number and click the Go button to navigate to a specific page when multiple pages exist Voice VLAN Voice VLAN Global Settings Voice VLAN is a VLAN used to carry voice traffic from IP phone Because the sound quality of an IP phone call will be deteriorated if the data is unevenly sent the quality of service QoS for voice traffic shall be configured to ensure the transmission priority of voice...

Страница 100: ...ual section Voice VLAN Port Settings This window is used to show the ports voice VLAN information To view the following window click L2 Features VLAN Voice VLAN Voice VLAN Port Settings as shown below Figure 4 19 Voice VLAN Port Settings window The fields that can be configured are described below Parameter Description Unit Select the unit you want to configure EI and SI Mode Only From Port To Por...

Страница 101: ...ed Click the Edit button to re configure the specific entry Click the Delete button to remove the specific entry Voice VLAN Device This window is used to show voice devices that are connected to the ports The start time is the time when the device is detected on this port the activate time is the latest time saw the device sending the traffic To view the following window click L2 Features VLAN Voi...

Страница 102: ... 7 The default priority is 5 Aging Time 1 65535 The aging time to set the range is 1 65535 minutes The default value is 720 minutes The aging time is used to remove a port from surveillance VLAN if the port is an automatic surveillance VLAN member When the last surveillance device stops sending traffic and the MAC address of this surveillance device is aged out the surveillance VLAN aging timer wi...

Страница 103: ...ply button to accept the changes made Surveillance VLAN OUI Settings This window is used to configure the user defined surveillance traffic s OUI The OUI is used to identify the surveillance traffic There are a number of pre defined OUIs The user can further define the user defined OUIs if needed The user defined OUI cannot be the same as the pre defined OUI To view the following window click L2 F...

Страница 104: ...urveillance VLAN Device as shown below Figure 4 26 Surveillance VLAN Device window VLAN Trunk Settings Enable VLAN on a port to allow frames belonging to unknown VLAN groups to pass through that port This is useful if you want to set up VLAN groups on end devices without having to configure the same VLAN groups on intermediary devices Suppose you want to create VLAN groups 1 and 2 V1 and V2 on dev...

Страница 105: ... individual section Browse VLAN Users can display the VLAN status for each of the Switch s ports viewed by VLAN Enter a VID VLAN ID in the field at the top of the window and click the Find button To view the following window click L2 Features VLAN Browse VLAN as shown below Figure 4 29 Browse VLAN window Enter a page number and click the Go button to navigate to a specific page when multiple pages...

Страница 106: ...tions on the client s side Not only will over complication be avoided but also now the administrator has over 4000 VLANs in which over 4000 VLANs can be placed therefore greatly expanding the VLAN network and enabling greater support of customers utilizing multiple VLANs on the network Double VLANs are basically VLAN tags placed within existing IEEE 802 1Q VLANs which we will call SPVIDs Service P...

Страница 107: ...LANs Some rules and regulations apply with the implementation of the Double VLAN procedure All ports must be configured for the SPVID and its corresponding TPID on the Service Provider s edge switch All ports must be configured as Access Ports or Uplink ports Access ports can only be Ethernet ports while Uplink ports must be Gigabit ports Provider Edge switches must allow frames of at least 1522 b...

Страница 108: ...p down menus to select a range of ports to use in the configuration Role Port role in Q in Q mode it can be UNI port or NNI port Missdrop This option enables or disables C VLAN based SP VLAN assignment miss drop If Missdrop is enabled the packet that does not match any assignment rule in the VLAN translation will be dropped If disabled then the packet will be forwarded and will be assigned to S VL...

Страница 109: ... are described below Parameter Description Unit Specify the unit ID to be configured EI Mode Only From Port To Port Use the drop down menus to select a range of ports to use in the configuration CVID 1 5 7 Enter the C VLAN ID to match Action The action indicates to add an S tag before a C tag or to replace the original C tag by an S tag SVID 1 4094 Enter the SP VLAN ID Priority Use the drop down m...

Страница 110: ...tocol s threshold is exceeded Click the Apply button to accept the changes made for each individual section Enter a page number and click the Go button to navigate to a specific page when multiple pages exist Spanning Tree This Switch supports three versions of the Spanning Tree Protocol 802 1D 1998 STP 802 1D 2004 Rapid STP and 802 1Q 2005 MSTP 802 1D 1998 STP will be familiar to most networking ...

Страница 111: ...Multiple Spanning Tree Protocol MSTP as defined by the IEEE 802 1Q 2005 the Rapid Spanning Tree Protocol RSTP as defined by the IEEE 802 1D 2004 specification and a version compatible with the IEEE 802 1D 1998 STP RSTP can operate with legacy equipment implementing IEEE 802 1D 1998 however the advantages of using RSTP will be lost The IEEE 802 1D 2004 Rapid Spanning Tree Protocol RSTP evolved from...

Страница 112: ... a BPDU packet immediately becoming a normal spanning tree port P2P Port A P2P port is also capable of rapid transition P2P ports may be used to connect to other bridges Under RSTP MSTP all ports operating in full duplex mode are considered to be P2P ports unless manually overridden through configuration 802 1D 1998 802 1D 2004 802 1Q 2005 Compatibility MSTP or RSTP can interoperate with legacy eq...

Страница 113: ...it is indeed the Root Bridge This field will only appear here when STP or RSTP is selected for the STP Version For MSTP the Hello Time must be set on a port per port basis The default is 2 seconds Bridge Forward Delay 4 30 The Forward Delay can be from 4 to 30 seconds Any port on the Switch spends this time in the listening state while moving from the blocking state to the forwarding state The def...

Страница 114: ...s are similar to edge ports however they are restricted in that a P2P port must operate in full duplex Like edge ports P2P ports transition to a forwarding state rapidly thus benefiting from RSTP A P2P value of False indicates that the port cannot have P2P status Auto allows the port to have P2P status whenever possible and operate as if the P2P status were True If the port cannot maintain this st...

Страница 115: ...or and cannot be deleted To view the following window click L2 Features Spanning Tree MST Configuration Identification as shown below Figure 4 37 MST Configuration Identification window The fields that can be configured are described below Parameter Description Configuration Name This name uniquely identifies the MSTI Multiple Spanning Tree Instance If a Configuration Name is not set this field wi...

Страница 116: ...o display the information of the specific entry MSTP Port Information This window displays the current MSTI configuration information and can be used to update the port configuration for an MSTI ID If a loop occurs the MSTP function will use the port priority to select an interface to put into the forwarding state Set a higher priority value for interfaces to be selected for forwarding first In in...

Страница 117: ...igher priority will designate the interface to forward packets first A lower number denotes a higher priority Click the Find button to locate a specific entry based on the information entered Click the Apply button to accept the changes made Click the Edit button to re configure the specific entry Link Aggregation Understanding Port Trunk Groups Port trunk groups are used to combine a number of po...

Страница 118: ...network traffic to be directed to the remaining links in the group The Spanning Tree Protocol will treat a link aggregation group as a single link on the switch level On the port level the STP will use the port parameters of the Master Port in the calculation of port cost and in determining the state of the link aggregation group If two redundant link aggregation groups are configured on the Switc...

Страница 119: ...ions for this link aggregation group Member Ports Choose the members of a trunked group Up to eight ports per group can be assigned to a group Active Ports Shows the ports that are currently forwarding packets Click the Apply button to accept the changes made Click the Edit button to re configure the specific entry Click the Delete button to remove the specific entry Click the Clear All button to ...

Страница 120: ...lly one end of the connection must have active LACP ports see above Click the Apply button to accept the changes made FDB Static FDB Settings Unicast Static FDB Settings Users can set up static unicast forwarding on the Switch To view the following window click L2 Features FDB Static FDB Settings Unicast Static FDB Settings as shown below Figure 4 43 Unicast Static FDB Settings window The fields t...

Страница 121: ...and 33 33 XX XX XX are reserved for IPv6 multicast MAC address Unit Select the unit you want to configure EI and SI Mode Only Port Allows the selection of ports that will be members of the static multicast group and ports that are either forbidden from joining dynamically or that can join the multicast group dynamically using GMRP The options are None No restrictions on the port dynamically joinin...

Страница 122: ...og used for notification Up to 500 entries can be specified Unit Select the unit you want to configure EI and SI Mode Only From Port To Port Select the starting and ending ports for MAC notification State Enable MAC Notification for the ports selected using the drop down menu Click the Apply button to accept the changes made for each individual section MAC Address Aging Time Settings Users can con...

Страница 123: ...Features FDB MAC Address Table as shown below Figure 4 47 MAC Address Table window The fields that can be configured are described below Parameter Description Unit Select the unit you want to configure EI and SI Mode Only Port The port to which the MAC address below corresponds VLAN Name Enter a VLAN Name for the forwarding table to be browsed by VID List Enter a list of VLAN IDs for the forwardin...

Страница 124: ...nt to configure EI and SI Mode Only Port Select the port number to use for this configuration MAC Address Enter the MAC address to use for this configuration IP Address Enter the IP address the use for this configuration Click the Find by Port button to locate a specific entry based on the port number selected Click the Find by MAC button to locate a specific entry based on the MAC address entered...

Страница 125: ...enable or disable the IGMP Proxy Global State VLAN Name The VLAN name for the interface VID The VID for the interface Source IP Address Enter the source IP address of the upstream protocol packet here If it is not specified the zero IP address will be used as the protocol source IP address Unsolicited Report Interval 0 25 The Unsolicited report interval It is the time between repetitions of the ho...

Страница 126: ...on to accept the changes made IGMP Proxy Group This window is used to display the IGMP Proxy Group settings To view the following window click L2 Features L2 Multicast Control IGMP Proxy IGMP Proxy Group as shown below Figure 4 53 IGMP Proxy Group window Click the Member Ports link to view the IGMP proxy member port information After clicking the Member Ports option the following window will appea...

Страница 127: ...e following window click L2 Features L2 Multicast Control IGMP Snooping IGMP Snooping Settings as shown below Figure 4 55 IGMP Snooping Settins Window RI Mode Only Figure 4 56 IGMP Snooping Settings window EI and SI Mode Only The fields that can be configured are described below Parameter Description IGMP Snooping State Click to enable or disable the IGMP Snooping state Max Learning Entry Value 1 ...

Страница 128: ...mber Query Interval 1 25 Specify the maximum amount of time between group specific query messages including those sent in response to leave group messages You might lower this interval to reduce the amount of time it takes a router to detect the loss of the last member of a group Data Drive Group Expiry Time 1 65535 Specify the data driven group lifetime in seconds EI and SI Mode Only Proxy Report...

Страница 129: ...enu to select wheather the IGMP snooping should porecess or ignore the link layer topology changes caused by spanning tree operation RI Mode Only Click the Apply button to accept the changes made Click the Back button to discard the changes made and return to the previous page After clicking the Modify Router Port link the following window will appear Figure 4 59 IGMP Snooping Router Port Settings...

Страница 130: ...is configuration VID List Click the radio button and enter the VID list used for this configuration Rate Limit 1 1000 Enter the IGMP snooping rate limit used Tick the No Limit check box to ignore the rate limit Click the Apply button to accept the changes made Click the Find button to locate a specific entry based on the information entered Click the Edit button to re configure the specific entry ...

Страница 131: ...ollowing window will appear Figure 4 62 IGMP Snooping Static Group Settings window Click the Select All button to select all the ports for configuration Click the Clear All button to unselect all the ports for configuration Click the Apply button to accept the changes made Click the Back button to discard the changes made and return to the previous page IGMP Router Port Users can display which of ...

Страница 132: ...ure 4 65 IGMP Snooping Group window EI and SI Mode Only The user may search the IGMP Snooping Group Table by either VLAN Name or VID List by entering it in the top left hand corner and clicking Find The fields that can be configured are described below Parameter Description VLAN Name The VLAN Name of the multicast group VID List The VLAN ID list of the multicast group Port List Specify the port nu...

Страница 133: ... the multicast group VID List The VLAN ID list of the multicast group Click the Find button to locate a specific entry based on the information entered Click the View All button to display all the existing entries IGMP Snooping Counter Users can view the switch s IGMP Snooping counter table To view the following window click L2 Features L2 Multicast Control IGMP Snooping IGMP Snooping Counter as s...

Страница 134: ... so that new information will appear Click the Back button to return to the previous page CPU Filter L3 Control Packet Settings This window is used to discard and display Layer 3 control packets sent to the CPU from specific ports To view the following window click L2 Features L2 Multicast Control IGMP Snooping CPU Filter L3 control Packet Settings as shown below Figure 4 69 CPU Filter L3 Control ...

Страница 135: ... MLD control packets transmitted to the core network MLD Proxy Settings Users can configure the MLD proxy state and MLD proxy upstream interface in this page To view the following window click L2 Features L2 Multicast Control MLD Proxy MLD Proxy Settings as shown below Figure 4 70 MLD Proxy Settings window The fields that can be configured are described below Parameter Description MLD Proxy State ...

Страница 136: ...e 4 71 MLD Proxy Downstream Settings window The fields that can be configured are described below Parameter Description VLAN Name The VLAN name for the interface VID List The VID List for the interface Downstream Action Here the user can select the appropriate action Selecting Add will add a downstream interface Selecting Delete will remove a downstream interface Click the Apply button to accept t...

Страница 137: ...beled as 131 in the ICMP packet header this message is sent by the listening port to the Switch stating that it is interested in receiving multicast data from a multicast address in response to the Multicast Listener Query message 3 Multicast Listener Done Akin to the Leave Group Message in IGMPv2 and labeled as 132 in the ICMPv6 packet header this message is sent by the multicast listening port s...

Страница 138: ...on MLD Snooping State Click to enable or disable the MLD snooping state Max Learning Entry Value 1 1024 Enter the maximum learning entry value EI and SI Mode Only Click the Apply button to accept the changes made for each individual section Click the Edit button to configure the MLD Snooping Parameters Settings for a specific entry Click the Modify Router Port link to configure the MLD Snooping Ro...

Страница 139: ...group The default number is the value of the robustness variable By default the robustness variable is set to 2 You might want to increase this value if you expect a subnet to be loosely Last Listener Query Interval 1 25 The maximum amount of time between group specific query messages including those sent in response to done group messages You might lower this interval to reduce the amount of time...

Страница 140: ...orts as being connected to multicast enabled routers This will ensure that all packets with such a router as its destination will reach the multicast enabled router regardless of the protocol Forbidden Router Port This section is used to designate a range of ports as being not connected to multicast enabled routers This ensures that the forbidden router port will not propagate routing packets out ...

Страница 141: ... button to re configure the specific entry Enter a page number and click the Go button to navigate to a specific page when multiple pages exist MLD Snooping Static Group Settings This window is used to configure the MLD snooping multicast group static members To view the following window click L2 Features L2 Multicast Control MLD Snooping MLD Snooping Static Group Settings as shown below Figure 4 ...

Страница 142: ...button to discard the changes made and return to the previous page MLD Router Port Users can display which of the Switch s ports are currently configured as router ports in IPv6 A router port configured by a user using the console or Web based management interfaces is displayed as a static router port designated by S A router port that is dynamically configured by the Switch is designated by D whi...

Страница 143: ...sed here Select the Data Driven option to enable the data driven feature for this MLD snooping group Data Driven If Data Drive is selected only data driven groups will be displayed EI and SI Mode Only Click the Find button to locate a specific entry based on the information entered Click the Clear Data Driven button to delete the specific MLD snooping group which is learned by the Data Driven feat...

Страница 144: ...e existing entries MLD Snooping Counter This window displays the statistics counter for MLD protocol packets that are received by the switch since MLD Snooping is enabled To view the following window click L2 Features L2 Multicast Control MLD Snooping MLD Snooping Counter as shown below Figure 4 86 MLD Snooping Counter window The fields that can be configured are described below Parameter Descript...

Страница 145: ...rt and if configured to do so will cause error messages to be produced by the switch Once properly configured the stream of multicast data will be relayed to the receiver ports in a much more timely and reliable fashion Restrictions and Provisos The Multicast VLAN feature of this Switch does have some restrictions and limitations such as 1 Multicast VLANs can be implemented on edge and non edge sw...

Страница 146: ...e entries listed Click the View All button to display all the existing entries Click the Delete button to remove the corresponding entry Click the Group List link to configure the Multicast Group Profile Address Settings for the specific entry After clicking the Group List link the following window will appear Figure 4 89 Multicast Group Profile Multicast Address Settings window The fields that ca...

Страница 147: ...ded on the multicast VLAN None If this is specified the packet s original priority is used The default setting is None Replace Priority Specify that the packet s priority will be changed by the switch based on the remap priority This flag will only take effect when the remap priority is set Click the Apply button to accept the changes made for each individual section Click the Add button to add a ...

Страница 148: ...ort of the multicast VLAN Tagged Member Ports Specify the tagged member port of the multicast VLAN Untagged Source Ports Specify the source port or range of source ports as untagged members of the multicast VLAN The PVID of the untagged source port is automatically changed to the multicast VLAN Source ports must be either tagged or untagged for any single multicast VLAN i e both types cannot be me...

Страница 149: ...he View All button to display all the existing entries Click the Group List link to configure the Multicast Group Profile Multicast Address Settings for the specific entry Click the Delete button to remove the specific entry After clicking the Group List link the following window will appear Figure 4 94 Multicast Group Profile Multicast Address Settings window The fields that can be configured are...

Страница 150: ...data traffic to be forwarded on the multicast VLAN If None is specified the packet s original priority will be used The default setting is None Replace Priority Tick the check box to specify that the packet s priority will be changed by the switch based on the remap priority This flag will only take effect when the remap priority is set Click the Apply button to accept the changes made for each in...

Страница 151: ...ed member port of the multicast VLAN Tagged Member Ports Specify the tagged member port of the multicast VLAN Untagged Source Ports Specify the source port or range of source ports as untagged members of the multicast VLAN The PVID of the untagged source port is automatically changed to the multicast VLAN Source ports must be either tagged or untagged for any single multicast VLAN i e both types c...

Страница 152: ...gs window The fields that can be configured are described below Parameter Description Profile ID 1 24 Enter a Profile ID between 1 and 24 Profile Name Enter a name for the IP Multicast Profile Click the Add button to add a new entry based on the information entered Click the Find button to locate a specific entry based on the information entered Click the Delete All button to remove all the entrie...

Страница 153: ...scribed below Parameter Description Ports VID List Select the appropriate port s or VLAN IDs used for the configuration Access Assign access permissions to the ports selected Options listed are Permit and Deny Profile ID Profile Name Use the drop down menu to select the profile ID or profile name used and then assign Permit or Deny access to them Click the Apply button to accept the changes made C...

Страница 154: ...to navigate to a specific page when multiple pages exist IPv6 Multicast Filtering Users can add a profile to which multicast address s reports are to be received on specified ports on the Switch This function will therefore limit the number of reports received and the number of multicast groups configured on the Switch The user may set an IPv6 Multicast address or range of IPv6 Multicast addresses...

Страница 155: ...cast Address List Enter the multicast address list here Click the Add button to add a new entry based on the information entered Click the Back button to discard the changes made and return to the previous page Click the Edit button to re configure the specific entry Click the Delete button to remove the specific entry IPv6 Limited Multicast Range Settings Users can configure the ports and VLANs o...

Страница 156: ...ering IPv6 Max Multicast Group Settings as shown below Figure 4 105 IPv4 Max Multicast Group Settings window The fields that can be configured are described below Parameter Description Ports VID List Select the appropriate port s or VLAN IDs used for the configuration here Max Group If the checkbox Infinite is not selected the user can enter a Max Group value Tick the Infinite check box to enable ...

Страница 157: ... by integrating mature Ethernet operations administration and maintenance OAM functions and a simple automatic protection switching APS protocol for Ethernet ring networks ERPS provides sub 50ms protection for Ethernet traffic in a ring topology It ensures that there are no loops formed at the Ethernet layer One link within a ring will be blocked to avoid Loop RPL Ring Protection Link When the fai...

Страница 158: ... R APS VLAN Click the Apply button to accept the changes made for each individual section Click the Find button to find a specific entry based on the information entered Click the View All button to view all the entries configured Click the Delete button to remove the specific entry Click the Detail Information link to view detailed information of the R APS entry Click the Sub Ring Information lin...

Страница 159: ...onal East Port Here the operational east port value will be displayed Admin RPL Port Specify the RPL port used Options to choose from are West Port East Port and None Operational RPL Port Here the operational RPL port value will be displayed Admin RPL Owner Specify to enable or disable the RPL owner node Operational RPL Owner Here the operational RPL owner value will be displayed Protected VLAN s ...

Страница 160: ... ID used here State Specify the ERPS Sub Ring state here Options to choose from are Add and Delete TC Propagation State Specify the TC Propagation state here Options to choose from are Enabled and Disabled Click the Apply button to accept the changes made Click the Back button to return to the previous window LLDP LLDP LLDP Global Settings This window is used to configure the LLDP global parameter...

Страница 161: ...res the advertised data is then deleted from the neighbor Switch s MIB LLDP ReInit Delay 1 10 The LLDP re initialization delay interval is the minimum time that an LLDP port will wait before reinitializing after receiving an LLDP disable command To change the LLDP re init delay enter a value in seconds 1 to 10 LLDP TX Delay 1 8192 LLDP TX Delay allows the user to change the minimum time delay inte...

Страница 162: ... and allows it to send and receive LLDP frames on the ports This option contains TX RX TX And RX or Disabled TX the local LLDP agent can only transmit LLDP frames RX the local LLDP agent can only receive LLDP frames TX And RX the local LLDP agent can both transmit and receive LLDP frames Disabled the local LLDP agent can neither transmit nor receive LLDP frames The default value is TX And RX Subty...

Страница 163: ...information entered LLDP Basic TLVs Settings TLV stands for Type length value which allows the specific sending information as a TLV element within LLDP packets This window is used to enable the settings for the Basic TLVs Settings An active LLDP port on the Switch always included mandatory data in its outbound advertisements There are four optional data types that can be configured for an individ...

Страница 164: ...menu to enable or disable the System Name option System Description Use the drop down menu to enable or disable the System Description option System Capabilities Use the drop down menu to enable or disable the System Capabilities option Click the Apply button to accept the changes made LLDP Dot1 TLVs Settings LLDP Dot1 TLVs are organizationally specific TLVs which are defined in IEEE 802 1 and use...

Страница 165: ...nter either the VLAN name or VLAN ID value in the space provided Dot1 TLV VLAN Use the drop down menu to enable or disable and configure the Dot1 TLV VLAN option After this option is enabled the user can select to use VLAN Name VLAN ID or All in the next drop down menu After selecting this the user can enter either the VLAN name or VLAN ID value in the space provided Dot1 TLV Protocol Identity Use...

Страница 166: ...l MAU type The default state is Disabled Link Aggregation The Link Aggregation option indicates that LLDP agents should transmit Link Aggregation TLV This indicates the current link aggregation status of IEEE 802 3 MACs More precisely the information should include whether the port is capable of doing link aggregation whether the port is aggregated in an aggregated link and what is the aggregated ...

Страница 167: ...menu to select a port Click the Find button to locate a specific entry based on the information entered LLDP Local Port Information This window displays the information on a per port basis currently available for populating outbound LLDP advertisements in the local port brief table shown below To view the following window click L2 Features LLDP LLDP LLDP Local Port Information as shown below Figur...

Страница 168: ...Click the Find button to locate a specific entry based on the information entered To view more details about for example the Management Address Count click the Show Detail hyperlink To view the brief LLDP Local Port information window per port click the Show Brief button After clicking the Show Detail hyperlink under the Management Address Count the following window will appear Figure 4 120 LLDP L...

Страница 169: ... LLDP Remote Port information window per port click the Show Normal button After clicking the Show Normal button the following window will appear Figure 4 122 LLDP Remote Port Information Show Normal window Click the Back button to return to the previous page LLDP MED LLDP MED System Settings This window is used to configure the LLDP MED log state and the fast start repeat count and display the LL...

Страница 170: ...ettings This window is used to enable or disable transmitting LLDP MED TLVs To view the following window click L2 Features LLDP LLDP MED LLDP MED Port Settings as shown below Figure 4 124 LLDP MED Port Settings window The fields that can be configured are described below Parameter Description Unit Select the unit you want to configure EI and SI Mode Only From Port To Port Select the port range to ...

Страница 171: ...down menu to select a port Click the Find button to locate a specific entry based on the information entered LLDP MED Remote Port Information This window displays the information learned from the neighbor parameters To view the following window click L2 Features LLDP LLDP MED LLDP MED Remote Port Information as shown below Figure 4 126 LLDP MED Remote Port Information window The fields that can be...

Страница 172: ...LB multicast FDB entry will be mutually exclusive with the L2 multicast entry To view the following window click L2 Features NLB FDB Settings as shown below Figure 4 128 NLB FDB Settings window The fields that can be configured are described below Parameter Description Unicast Click to create NLB unicast FDB entry Multicast Click to NLB multicast FDB entry VLAN Name Click the radio button and ente...

Страница 173: ...nly VRRP RI Mode Only IP Route Filter RI Mode Only MD5 Settings RI Mode Only IGMP Static Group Settings RI Mode Only IPv4 Default Route Settings SI Mode Only Entries into the Switch s forwarding table can be made using both an IP address subnet mask and a gateway To view the following window click L3 Features IPv4 Default Route Settings as shown below Figure 5 1 IPv4 Default Route Settings window ...

Страница 174: ...is lost the backup route will uplink and its status will become Active Entries into the Switch s forwarding table can be made using both an IP address subnet mask and a gateway To view the following window click L3 Features IPv4 Static Default Route Settings as shown below Figure 5 2 IPv4 Static Default Route Settings window RI Mode Only Figure 5 3 IPv4 Static Default Route Settings window EI Mode...

Страница 175: ...anges made IPv4 Route Table The IP routing table stores all the external routes information of the Switch This window is used to display all the external route information on the switch To view the following window click L3 Features IPv4 Route Table as shown below Figure 5 4 IPv4 Route Table window RI Mode Only Figure 5 5 IPv4 Route Table window EI Mode Only Figure 5 6 IPv4 Route Table window SI M...

Страница 176: ...terface Name The IP Interface where the default IPv6 route is created Nexthop Address The corresponding IPv6 address for the next hop gateway address in IPv6 format Metric 1 65535 Represents the metric value of the IPv6 interface entered into the table This field may read a number between 1 and 65535 Backup State Specify the backup state of the default route created Options to choose from are Prim...

Страница 177: ...6 format Metric 1 65535 The metric of the IPv6 interface entered into the table representing the number of routers between the Switch and the IPv6 address above Metric values allowed are between 1 and 65535 Backup State Each IP address can only have one primary route while other routes should be assigned to the backup state When the primary route failed the Switch will try the backup routes accord...

Страница 178: ...ox and enter a 128 bit length IPv6 address RI and EI Mode Only IPv6 Address Tick the check box and enter the destination IPv6 address of the route to be displayed RI and EI Mode Only RIPng Tick the check box to display routes that are related to RIPng RI Mode Only OSPFv3 Tick the check box to display routes that are related to OSPFv3 RI Mode Only Hardware Tick the check box to display only the rou...

Страница 179: ...indow to be enabled for this Access Profile and its associated rule and the Next Hop Router s IP address 10 2 2 2 must be set Finally this Policy Route entry must be enabled Figure 5 13 Policy Base Routing Example window Once completed the Switch will identify the IP address using the Access Profile function recognize that is has a Policy Based route and then forward the information on to the spec...

Страница 180: ...which will be used to identify packets as following this Policy Route This access rule along with the access profile must first be constructed before this policy route can be created Next Hop IPv4 Address This is the IP address of the Next Hop router that will have a direct connection to the Gateway router connected to the Internet State Use the pull down menu to enable or disable this Policy Rout...

Страница 181: ...figured are described below Parameter Description Group Address Enter the group address Network Address Enter the network address Click the Find button to locate a specific entry based on the information entered Click the View All button to display all the existing entries IP Multicast Interface Table RI Mode Only This window displays the current IP multicasting interfaces located on the Switch To...

Страница 182: ...ource IP address of the received IP multicast packet matches this network the RPF address is used to do RPF check Subnet Mask Enter the subnet mask of the above specified IP address If the source IP address of the received IP multicast packet matches the IP address and subnet mask RPF address will be used to check whether packets are received from legal interface RPF Address Enter the RPF address ...

Страница 183: ...value is 115 Click the Apply button to accept the changes made ECMP Algorithm Settings RI Mode Only This window is used to configure the ECMP OSPF state and ECMP route load balancing algorithm To view the following window click L3 Features ECMP Algorithm Settings as shown below Figure 5 21 ECMP Algorithm Settings window The fields that can be configured are described below Parameter Description EC...

Страница 184: ...ription Destination Protocol Specifies the destination protocol Options to choose from are RIP and OSPF Source Protocol Specifies the source protocol Options to choose from are RIP OSPF Static and Local Type Specifies the type of route to be redistributed Options to choose from are All Internal External Ext Type1 Ext Type2 Inter E1 Inter E2 Type 1 and Type 2 To redistribute all types of route sele...

Страница 185: ... and 16777214 when the Destination Protocol is OSPFv3 Click the Apply button to accept the changes made Click the Edit button to re configure the specified entry Click the Delete button to remove the specified entry IP Tunnel RI Mode Only IP Tunnel Settings This window is used to configure IP Tunnel Settings To view the following window click L3 Features IP Tunnel IP Tunnel Settings as shown below...

Страница 186: ...nges made for each individual section IP Tunnel GRE Settings This window is used to configure an existing tunnel as a GRE tunnel on the Switch If this tunnel has been configured in another mode before the tunnel s information will still exist in the database However whether the tunnel s former information is valid or not it depends on the current mode To view the following window click L3 Features...

Страница 187: ...he Back button to return to the previous window Click the Apply button to accept the changes made for each individual section OSPF RI Mode Only The Open Shortest Path First OSPF routing protocol uses a link state algorithm to determine routes to network destinations A link is an interface on a router and the state is a description of that interface and its relationship to neighboring routers The s...

Страница 188: ...nges in the OSPF network such as a network link going down there is very little OSPF traffic Shortest Path Algorithm The Shortest Path to a destination is calculated using the Dijkstra algorithm Each router is placed at the root of a tree and then calculates the shortest path to each destination based on the cumulative cost to reach that destination over multiple possible routes Each router will t...

Страница 189: ...wpoint of Router A Router A can reach 192 213 11 0 through Router B with a cost of 10 5 15 Router A can reach 222 211 10 0 through Router C with a cost of 10 10 20 Router A can also reach 222 211 10 0 through Router B and Router D with a cost of 10 5 10 25 but the cost is higher than the route through Router C This higher cost route will not be included in the Router A s shortest path tree The res...

Страница 190: ...g the various router s routing tables Areas establish boundaries beyond which link state updates do not need to be flooded So the exchange of link state updates and the calculation of the shortest path tree are limited to the area that the router is connected to Routers that have connections to more than one area are called Border Routers BR The Border Routers have the responsibility of distributi...

Страница 191: ...ication There are two other authentication methods Simple Password Authentication key and Message Digest authentication MD 5 Simple Password Authentication A password or key can be configured on a per area basis Routers in the same area that participate in the routing domain must be configured with the same key This method is possibly vulnerable to passive attacks where a link analyzer is used to ...

Страница 192: ...en the hello packets that a router sends on an OSPF interface The dead interval is the number of seconds that a router s Hello packets have not been seen before its neighbors declare the OSPF router down OSPF routers exchange Hello packets on each segment in order to acknowledge each other s existence on a segment and to elect a Designated Router on multi access segments OSPF requires these interv...

Страница 193: ...est list Any update that is sent will be put on the retransmission list until it gets acknowledged Full The adjacency is now complete The neighboring routers are fully adjacent Adjacent routers will have the same link state database Adjacencies on Point to Point Interfaces OSPF Routers that are linked using point to point interfaces such as serial links will always form adjacencies The concepts of...

Страница 194: ...hentication field Authentication Type The type of authentication to be used for the packet Authentication A 64 bit field used by the authentication scheme Hello Packet Hello packets are OSPF packet type 1 They are sent periodically on all interfaces including virtual links in order to establish and maintain neighbor relationships In addition Hello Packets are multicast on those physical networks h...

Страница 195: ...uter The identity of the DR for this network in the view of the advertising router The DR is identified here by its IP interface address on the network Backup Designated Router The identity of the Backup Designated Router BDR for this network The BDR is identified here by its IP interface address on the network This field is set to 0 0 0 0 if there is no BDR Neighbor The Router IDs of each router ...

Страница 196: ... be unique The DD sequence number then increments until the complete database description has been sent The rest of the packet consists of a list of the topological database s pieces Each link state advertisement in the database is described by its link state advertisement header Link State Request Packet Link State Request packets are OSPF packet type 3 After exchanging Database Description packe...

Страница 197: ...ance Link State Update Packet Link State Update packets are OSPF packet type 4 These packets implement the flooding of link state advertisements Each Link State Update packet carries a collection of link state advertisements one hop further from its origin Several link state advertisements may be included in a single packet Link State Update packets are multicast on those physical networks that su...

Страница 198: ...ledgment packets are OSPF packet type 5 To make the folding of link state advertisements reliable flooded advertisements are explicitly acknowledged This acknowledgment is accomplished through the sending and receiving of Link State Acknowledgment packets Multiple link state advertisements can be acknowledged in a single Link State Acknowledgment packet Depending on the state of the sending interf...

Страница 199: ...es of link state advertisements may also be originated The flooding algorithm is reliable ensuring that all routers have the same collection of link state advertisements The collection of advertisements is called the link state or topological database From the link state database each router constructs a shortest path tree with itself as root This yields a routing table There are four types of lin...

Страница 200: ...ment s Link State Type Advertising Router The Router ID of the router that originated the Link State Advertisement For example in network links advertisements this field is set to the Router ID of the network s Designated Router Link State Sequence Number Detects old or duplicate link state advertisements Successive instances of a link state advertisement are given successive Link State Sequence n...

Страница 201: ...When set the router is an endpoint of an active virtual link that is using the described area as a Transit area V is for Virtual link endpoint E bit When set the router is an Autonomous System AS boundary router E is for External B bit When set the router is an area border router B is for Border Number of Links The number of router links described by this advertisement This must be the total colle...

Страница 202: ... counting the required metric for TOS 0 If no additional TOS metrics are given this field should be set to 0 TOS 0 Metric The cost of using this router link for TOS 0 For each link separate metrics may be specified for each Type of Service ToS The metric for ToS 0 must always be included and was discussed above Metrics for non zero TOS are described below Note that the cost for non zero ToS values...

Страница 203: ...dvertisements These advertisements are originated by Area Border routers A separate summary link advertisement is made for each destination known to the router that belongs to the Autonomous System AS yet is outside the area Type 3 link state advertisements are used when the destination is an IP network In this case the advertisement s Link State ID field is an IP network number When the destinati...

Страница 204: ...he value 0xff000000 ToS The Type of Service that the following cost is relevant to Metric The cost of this route Expressed in the same units as the interface costs in the router links advertisements Autonomous Systems External Link Advertisements Autonomous Systems AS link advertisements are Type 5 link state advertisements These advertisements are originated by AS boundary routers A separate adve...

Страница 205: ...ol itself Including the NSSA The NSSA or Not So Stubby Area is a feature that has been added to OSPF so external routes from ASs Autonomous Systems can be imported into the OSPF area As an extension of stub areas the NSSA feature uses a packet translation system used by BRs Border Routers to translate outside routes into the OSPF area Consider the following example Figure 5 42 NSSA Area example Th...

Страница 206: ...d metric is a Type 1 external metric This means that is comparable directly to the link state metric Forwarding Address Data traffic for the advertised destination will be forwarded to this address If the Forwarding Address is set to 0 0 0 0 data traffic will be forwarded instead to the advertisement s originator Yet if the network between the NSSA ASBR and the adjacent AS is advertised in the are...

Страница 207: ...s a translation or an aggregation of other type 7 LSAs The forwarding addresses contained in translated type 5 LSAs must be set with the exception of an LSA address range match OSPFv2 OSPF Global Settings This window is used to configure the OSPF Global settings for this Switch To view the following window click L3 Features OSPF OSPFv2 OSPF Global Settings as shown below Figure 5 44 OSPF Global Se...

Страница 208: ... internal routers Translate Use the pull down menu to enable or disable the translating of Type 7 LSAs into Type 5 LSAs so that they can be distributed outside of the NSSA The default is Disabled This field can only be configured if NSSA is chosen in the Type field Stub Summary Displays whether or not the selected Area will allow Summary Link State Advertisements Summary LSAs to be imported into t...

Страница 209: ... Figure 5 48 OSPF Interface Settings Edit window The fields that can be configured are described below Parameter Description Priority 0 255 Specifies the priority for the Designated Router election If a Router Priority of 0 is set the Switch cannot be elected as the DR for the network Metric 1 65535 Specifies the interface metric used Authentication Select the authentication used Options to choose...

Страница 210: ...this Switch To view the following window click L3 Features OSPF OSPFv2 OSPF Virtual Link Settings as shown below Figure 5 49 OSPF Virtual Link Settings window The fields that can be configured are described below Parameter Description Transit Area ID A 32 bit number in the form of an IP address xxx xxx xxx xxx that uniquely identifies the OSPF area in the OSPF domain Hello Interval 1 65535 Allows ...

Страница 211: ...hat router down The Dead Interval must be evenly divisible by the Hello Interval Authentication Select the authentication used Options to choose from are None Simple and MD5 When choosing Simple authentication a Password must be entered When choosing MD5 authentication a Key ID must be entered Click the Apply button to accept the changes made Click on the Back button to return to the previous wind...

Страница 212: ...low Figure 5 52 OSPF Host Route Settings window The fields that can be configured are described below Parameter Description Host Address Specifies the host s IP address used Metric 1 65535 Enter a metric between 1 and 65535 which will be advertised Area ID Enter a 32 bit number in the form of an IP address xxx xxx xxx xxx that uniquely identifies the OSPF area in the OSPF domain Click the Apply bu...

Страница 213: ...on to accept the changes made OSPF LSDB Table This window is used to display the OSPF Link State Database LSDB To view the following window click L3 Features OSPF OSPFv2 OSPF LSDB Table as shown below Figure 5 54 OSPF LSDB Table window The fields that can be configured are described below Parameter Description Area ID Enter a 32 bit number in the form of an IP address xxx xxx xxx xxx that uniquely...

Страница 214: ...ighbor Table as shown below Figure 5 56 OSPF Neighbor Table window The fields that can be configured are described below Parameter Description Neighbor IP Address Enter the IP address of the neighbor router Click the Find button to find the specified entry Click the View All button to view all the entries OSPF Virtual Neighbor Table This window is used to display OSPF neighbor information of OSPF ...

Страница 215: ...F area in the OSPF domain Virtual Neighbor Router ID The OSPF router ID for the remote area This is a 32 bit number in the form of an IP address xxx xxx xxx xxx that uniquely identifies the remote area s Area Border Router Click the Find button to find the specified entry Click the View All button to view all the entries OSPFv3 OSPFv3 Global Settings This window is used to configure the OSPFv3 glo...

Страница 216: ...tings for the Switch To view the following window click L3 Features OSPF OSPFv3 OSPFv3 Area Settings as shown below Figure 5 59 OSPFv3 Area Settings window The fields that can be configured are described below Parameter Description Area ID Enter the OSPFv3 area s ID It is a 32 bit number in the form of an IPv4 address that uniquely identifies the OSPFv3 area in the OSPFv3 domain Type Specifies the...

Страница 217: ...OSPF OSPFv3 OSPFv3 Interface Settings as shown below Figure 5 61 OSPFv3 Interface Settings window The fields that can be configured are described below Parameter Description Interface Name Enter the OSPFv3 IP interface name Click the Find button to find the interface entered Click the View All button to display all the existing entries Click the Edit button to re configure the selected entry After...

Страница 218: ...he default value is Disabled Passive Mode Assign the designated entry to be a passive interface A passive interface will not advertise to any other routers than those within its OSPFv3 intranet Click the Apply button to accept the changes made Click the Back button to return to the previous window OSPFv3 Virtual Interface Settings This window is used to configure the OSPFv3 virtual interface setti...

Страница 219: ...wn The Dead Interval must be evenly divisible by the Hello Interval Instance ID 0 255 Enter the instance ID of the interface The default value is 0 Click the Apply button to accept the changes made Click the Back button to return to the previous window OSPFv3 Area Aggregation Settings This window is used to configure the OSPFv3 area aggregation settings To view the following window click L3 Featur...

Страница 220: ...in Click the Find button to find the specified entry Click the View All button to view all the OSPFv3 Link State Database entries Click the View Detail link to under the specific column to view the details of the specific entry Click the View Detail link under Router LSA in the OSPFv3 LSDB Table window the following window will appear Figure 5 67 OSPFv3 LSDB Router LSA Table window Click the Back ...

Страница 221: ... Back button to return to the previous window Click the View Detail link to under the specific column to view the details of the specific entry Enter a page number and click the Go button to navigate to a specific page when multiple pages exist Click the View Detail link to see the following window Figure 5 71 OSPFv3 LSDB Network LSA Detail Table window Click the View Detail link to under the Atta...

Страница 222: ... to navigate to a specific page when multiple pages exist Click the View Detail link to see the following window Figure 5 74 OSPFv3 LSDB Inter Area Prefix LSA Detail Table window Click the Back button to return to the previous window Click the View Detail link under Inter Area Router LSA in the OSPFv3 LSDB Table window the following window will appear Figure 5 75 OSPFv3 LSDB Inter Area Router LSA ...

Страница 223: ...Back button to return to the previous window Click the View Detail link to under the specific column to view the details of the specific entry Enter a page number and click the Go button to navigate to a specific page when multiple pages exist Click the View Detail link to see the following window Figure 5 78 OSPFv3 LSDB Intra Area Prefix LSA Detail Table window Click the View Detail link to under...

Страница 224: ...r and click the Go button to navigate to a specific page when multiple pages exist Click the View Detail link to see the following window Figure 5 81 OSPFv3 LSDB AS External LSA Detail Table window Click the Back button to return to the previous window OSPFv3 LSDB Link LSA Interface Table This window displays OSPFv3 LSDB Link LSA interface information To view the following window click L3 Features...

Страница 225: ...fix Detail Table window Click the Back button to return to the previous window OSPFv3 Neighbor Table This window is used to display OSPFv3 neighbor information To view the following window click L3 Features OSPF OSPFv3 OSPFv3 Neighbor Table as shown below Figure 5 86 OSPFv3 Neighbor Table window The fields that can be configured are described below Parameter Description Interface Name Enter the IP...

Страница 226: ...rk that can be reached through a router etc The more routers between a source and a destination the greater the RIP distance or hop count There are a few rules to the routing table update process that help to improve performance and stability A router will not replace a route with a newly learned one if the new route has the same hop count sometimes referred to as cost So learned routes are retain...

Страница 227: ...RIP is not limited to TCP IP Its address format can support up to 14 octets when using IP the remaining 10 octets must be zeros Other network protocol suites can be specified in the Family of Source Network field IP has a value of 2 This will determine how the address field is interpreted RIP specifies that the IP address 0 0 0 0 denotes a default route The distances measured in router hops are en...

Страница 228: ...re described below Parameter Description RIP State Specifies that the RIP state will be enabled or disabled If the state is disabled then RIP packets will not be either transmitted or received by the interface The network configured on this interface will not be in the RIP database Update Time 5 65535 Enter the value of the rate at which RIP updates are sent Timeout Time 5 65535 Enter the value of...

Страница 229: ...e enabled or disabled If the state is disabled then RIP packets will not be either transmitted or received by the interface The network configured on this interface will not be in the RIP database Authentication Specifies to set the state of authentication When the authentication state is enabled enter the password used in the space provided Distribute List In Specify the inbound route filter on R...

Страница 230: ...ce Settings This window is used to display and configure the RIPng interface settings To view the following window click L3 Features RIP RIPng RIPng Interface Settings as shown below Figure 5 91 RIPng Interface Settings window The fields that can be configured are described below Parameter Description Interface Name Enter the IPv6 interface name Click the Find button to locate a specific entry bas...

Страница 231: ...ticast Routing Protocol RI Mode Only IGMP IGMP Interface Settings The Internet Group Management Protocol IGMP can be configured on the Switch on a per IP interface basis Each IP interface configured on the Switch is displayed in the below IGMP Interface Settings window To view the following window click L3 Features IP Multicast Routing Protocol IGMP IGMP Interface Settings as shown below Figure 5 ...

Страница 232: ...ckets The default setting is 2 Last Member Query Interval 1 25 Enter a value between 1 and 25 to specify the maximum amount of time between group specific query messages including those sent in response to leave group messages The default is 1 second Click the Back button to return to the previous window Click the Apply button to accept the changes made IGMP Subscriber Source Network Check Setting...

Страница 233: ...e window is used to display the dynamic IGMP groups on the Switch To view the following window click L3 Features IP Multicast Routing Protocol IGMP IGMP Group Table as shown below Figure 5 96 IGMP Group Table window The fields that can be configured are described below Parameter Description Interface Name Enter the IP interface name used for this configuration Multicast Group Enter the multicast g...

Страница 234: ...P is used in IPv4 routers to discover the presence of multicast listeners i e nodes that wish to receive multicast packets on their directly attached links and to discover specifically which multicast addresses are of interest to those neighboring nodes The protocol is embedded in ICMPv6 instead of using a separate protocol MLDv1 is similar to IGMPv2 and MLDv2 similar to IGMPv3 MLD Interface Setti...

Страница 235: ... window The fields that can be configured are described below Parameter Description Query Interval 1 31744 Enter a value between 1 and 31744 seconds with a default of 125 seconds This specifies the interval between sending MLD queries State Use the drop down menu to enable or disable MLD for the IP interface The default is Disabled Version Use the drop down menu to select the MLD version that will...

Страница 236: ... second Click the Back button to return to the previous window Click the Apply button to accept the changes made MLD Group Table The window is used to display the MLD static groups on the Switch To view the following window click L3 Features IP Multicast Routing Protocol MLD MLD Group Table as shown below Figure 5 100 MLD Group Table window The fields that can be configured are described below Par...

Страница 237: ...west cost back to the source If the multicast was received over the shortest path then the adjacent router enters the information into its tables and forwards the message If the message is not received on the shortest path back to the source the message is dropped Route cost is a relative number that is used by DVMRP to calculate which branches of a multicast delivery tree should be pruned The cos...

Страница 238: ... All button to view all the interfaces configured on this switch DVMRP Neighbor Table This window is used to display DVMRP neighbor table on the Switch To view the following window click L3 Features IP Multicast Routing Protocol DVMRP DVMRP Neighbor Table as shown below Figure 5 104 DVMRP Neighbor Table window The fields that can be configured are described below Parameter Description Interface Na...

Страница 239: ...PIM SM will forward traffic to routers who are explicitly a part of the multicast group through the use of a Rendezvous Point RP This RP will take all requests from PIM SM enabled routers analyze the information and then returns multicast information it receives from the source to requesting routers within its configured network Through this method a distribution tree is created with the RP as the...

Страница 240: ...p messages The first multicast packet received by the DR is encapsulated and sent on to the RP which in turn removes the encapsulation and sends the packet on down the RP distribution tree When the route has been established a SPT can be created to directly connect routers to the source or the multicast traffic flow can begin traveling from the DR to the RP When the latter occurs the same packet m...

Страница 241: ...ng window click L3 Features IP Multicast Routing Protocol PIM PIM for IPv4 PIM Global Settings as shown below Figure 5 106 PIM Global Settings window The fields that can be configured are described below Parameter Description PIM Global State Click the radio buttons to enable or disable PIM global state The default is Disabled Register Probe Time 1 127 Enter a time to send a NULL register message ...

Страница 242: ...ted Router DR on the PIM enabled network The user may enter an interval time between 1 and 18724 seconds with a default interval time of 30 seconds Join Prune Interval 1 18724 This field will set the interval time between the sending of Join Prune packets stating which multicast groups are to join the PIM enabled network and which are to be removed or pruned from that group The user may enter an i...

Страница 243: ...ed network will be the RP The user may select a length between 0 and 32 with a default setting of 30 Candidate BSR Bootstrap Period 1 255 Enter a time period between 1 and 255 to determine the interval the Switch will send out Boot Strap Messages BSM to the PIM enabled network The default setting is 60 seconds Interface name Enter the interface name Click the Apply button to accept the changes mad...

Страница 244: ...if there is a tie for the highest priority the router having the higher IP address will become the RP The user may set a priority between 0 and 255 with a default setting of 192 Candidate RP Wildcard Prefix Count 0 1 The user may set the Prefix Count value of the wildcard group address here by choosing a value between 0 and 1 with a default setting of 0 IP Address Enter the IP address of the devic...

Страница 245: ...checksum for a PIM register message to the RP on the first hop router To view the following window click L3 Features IP Multicast Routing Protocol PIM PIM for IPv4 PIM Register Checksum Settings as shown below Figure 5 113 PIM Register Checksum Settings window The fields that can be configured are described below Parameter Description RP Address Enter the IP address of the RP for which the data pa...

Страница 246: ... Multicast Routing Protocol PIM PIM for IPv4 PIM Multicast Route Table as shown below Figure 5 115 PIM Multicast Route Table window Enter a page number and click the Go button to navigate to a specific page when multiple pages exist PIM RP Set Table This window is used to display a list of all the RP Set information To view the following window click L3 Features IP Multicast Routing Protocol PIM P...

Страница 247: ...otocol on some interfaces To view the following window click L3 Features IP Multicast Routing Protocol PIM PIM for IPv6 PIM for IPv6 Global Settings as shown below Figure 5 118 PIM for IPv6 global Settings window The fields that can be configured are described below Parameter Description PIM for IPv6 Global State Click the radio buttons to enable or disable the PIM for IPv6 global state Register P...

Страница 248: ...hecksum in IPv6 PIM register packet the data portion will be included Embedded RP State Use the drop down menu to enable or disable the embedded RP support in the PIM for IPv6 state Click the Apply button to accept the changes made PIM for IPv6 Interface Settings This window is used to configure the settings for the PIM for IPv6 protocol per IP interface To view the following window click L3 Featu...

Страница 249: ... for IPv6 routers that are active on a network the more likely it is that the prune will be overridden after a small proportion of this time has elapsed The more PIM for IPv6 routers are active on this network the larger this object should be to obtain an optimal spread of prune override latencies State Use the drop down menu to enable or disable the PIM for IPv6 for the above IPv6 interface By de...

Страница 250: ...Candidate RP Settings window The fields that can be configured are described below Parameter Description Group Enter the IPv6 group address range served by the RP Interface Name Enter the interface that will act as the Candidate RP Interface Name Enter the RP IP interface used Tick the All check box to select all RP IP interface Priority 0 255 Enter the RP priority value that will be used in the e...

Страница 251: ...lticast Routing Protocol PIM PIM for IPv6 PIM for IPv6 Neighbor Table as shown below Figure 5 124 PIM for IPv6 Neighbor Table window The fields that can be configured are described below Parameter Description Interface Name Enter the name of the IP interface for which you want to display the current PIM for IPv6 neighbor routing table Click the Find button to find the interface entered Click the V...

Страница 252: ...c page when multiple pages exist Click the View Detail link to see the following window Figure 5 126 PIM for IPv6 Multicast Route Table View Detail window The fields that can be configured are described below Parameter Description Source Address Enter the IPv6 source address Click the Back button to return to the previous window Click the Find button to find the source address entered Click the Vi...

Страница 253: ... Routing Protocol PIM PIM for IPv6 PIM for IPv6 RP Set Table as shown below Figure 5 129 PIM for IPv6 RP Set Table window Enter a page number and click the Go button to navigate to a specific page when multiple pages exist PIM for IPv6 Multicast Route Star G Table This window is used to display the multicast routing information for G entries generated by PIM for IPv6 To view the following window c...

Страница 254: ...igate to a specific page when multiple pages exist Click the View Detail link to see the following window Figure 5 131 PIM for IPv6 Multicast Route Star G Table View Detail window Click the Back button to return to the previous window Click the View Detail button to display the information of the specific entry Click the View Detail button to see the following window Figure 5 132 PIM for IPv6 Mult...

Страница 255: ...r Description Group Address Enter the IPv6 multicast group address Source Address Enter the source IPv6 interface Click the Find button to find the group address source address or RPT option entered Click the View All button to view all S G or S G rpt entries on this switch Click the View Detail link to view more information regarding the specific entry Enter a page number and click the Go button ...

Страница 256: ...ow To view the following window click L3 Features IP Multicast Routing Protocol PIM PIM for IPv6 PIM for IPv6 Multicast Route S G Table select RPT click find button as shown below Figure 5 136 PIM for IPv6 Multicast Route S G RPT Table window Click the View Detail button to display the information of the specific entry Click the View Detail button to see the following window Figure 5 137 PIM for I...

Страница 257: ... VRRP routers on the LAN When a virtual router fails the election protocol will select a virtual router with the highest priority to be the Master router on the LAN This retains the link and the connection is kept alive regardless of the point of failure To configure VRRP for virtual routers on the Switch an IP interface must be present on the system and it must be a part of a VLAN VRRP IP interfa...

Страница 258: ...router A higher priority will increase the probability that this router will become the Master router of the group A lower priority will increase the probability that this router will become the backup router VRRP routers that are assigned the same priority value will elect the highest physical IP address as the Master router Critical IP Address Specifies an IP address of the physical device that ...

Страница 259: ... status active or inactive of a critical IP address Options to choose from are Enabled and Disabled VRID Specifies the ID of the Virtual Router used All routers participating in this group must be assigned the same VRID value This value must be different from other VRRP groups set on the Switch State Specifies the state of the virtual router function of the interface Advertisement Interval Specifi...

Страница 260: ...ies the authentication data used in the Simple and IP authentication algorithm This entry must be consistent with all routers participating in the same IP interface Simple Simple will require the user to enter an alphanumeric string of no more than eight characters to identify VRRP packets received by a router IP IP will require the user to enter an alphanumeric string of no more than sixteen char...

Страница 261: ...k the Delete button to remove the specific entry Route Map Settings This window is used to create a route map or add delete sequences to a route map To view the following window click L3 Features IP Route Filter Route Map Settings as shown below Figure 5 145 Route Map Settings window The fields that can be configured are described below Parameter Description Route Map Name Enter the route map name...

Страница 262: ... configure the clause Click the Delete button to remove the specific entry Click the Edit button under Match Clause to see the following window Figure 5 147 Route Map Settings Match Clause window The fields that can be configured are described below Parameter Description Action Use the drop down menu to Add or Delete a sequence entry IP Address List Click the radio button and specify to match the ...

Страница 263: ... selection This can be overwritten by the metric that is ingress set for the route If the received route has neither metric attribute nor metric ingress metric set then the default metric 0 will be associated with the route for the best path selection If med missing as worst is enabled for the router then a value of infinite will be associated with the route This will take effect for both ingress ...

Страница 264: ...Edit button to re configure a specific entry listed Click the Delete button to remove a specific entry listed IGMP Static Group Settings RI Mode Only This window is used to create an IGMP static group on the switch To view the following window click L3 Features IGMP Static Group Settings as shown below Figure 5 1509 IGMP Static Group Settings window The fields that can be configured are described ...

Страница 265: ...plements basic 802 1P priority queuing Figure 6 1 Mapping QoS on the Switch The picture above shows the default priority setting for the Switch Class 7 has the highest priority of the seven priority classes of service on the Switch In order to implement QoS the user is required to instruct the Switch to examine the header of a packet to see if it has the proper identifying tag Then the user may fo...

Страница 266: ... CoS queue has the same weight value then each CoS queue has an equal opportunity to send packets just like round robin queuing For weighted round robin queuing if the weight for a CoS is set to 0 then it will continue processing the packets from this CoS until there are no more packets for this CoS The other CoS queues that have been given a nonzero value and depending upon the weight will follow...

Страница 267: ... to accept the changes made 802 1p User Priority Settings The Switch allows the assignment of a class of service to each of the 802 1p priorities To view the following window click QoS 802 1p Settings 802 1p User Priority Settings as shown below Figure 6 3 802 1p User Priority Settings window Once a priority has been assigned to the port groups on the Switch then a Class may be assigned to each of...

Страница 268: ...Bandwidth Control Bandwidth Control Settings as shown below Figure 6 4 Bandwidth Control Settings window The fields that can be configured or displayed are described below Parameter Description Unit Select the unit you want to configure EI and SI Mode Only From Port To Port Use the drop down menu to select the port range to use for this configuration Type This drop down menu allows a selection bet...

Страница 269: ...s assigned the TX bandwidth then it will be the effective TX bandwidth The authentication with the RADIUS sever can be per port or per user For per user authentication there may be multiple TX bandwidths assigned if there are multiple users attached to this specific port The final TX bandwidth will be the largest one among these multiple TX bandwidths Click the Apply button to accept the changes m...

Страница 270: ... subsided This method can be utilized by selecting the Drop option of the Action parameter in the window below The Switch will also scan and monitor packets coming into the Switch by monitoring the Switch s chip counter This method is only viable for Broadcast and Multicast storms because the chip only has counters for these two types of packets Once a storm has been detected that is once the pack...

Страница 271: ...rever mode and is no longer operational until the port recovers after 5 minutes automatically or the user manually resets the port using the Port Settings window Configuration Port Configuration Port Settings Choosing this option obligates the user to configure the Time Interval setting as well which will provide packet count samplings from the Switch s chip to determine if a Packet Storm is occur...

Страница 272: ...Switch only Both Will send Storm Trap messages when a Traffic Storm has been both detected and cleared by the Switch This function cannot be implemented in the hardware mode When Drop is chosen for the Action parameter Traffic Log Settings Use the drop down menu to enable or disable the function If enabled the traffic control states are logged when a storm occurs and when a storm is cleared If the...

Страница 273: ...ect the unit you want to configure EI and SI Mode Only From Port To Port Use the drop down menu to select a range of port to configure State Enable disable to trust DSCP By default DSCP trust is disabled Click the Apply button to accept the changes made DSCP Map Settings The mapping of DSCP to queue will be used to determine the priority of the packet which will be then used to determine the sched...

Страница 274: ...igure EI and SI Mode Only From Port To Port Use the drop down menu to select a range of port to configure DSCP Map Use the drop down menu to select one of two options DSCP Priority Specify a list of DSCP values to be mapped to a specific priority DSCP DSCP Specify a list of DSCP value to be mapped to a specific DSCP DSCP List 0 63 Enter a DSCP List value Priority Use the drop down menu to select a...

Страница 275: ...er latency and better performance This window is used to enable or disable HOL Blocking Prevention To view the following window click QoS HOL Blocking Prevention as shown below Figure 6 10 HOL blocking Prevention window The fields that can be configured are described below Parameter Description HOL Blocking Prevention State Click the radio buttons to enable of disable the HOL blocking prevention g...

Страница 276: ...d robin WRR algorithm to handle packets in an even distribution in priority classes of service Click the Apply button to accept the changes made QoS Scheduling Mechanism Changing the output scheduling used for the hardware queues in the Switch can customize QoS As with any changes to QoS implementation careful consideration should be given to how network traffic in lower priority queues are affect...

Страница 277: ...o process traffic That is the highest class of service will finish before other queues empty Weighted Round Robin Use the weighted round robin algorithm to handle packets in an even distribution in priority classes of service Click the Apply button to accept the changes made NOTE The settings you assign to the queues numbers 0 7 represent the IEEE 802 1p priority tag number Do not confuse these se...

Страница 278: ...n Class ID Use the drop down menu to select the hardware priority Weight 0 15 Specify the weight in the average queue size calculation Profile Use the drop down menu to select the profile to be used for WERD ports and queue Default Specify the default profile to be used Profile ID Select and enter a profile ID to be used Profile Name Select and enter a profile name to be used Click the Apply butto...

Страница 279: ...gher than this value then the color yellow will be assigned to it If the queue size is lower than this value then the color green will be assigned to it and then it will be guaranteed not to be dropped Yellow packet behavior depends on the profile setting for this color Max Threshold 0 100 Enter the maximum threshold value used If the queue size is lower than this value then the color yellow will ...

Страница 280: ...Type Use the drop down menu to select the general ACL Rule types Normal Select to create a Normal ACL Rule CPU Select to create a CPU ACL Rule Egress RI and EI Mode Only Select to create an Egress ACL Rule Profile Name After selecting to configure a Normal type rule the user can enter the Profile Name for the new rule here Profile ID 1 6 Enter the Profile ID for the new rule A lower value denotes ...

Страница 281: ...e one minimum mask to cover all the terms that user input however some extra bits may also be masked at the same time To optimize the ACL profile and rules please use manual configuration Access Profile List Access profiles allow you to establish criteria to determine whether the Switch will forward packets based on the information contained in each packet s header To view Access Profile List wind...

Страница 282: ...ltering masks in this ACL profile click the packet filtering mask field to highlight it red This will add more filed to the mask After clicking the Add ACL Profile button the following window will appear Figure 7 3 Add ACL Profile window Ethernet ACL The fields that can be configured are described below Parameter Description Profile ID 1 6 Enter a unique identifier number for this profile set This...

Страница 283: ...rion for forwarding Ethernet Type Selecting this option instructs the Switch to examine the Ethernet type value in each frame s header Click the Select button to select an ACL type Click the Create button to create a profile Click the Back button to discard the changes made and return to the previous page After clicking the Show Details button the following window will appear Figure 7 4 Access Pro...

Страница 284: ...or port command Port Mirroring must be enabled and a target port must be set Priority 0 7 Tick the corresponding check box if you want to re write the 802 1p default priority of a packet to the value entered in the Priority field which meets the criteria specified previously in this command before forwarding it on to the specified CoS queue Otherwise a packet will have its incoming 802 1p user pri...

Страница 285: ...s When a range of ports is to be configured the Auto Assign check box MUST be ticked in the Access ID field of this window If not the user will be presented with an error message and the access rule will not be configured VLAN Name Specify the VLAN name to apply to the access rule VLAN ID Specify the VLAN ID to apply to the access rule Click the Apply button to accept the changes made Click the Ba...

Страница 286: ...elect IPv6 ACL to instruct the Switch to examine the IPv6 address in each frame s header Select Packet Content to instruct the Switch to examine the packet content in each frame s header 802 1Q VLAN Selecting this option instructs the Switch to examine the 802 1Q VLAN identifier of each packet header and use this as the full or partial criterion for forwarding IPv4 DSCP Selecting this option instr...

Страница 287: ...he user may filter packets by filtering certain flag bits within the packets by checking the boxes corresponding to the flag bits of the TCP field The user may choose between urg urgent ack acknowledgement psh push rst reset syn synchronize fin finish Select UDP to use the UDP port number contained in an incoming packet as the forwarding criterion Selecting UDP requires that you specify a source p...

Страница 288: ... fields that can be configured are described below Parameter Description Access ID 1 256 Type in a unique identifier number for this access This value can be set from 1 to 256 A lower value denotes a higher priority Auto Assign Ticking this check box will instruct the Switch to automatically assign an Access ID for the rule being created Action Select Permit to specify that the packets that match ...

Страница 289: ... Time Range settings that has been previously configured in the Time Range Settings window This will set specific times when this access rule will be implemented on the Switch Counter Here the user can select the counter By checking the counter the administrator can see how many times that the rule was hit Mirror Group ID 1 4 Enter the mirror group When the packets match the access rule the packet...

Страница 290: ...the Switch to examine the IPv6 address in each frame s header Select Packet Content to instruct the Switch to examine the packet content in each frame s header IPv6 Class Ticking this check box will instruct the Switch to examine the class field of the IPv6 header This class field is a part of the packet header that is similar to the Type of Service ToS or Precedence bits field in IPv4 IPv6 Flow L...

Страница 291: ...ck button to discard the changes made and return to the previous page After clicking the Show Details button the following window will appear Figure 7 14 Access Profile Detail Information window IPv6 ACL Click the Show All Profiles button to navigate back to the Access Profile List Page After clicking the Add View Rules button the following window will appear Figure 7 15 Access Rule List window IP...

Страница 292: ...ck the corresponding check box to re write the 802 1p default priority of a packet to the value entered in the Priority field which meets the criteria specified previously in this command before forwarding it on to the specified CoS queue Otherwise a packet will have its incoming 802 1p user priority re written to its original value before being forwarded by the Switch For more information on prio...

Страница 293: ...ser will be presented with an error message and the access rule will not be configured Ticking the All Ports check box will denote all ports on the Switch VLAN Name Specify the VLAN name to apply to the access rule VLAN ID Specify the VLAN ID to apply to the access rule Click the Apply button to accept the changes made Click the Back button to discard the changes made and return to the previous pa...

Страница 294: ... the layer 2 part of each packet header Select IPv4 ACL to instruct the Switch to examine the IPv4 address in each frame s header Select IPv6 ACL to instruct the Switch to examine the IPv6 address in each frame s header Select Packet Content to instruct the Switch to examine the packet content in each frame s header Packet Content Allows users to examine up to 4 specified offset_chunks within a pa...

Страница 295: ... will appear Figure 7 19 Access Profile Detail Information Packet Content ACL Click the Show All Profiles button to navigate back to the Access Profile List Page NOTE Address Resolution Protocol ARP is the standard for finding a host s hardware address MAC address However ARP is vulnerable as it can be easily spoofed and utilized to attack a LAN i e an ARP spoofing attack For a more detailed expla...

Страница 296: ...or port command Port Mirroring must be enabled and a target port must be set Priority 0 7 Tick the corresponding check box if you want to re write the 802 1p default priority of a packet to the value entered in the Priority field which meets the criteria specified previously in this command before forwarding it on to the specified CoS queue Otherwise a packet will have its incoming 802 1p user pri...

Страница 297: ...gure 7 22 Access Rule Detail Information Packet Content ACL Click the Show All Rules button to navigate back to the Access Rule List CPU Access Profile List Due to a chipset limitation and needed extra switch security the Switch incorporates CPU Interface filtering This added feature increases the running security of the Switch by enabling the user to create a list of access rules for packets dest...

Страница 298: ...the Delete All button to remove all access profiles from this table Click the Show Details button to display the information of the specific profile ID entry Click the Add View Rules button to view or add CPU ACL rules within the specified profile ID Click the Delete button to remove the specific entry There are four Add CPU ACL Profile windows one for Ethernet or MAC address based profile configu...

Страница 299: ... Select IPv6 to instruct the Switch to examine the IP address in each frame s header Select Packet Content Mask to specify a mask to hide the content of the packet header Source MAC Mask Enter a MAC address mask for the source MAC address Destination MAC Mask Enter a MAC address mask for the destination MAC address 802 1Q VLAN Selecting this option instructs the Switch to examine the VLAN identifi...

Страница 300: ... Figure 7 26 CPU Access Rule List Ethernet ACL Click the Add Rule button to create a new CPU ACL rule in this profile Click the Back button to return to the previous page Click the Show Details button to view more information about the specific rule created Click the Delete Rules button to remove the specific entry Enter a page number and click the Go button to navigate to a specific page when mul...

Страница 301: ...iously configured in the Time Range Settings window This will set specific times when this access rule will be implemented on the Switch Ports Ticking the All Ports check box will denote all ports on the Switch Click the Apply button to accept the changes made Click the Back button to discard the changes made and return to the previous page After clicking the Show Details button in the CPU Access ...

Страница 302: ...mine the IP address in each frame s header Select Packet Content Mask to specify a mask to hide the content of the packet header 802 1Q VLAN Selecting this option instructs the Switch to examine the VLAN part of each packet header and use this as the or part of the criterion for forwarding IPv4 DSCP Selecting this option instructs the Switch to examine the DiffServ Code part of each packet header ...

Страница 303: ...ask for the source port in hex form hex 0x0 0xffff which you wish to filter dst port mask Specify a TCP port mask for the destination port in hex form hex 0x0 0xffff which you wish to filter Select UDP to use the UDP port number contained in an incoming packet as the forwarding criterion Selecting UDP requires that you specify a source port mask and or a destination port mask src port mask Specify...

Страница 304: ...ameter Description Access ID 1 100 Type in a unique identifier number for this access This value can be set from 1 to 100 A lower value denotes a higher priority Action Select Permit to specify that the packets that match the access profile are forwarded by the Switch according to any additional rule added see below Select Deny to specify that the packets that match the access profile are not forw...

Страница 305: ...e window shown below is the Add CPU ACL Profile window for IPv6 To use specific filtering masks in this ACL profile click the packet filtering mask field to highlight it red This will add more filed to the mask After clicking the Add CPU ACL Profile button the following window will appear Figure 7 34 Add CPU ACL Profile IPv6 ACL The fields that can be configured are described below Parameter Descr...

Страница 306: ...er may specify an IP address mask for the source IPv6 address by checking the corresponding box and entering the IP address mask IPv6 Destination Mask The user may specify an IP address mask for the destination IPv6 address by checking the corresponding box and entering the IP address mask Click the Select button to select a CPU ACL type Click the Create button to create a profile Click the Back b...

Страница 307: ...truct the Switch to examine the flow label field of the IPv6 header This flow label field is used by a source to label sequences of packets such as non default quality of service or real time service packets Time Range Name Tick the check box and enter the name of the Time Range settings that has been previously configured in the Time Range Settings window This will set specific times when this ac...

Страница 308: ...sed on Ethernet MAC Address IPv4 address IPv6 address or packet content mask This will change the menu according to the requirements for the type of profile Select Ethernet to instruct the Switch to examine the layer 2 part of each packet header Select IPv4 to instruct the Switch to examine the IP address in each frame s header Select IPv6 to instruct the Switch to examine the IP address in each f...

Страница 309: ...cket Content ACL Click the Show All Profiles button to navigate back to the CPU ACL Profile List Page After clicking the Add View Rules button the following window will appear Figure 7 41 CPU Access Rule List Packet Content ACL Click the Add Rule button to create a new CPU ACL rule in this profile Click the Back button to return to the previous page Click the Show Details button to view more infor...

Страница 310: ...Enter a value in hex form to mask the packet from the beginning of the packet to the 15th byte Offset 16 31 Enter a value in hex form to mask the packet from byte 16 to byte 31 Offset 32 47 Enter a value in hex form to mask the packet from byte 32 to byte 47 Offset 48 63 Enter a value in hex form to mask the packet from byte 48 to byte 63 Offset 64 79 Enter a value in hex form to mask the packet f...

Страница 311: ... the drop down menu to select the state Normal Allow the user to find normal ACL rules CPU Allow the user to find CPU ACL rules Egress Allow the user to find Egress ACL rules Click the Find button to locate a specific entry based on the information entered Click the Delete button to remove the specific entry selected Enter a page number and click the Go button to navigate to a specific page when m...

Страница 312: ...ze The CBS should be configured to accept the biggest IP packet that is expected in the IP flow EBS Excess Burst Size Measured in bytes the EBS is associated with the CIR and is used to identify packets that exceed the boundaries of the CBS packet size The EBS is to be configured for an equal or larger rate than the CBS DSCP Differentiated Services Code Point The part of the packet header where th...

Страница 313: ...specific entry Enter a page number and click the Go button to navigate to a specific page when multiple pages exist After clicking the Add or Modify button the following window will appear Figure 7 46 ACL Flow meter Configuration window The fields that can be configured are described below Parameter Description Profile ID 1 6 Click the radio button and enter the Profile ID for the flow meter A low...

Страница 314: ...meter to enable or disable the packet counter for the specified ACL entry in the green flow Exceed This field denotes the yellow packet flow Yellow packet flows may have excess packets permitted through or dropped Users may replace the DSCP field of these packets by checking its radio button and entering a new DSCP value in the allotted field Counter Use this parameter to enable or disable the pac...

Страница 315: ...ofile ID Click the Delete button to remove the specific entry Enter a page number and click the Go button to navigate to a specific page when multiple pages exist There are three Add Egress ACL windows one for Ethernet profile configuration one for IPv6 address based profile configuration and one for IPv4 address based profile configuration Add an Ethernet ACL Profile The window shown below is the...

Страница 316: ...header Select IPv4 ACL to instruct the Switch to examine the IPv4 address in each frame s header Select IPv6 ACL to instruct the Switch to examine the IPv6 address in each frame s header Source MAC Mask Enter a MAC address mask for the source MAC address Destination MAC Mask Enter a MAC address mask for the destination MAC address 802 1Q VLAN Selecting this option instructs the Switch to examine t...

Страница 317: ...icking the Add View Rules button the following window will appear Figure 7 51 Egress Access Rule List window Ethernet ACL Click the Add Rule button to create a new ACL rule in this profile Click the Back button to return to the previous page Click the Show Details button to view more information about the specific rule created Click the Delete Rules button to remove the specific entry Enter a page...

Страница 318: ...alue in a packet that meets the selected criteria with the value entered in the adjacent field When an ACL rule is added to change both the priority and DSCP of an IPv4 packet only one of them can be modified due to a chip limitation Currently the priority is changed when both the priority and DSCP are set to be modified Time Range Name Tick the check box and enter the name of the Time Range setti...

Страница 319: ...er a profile name for the profile created Select ACL Type Select profile based on Ethernet MAC Address IPv4 address or IPv6 address This will change the window according to the requirements for the type of profile Select Ethernet ACL to instruct the Switch to examine the layer 2 part of each packet header Select IPv4 ACL to instruct the Switch to examine the IPv4 address in each frame s header Sel...

Страница 320: ...st port mask Specify a TCP port mask for the destination port in hex form hex 0x0 0xffff which you wish to filter flag bit The user may also identify which flag bits to filter Flag bits are parts of a packet that determine what to do with the packet The user may filter packets by filtering certain flag bits within the packets by checking the boxes corresponding to the flag bits of the TCP field Th...

Страница 321: ...st window IPv4 ACL Click the Add Rule button to create a new ACL rule in this profile Click the Back button to return to the previous page Click the Show Details button to view more information about the specific rule created Click the Delete Rules button to remove the specific entry Enter a page number and click the Go button to navigate to a specific page when multiple pages exist After clicking...

Страница 322: ...iteria with the value entered in the adjacent field When an ACL rule is added to change both the priority and DSCP of an IPv4 packet only one of them can be modified due to a chip limitation Currently the priority is changed when both the priority and DSCP are set to be modified Time Range Name Tick the check box and enter the name of the Time Range settings that has been previously configured in ...

Страница 323: ... profile created Select ACL Type Select profile based on Ethernet MAC Address IPv4 address or IPv6 address This will change the window according to the requirements for the type of profile Select Ethernet ACL to instruct the Switch to examine the layer 2 part of each packet header Select IPv4 ACL to instruct the Switch to examine the IPv4 address in each frame s header Select IPv6 ACL to instruct ...

Страница 324: ...he Create button to create a profile Click the Back button to discard the changes made and return to the previous page After clicking the Show Details button the following window will appear Figure 7 60 Egress Access Profile Detail Information window IPv6 ACL Click the Show All Profiles button to navigate back to the Access Profile List Page After clicking the Add View Rules button the following w...

Страница 325: ...t on to the specified CoS queue Otherwise a packet will have its incoming 802 1p user priority re written to its original value before being forwarded by the Switch For more information on priority queues CoS queues and mapping for 802 1p see the QoS section of this manual Replace DSCP 0 63 Select this option to instruct the Switch to replace the DSCP value in a packet that meets the selected crit...

Страница 326: ... Flow Meter RI and EI Mode Only This window is used to configure the packet flow based metering based on an egress access profile and rule To view this window click ACL Egress ACL Flow Meter as shown below Figure 7 64 Egress ACL Flow Meter window The fields that can be configured are described below Parameter Description Profile ID Use the drop down menu to select it and enter the Profile ID for t...

Страница 327: ...rate two color mode The action can be specified as one of the following Drop Packet Drop the packet immediately Remark DSCP Mark the packet with a specified DSCP The packet is set to drop for packets with a high precedence trTCM Specify the two rate three color mode CIR Specify the Committed information Rate The unit is Kbps CIR should always be equal or less than PIR PIR Specify the Peak informat...

Страница 328: ... allotted field Counter Use this parameter to enable or disable the packet counter for the specified ACL entry in the yellow flow Violate This field denotes the red packet flow Red packet flows may have excess packets permitted through or dropped Users may replace the DSCP field of these packets by checking its radio button and entering a new DSCP value in the allotted field Counter Use this param...

Страница 329: ...enticating users to gain access to various wired or wireless devices on a specified Local Area Network by using a Client and Server based access control model This is accomplished by using a RADIUS server to authenticate users trying to access a network by relaying Extensible Authentication Protocol over LAN EAPOL packets between the Client and the Server The following figure represents a basic EA...

Страница 330: ...t certification information from the Client through EAPOL packets which is the only information allowed to pass through the Authenticator before access is granted to the Client The second purpose of the Authenticator is to verify the information gathered from the Client with the Authentication Server and to then relay that information back to the Client Figure 8 4 The Authenticator Three steps mus...

Страница 331: ...AC addresses by port and set them in a list Each MAC address must be authenticated by the Switch using a remote RADIUS server before being allowed access to the Network Understanding 802 1X Port based and Host based Network Access Control The original intent behind the development of 802 1X was to leverage the characteristics of point to point in LANs As any single LAN segment in such infrastructu...

Страница 332: ... The fields that can be configured are described below Parameter Description Authentication Mode Choose the 802 1X authenticator mode Disabled Port based or MAC based Authentication Protocol Choose the authenticator protocol Local or RADIUS EAP Forward EAPOL PDU This is a global setting to control the forwarding of EAPOL PDU When 802 1X functionality is disabled globally or for a port and if 802 1...

Страница 333: ...t is defined in SuppTimeout IEEE 802 1X 2001 page 47 The initialization value is used for the awhile timer when timing out the Supplicant Its default value is 30 seconds however if the type of challenge involved in the current exchange demands a different value of timeout for example if the challenge requires an action on the part of the user then the timeout value is adjusted accordingly It can b...

Страница 334: ...thorized state which ignores all attempts by the client to authenticate The Switch cannot provide authentication services to the client through the interface Capability This allows the 802 1X Authenticator settings to be applied on a per port basis Select Authenticator to apply the settings to the port When the setting is activated a user must pass the authentication process to gain access to the ...

Страница 335: ...dministrator must configure the guest accounts accessing the Switch to be placed in a Guest VLAN when trying to access the Switch Upon initial entry to the Switch the client wishing services on the Switch will need to be authenticated by a remote RADIUS Server or local authentication on the Switch to be placed in a fully operational VLAN Figure 8 12 Guest VLAN Authentication Process If authenticat...

Страница 336: ...this window click Security 802 1X Authenticator State as shown below Figure 8 14 Authenticator State window The fields that can be configured are described below Parameter Description Unit Select the unit to be displayed EI and SI Mode Only Port Select a port to be displayed Click the Find button to locate a specific entry based on the information entered Click the Refresh button to refresh the di...

Страница 337: ...yed Click the Apply button to accept the changes made NOTE The user must first globally enable Authentication Mode in the 802 1X Global Settings window before initializing ports Information in this window cannot be viewed before enabling the authentication mode for either Port based or MAC based Authenticator Session Statistics This window is used to display the authenticator session statistics in...

Страница 338: ...op down menu to select the interval to update the statistics Click the Apply button to accept the changes made NOTE The user must first globally enable Authentication Mode in the 802 1X Global Settings window before initializing ports Information in this window cannot be viewed before enabling the authentication mode for either Port based or MAC based Authenticator Diagnostics This window is used ...

Страница 339: ...erval to update the statistics Click the Apply button to accept the changes made NOTE The user must first globally enable Authentication Mode in the 802 1X Global Settings window before initializing ports Information in this window cannot be viewed before enabling the authentication mode for either Port based or MAC based Initialize Port based Port s This window is used to display the authenticato...

Страница 340: ...figured are described below Parameter Description Unit Select the unit to be displayed EI and SI Mode Only From Port To Port Select a range of ports to be displayed MAC Address Tick the check box and enter the authenticated MAC address of the client connected to the corresponding port Click the Apply button to accept the changes made NOTE The user must first globally enable Authentication Mode in ...

Страница 341: ...igured are described below Parameter Description Unit Select the unit to be displayed EI and SI Mode Only From Port To Port Select a range of ports to be displayed MAC Address Tick the check box and enter the authenticated MAC address of the client connected to the corresponding port Click the Apply button to accept the changes made NOTE The user must first globally enable Authentication Mode in t...

Страница 342: ...ult port is 1812 Accounting Port 1 65535 Set the RADIUS account server s UDP port which is used to transmit RADIUS accounting statistics between the Switch and the RADIUS server The default port is 1813 Timeout 1 255 Set the RADIUS server age out in seconds Retransmit 1 20 Set the RADIUS server retransmit time in times Key Set the key the same as that of the RADIUS server Confirm Key Confirm the k...

Страница 343: ...equests The number of RADIUS Access Request packets sent to this server This does not include retransmissions AccessRetrans The number of RADIUS Access Request packets retransmitted to this RADIUS authentication server AccessAccepts The number of RADIUS Access Accept packets valid or invalid received from this server AccessRejects The number of RADIUS Access Reject packets valid or invalid receive...

Страница 344: ...indow The user may also select the desired time interval to update the statistics between 1s and 60s where s stands for seconds The default value is one second The fields that can be configured are described below Parameter Description ServerIndex The identification number assigned to each RADIUS Accounting server that the client shares a secret with InvalidServerAddr The number of RADIUS Accounti...

Страница 345: ... the Clear button to clear the current statistics shown IP MAC Port Binding IMPB RI and EI Mode Only The IP network layer uses a four byte address The Ethernet link layer uses a six byte MAC address Binding these two address types together allows the transmission of data between the layers The primary purpose of IP MAC port binding is to restrict the access to a switch to a number of authorized us...

Страница 346: ... buttons to enable or disable enable ND snooping on the Switch The default is Disabled Recover Learning Ports Enter the port numbers used to recover the learning port state Tick the All check box to apply to all ports Recover Time 60 1000000 Enter an interval in second used by the auto recovery mechanism File Name Enter the location of the file or click the Browse button to navigate to the file fo...

Страница 347: ...When enabling this mode the Switch stops writing dropped FDB entries on these ports If detecting legal packets the Switch needs to write forward FDB entry Enabled Loose In this mode all packets are forwarded by default until an illegal ARP packet is detected The default value is Disabled IP Inspection When both ARP and IP inspections are enabled all IP packets are checked The legal IP packets are ...

Страница 348: ...dow The fields that can be configured are described below Parameter Description IPv4 Address Click the radio button and enter the IP address to bind to the MAC address set below IPv6 Address Click the radio button and enter the IPv6 address to bind to the MAC address set below MAC Address Enter the MAC address to bind to the IP Address set above Ports Specify the switch ports for which to configur...

Страница 349: ...zed device that has been blocked by the IP MAC binding restrictions Click the View All button to display all the existing entries Click the Delete All button to remove all the entries listed DHCP Snooping DHCP Snooping Maximum Entry Settings Users can configure the maximum DHCP snooping entry for ports in this window To view this window click Security IP MAC Port Binding IMPB DHCP Snooping DHCP Sn...

Страница 350: ...nooping DHCP Snooping Entry as shown below Figure 8 30 DHCP Snooping Entry window The fields that can be configured are described below Parameter Description Unit Select the unit you want to configure EI Mode Only Port Use the drop down menu to select the desired port Ports Specify the ports for DHCP snooping entries Tick the All Ports check box to select all entries for all ports Tick the IPv4 ch...

Страница 351: ...ond Tick the No Limit check box to disable DHCP snooping rate limiting Action Use the drop down menu to select the DHCP protection mode Shutdown Shut down the port when the port enters the under attack state Drop Drop all the above rate limit DHCP packets when the port enters the under attack state Click the Find button to locate a specific entry based on the port number selected ND Snooping ND Sn...

Страница 352: ...restriction on the maximum number of entries that can be learned with ND snooping Maximum Entry 1 50 Enter the maximum entry value Tick the No Limit check box to have unlimited maximum number of the learned entries Click the Apply button to accept the changes made ND Snooping Entry This window is used to view dynamic entries on specific ports To view this window click Security IP MAC Port Binding ...

Страница 353: ...result users achieve different levels of authorization Notes about MAC based Access Control There are certain limitations and regulations regarding MAC based access control 1 Once this feature is enabled for a port the Switch will clear the FDB of that port 2 If a port is granted clearance for a MAC address in a VLAN that is not a Guest VLAN other MAC addresses on that port must be authenticated f...

Страница 354: ...enu to enable or disable log state Trap State Use the drop down menu to enable or disable trap state Password Type Use the drop down menu to select the type of RADIUS authentication password for MAC based access control Manual String Use the same password in the Password text box Client MAC Address Use the client s MAC address as the password Password Enter the password for the RADIUS server which...

Страница 355: ...es The default is 1440 To set this value to have no aging time select the Infinite option Block Time 0 300 Enter a value between 0 and 300 seconds The default is 300 Max User 1 1000 Enter the maximum user used for this configuration When No Limit is selected there will be no user limit applied to this rule Click the Apply button to accept the changes made MAC based Access Control Local Settings Us...

Страница 356: ... button to locate a specific entry based on the MAC address entered Click the Find by VLAN button to locate a specific entry based on the VLAN name or ID entered Click the View All button to display all the existing entries To change the selected MAC address VLAN Name the user can click the Edit by Name button Figure 8 37 MAC based Access Control Local Settings Edit by Name window To change the se...

Страница 357: ...ess but not to the IP address of the Switch s physical interface Virtual IP works like this when a host PC communicates with the WAC Switch through a virtual IP the virtual IP is transformed into the physical IPIF IP interface address of the Switch to make the communication possible The host PC and other servers IP configurations do not depend on the virtual IP of WAC The virtual IP does not respo...

Страница 358: ...btain an IP address 2 Certain functions exist on the Switch that will filter HTTP packets such as the Access Profile function The user needs to be very careful when setting filter functions for the target VLAN so that these HTTP packets are not denied by the Switch 3 If a RADIUS server is to be used for authentication the user must first establish a RADIUS Server with the appropriate parameters in...

Страница 359: ... RADIUS Authorization or not Local Authorization The user can enable or disable this option to enable Local Authorization or not Method Use this drop down menu to choose the authenticator for Web based Access Control The user may choose Local Choose this parameter to use the local authentication method of the Switch as the authenticating method for users trying to access the network via the switch...

Страница 360: ...ve selected Local as their Web based authenticator VLAN Name Click the button and enter a VLAN Name in this field VID 1 4094 Click the button and enter a VID in this field Password Enter the password the administrator has chosen for the selected user This field is case sensitive and must be a complete alphanumeric string This field is for administrators who have selected Local as their Web based a...

Страница 361: ...s 1440 minutes 24 hours State Use this drop down menu to enable the configured ports as WAC ports Idle Time 1 1440 If there is no traffic during the Idle Time parameter the host will be moved back to the unauthenticated state Enter a value between 1 and 1440 minutes Tick the Infinite check box to indicate the Idle state of the authenticated host on the port will never be checked The default value ...

Страница 362: ...nticating Tick this check box to clear all authenticating users for a port Blocked Tick this check box to clear all blocked users for a port Click the Find button to locate a specific entry based on the information entered Click the Clear by Port button to remove entry based on the port list entered Click the View All Hosts button to display all the existing entries Click the Clear All Hosts butto...

Страница 363: ...cess Control on the Switch JWAC and Web Authentication are mutually exclusive functions That is they cannot be enabled at the same time To use the JWAC feature computer users need to pass through two stages of authentication The first stage is to do the authentication with the quarantine server and the second stage is the authentication with the Switch For the second stage the authentication is si...

Страница 364: ...DP and ICMP packets except DHCP and DNS packets from unauthenticated hosts will be dropped Port Number 1 65535 Enter the TCP port that the JWAC Switch listens to and uses to finish the authenticating process Forcible Logout Use the drop down menu to enable or disable JWAC Forcible Logout When Forcible Logout is Enabled a Ping packet from an authenticated host to the JWAC Switch with TTL 1 will be ...

Страница 365: ...When Enabled the JWAC Switch will monitor the Quarantine Server to ensure the server is okay If the Switch detects no Quarantine Server it will redirect all unauthenticated HTTP access attempts to the JWAC Login Page forcibly if the Redirect is enabled and the Redirect Destination is configured to be a Quarantine Server IPv4 URL Enter the JWAC Quarantine Server IPv4 URL If the Redirect is enabled ...

Страница 366: ... 1and 1440 minutes Tick the Infinite check box to indicate the authenticated host will never age out on the port The default value is 1440 minutes 24 hours Idle Time 1 1440 If there is no traffic during the Idle Time parameter the host will be moved back to the unauthenticated state Enter a value between 1 and 1440 minutes Tick the Infinite check box to indicate the Idle state of the authenticated...

Страница 367: ...ed in the previous field Click the Add button to add a new entry based on the information entered Click the Delete All button to remove all the entries listed Click the Edit button to re configure the specific entry Click the Delete button to remove the specific entry JWAC Authentication State This window is used to display Japanese web based access control host table information To view this wind...

Страница 368: ...gs for the Switch The current firmware supports either English or Japanese To view this window click Security Japanese Web based Access Control JWAC JWAC Customize Page Language as shown below Figure 8 49 JWAC Customize Page Language window The fields that can be configured are described below Parameter Description Customize Page Language Click to select the language of JWAC Customize Page either ...

Страница 369: ...xStack DGS 3120 Series Layer 3 Managed Gigabit Ethernet Switch Web UI Reference Guide 359 Figure 8 50 JWAC Customize Page Japanese window Figure 8 51 JWAC Customize Page English window ...

Страница 370: ...efault settings of all elements Compound Authentication Compound Authentication settings allows for multiple authentication to be supported on the Switch Compound Authentication Settings Users can configure Authorization Network State Settings and compound authentication methods for a port or ports on the Switch To view this window click Security Compound Authentication Compound Authentication Set...

Страница 371: ...S 3120 Series Layer 3 Managed Gigabit Ethernet Switch Web UI Reference Guide 361 Figure 8 53 Compound Authentication Settings window EI Mode Only Figure 8 54 Compound Authentication Settings window SI Mode Only ...

Страница 372: ...d WAC can be enabled on a port at the same time In Any MAC 802 1X JWAC or WAC mode whether an individual security module is active on a port depends on its system state 802 1X IMPB 802 1X will be verified first and then IMPB will be verified Both authentication methods need to be passed IMPB JWAC JWAC will be verified first and then IMPB will be verified Both authentication methods need to be pass...

Страница 373: ... to accept the changes made Click the Delete button to remove the specific entry Once properly configured the Guest VLAN and associated ports will be listed in the lower part of the window Compound Authentication MAC Format Settings RI and EI Mode Only This window is used to configure the MAC address format to be used for authenticating the user name via the RADIUS server To view this window click...

Страница 374: ...e authentication server after T1 time the Switch resends the Access Request to the server If the Switch doesn t receive a response after N1 times the result is denied and the entry host MAC switch port number multicast group IP is put in the authentication failed list In general case when the multicast group port is already learned by the switch it won t do the authentication again It only process...

Страница 375: ...ior to locking the port or ports from connecting to the Switch s locked ports and gaining access to the network To view this window click Security Port Security Port Security Settings as shown below Figure 8 58 Port Security Settings window The fields that can be configured are described below Parameter Description Port Security Trap Settings Click to enable or disable Port Security Traps on the S...

Страница 376: ...d addresses will not age out until the Switch has been reset or rebooted Max Learning Address 0 3072 Specify the maximum value of port security entries that can be learned on this port Click the Apply button to accept the changes made for each individual section Click the Edit button to re configure the specific entry Click the View Detail button to display the information of the specific entry Af...

Страница 377: ...en multiple pages exist Port Security Entries Users can remove an entry from the port security entries learned by the Switch and entered into the forwarding database To view this window click Security Port Security Port Security Entries as shown below Figure 8 61 Port Security Entries window The fields that can be configured or displayed are described below Parameter Description VLAN Name The VLAN...

Страница 378: ...gateway MAC address to help prevent ARP Spoofing Ports Enter the port numbers that this feature applies to Alternatively the user can select All Ports to apply this feature to all the ports of the switch Click the Apply button to accept the changes made Click the Delete All button to remove all the entries listed Click the Edit button to re configure the specific entry Click the Delete button to r...

Страница 379: ...d or Both Recover Time 60 1000000 Specify the BPDU protection Auto Recovery timer The default value of the recovery timer is 60 Tick the Infinite check box so that the port will not recovered automatically Unit Select the unit you want to configure EI and SI Mode Only From Port To Port Select a range of ports to use for this configuration State Use the drop down menu to enable or disable the prote...

Страница 380: ...k Detection Settings window The fields that can be configured are described below Parameter Description Loopback Detection State Use the radio button to enable or disable loopback detection The default is Disabled Mode Use the drop down menu to toggle between Port based and VLAN based Trap State Set the desired trap status None Loop Detected Loop Cleared or Both Log State Specify the state of the ...

Страница 381: ... down menus to select a range of ports to be configured State Use the drop down menu to enable or disable RPC portmapper filter on specified ports Click the Apply button to accept the changes made NetBIOS Filtering Settings NetBIOS is an application programming interface providing a set of functions that applications use to communicate across networks NetBEUI the NetBIOS Enhanced User Interface wa...

Страница 382: ... the NetBIOS over 802 3 frame on these enabled ports Ports Tick the appropriate ports to be configured Click the Select All button to select all ports in each individual section Click the Clear All button to deselect all ports in each individual section Click the Apply button to accept the changes made for each individual section Traffic Segmentation Settings Traffic segmentation is used to limit ...

Страница 383: ... one or more DHCP servers are present on the network and both provide DHCP services to different distinct groups of clients The first time the DHCP filter is enabled it will create both an access profile entry and an access rule per port entry it will also create other access rules These rules are used to block all DHCP server packets In addition to a permit DHCP entry it will also create one acce...

Страница 384: ...the DHCP server screening log state Illegitimate Server Log Suppress Duration Choose an illegal server log suppress duration of 1 minute 5 minutes or 30 minutes Unit Select the unit you want to configure EI and SI Mode Only From Port To Port Use the drop down menus to select a range of ports to be configured State Choose Enabled to enable the DHCP server screening or Disabled to disable it The def...

Страница 385: ...tered Filter DHCPv6 Server This window is used to configure the filter DHCPv6 server state To view this window click Security DHCP Server Screening Filter DHCPv6 Server as shown below Figure 8 70 Filter DHCPv6 Server window The fields that can be configured are described below Parameter Description Trap State Click to enable or disable the filter DHCPv6 server trap state Log State Click to enable ...

Страница 386: ... ICMPv6 RA all nodes forward list Click the Apply button to accept the changes made for each individual section Click the Delete button to remove the specific entry based on the information entered Access Authentication Control The TACACS XTACACS TACACS RADIUS commands allow users to secure access to the Switch using the TACACS XTACACS TACACS RADIUS protocols When a user logs in to the Switch or t...

Страница 387: ...n only have hosts that are running the specified protocol For example the TACACS Authentication Server Groups can only have TACACS Authentication Server Hosts The administrator for the Switch may set up six different authentication techniques per user defined method list TACACS XTACACS TACACS RADIUS local none for authentication These techniques will be listed in an order preferable and defined by...

Страница 388: ...ation upon login To view this window click Security Access Authentication Control Authentication Policy Settings as shown below Figure 8 74 Authentication Policy Settings window The fields that can be configured are described below Parameter Description Authentication Policy Use the drop down menu to enable or disable the authentication policy on the Switch Authentication Policy Encryption Use the...

Страница 389: ...scribed below Parameter Description Application Lists the configuration applications on the Switch The user may configure the Login Method List and Enable Method List for authentication for users utilizing the Console Command Line Interface application the TELNET application SSH and the Web HTTP application Login Method List Using the drop down menu configure an application for normal login on the...

Страница 390: ...st created Administrator When selected the accounting service for all administrator level commands will be enabled Operator When selected the accounting service for all operator level commands will be enabled Power User When selected the accounting service for all power user level commands will be enabled User When selected the accounting service for all user level commands will be enabled Click t...

Страница 391: ...Edit Server Group tab Figure 8 78 Authentication Server Group Settings Edit Server Group window To add an Authentication Server Host to the list enter its name in the Group Name field IP address in the IP Address field use the drop down menu to choose the Protocol associated with the IP address of the Authentication Server Host and then click Add to add this Authentication Server Host to the group...

Страница 392: ...server host to add Protocol The protocol used by the server host The user may choose one of the following TACACS Enter this parameter if the server host utilizes the TACACS protocol XTACACS Enter this parameter if the server host utilizes the XTACACS protocol RADIUS Enter this parameter if the server host utilizes the RADIUS protocol TACACS Enter this parameter if the server host utilizes the TACA...

Страница 393: ...istrator level the user must use the Enable Admin window in which the user must enter a previously configured password set by the administrator To view this window click Security Access Authentication Control Login Method Lists Settings as shown below Figure 8 80 Login Method Lists Settings window The Switch contains one Method List that is set and cannot be removed yet can be modified To delete a...

Страница 394: ...t is exhausted At that point the Switch will restart the same sequence with the following protocol listed XTACACS If no authentication takes place using the XTACACS list the Local Enable password set in the Switch is used to authenticate the user Successful authentication using any of these methods will give the user an Admin privilege NOTE To set the Local Enable Password see the next section ent...

Страница 395: ...Name Enter a method list name defined by the user of up to 15 characters Priority 1 2 3 4 The user may add one or a combination of up to four of the following accounting methods to this method list none Adding this parameter will require no accounting radius Adding this parameter will require the user to be accounted using the RADIUS protocol from a remote RADIUS server tacacs Adding this paramete...

Страница 396: ...DHE public key algorithm This is the first authentication process between client and host as they exchange keys in looking for a match and therefore authentication to be accepted to negotiate encryptions on the following level 2 Encryption The second part of the cipher suite that includes the encryption used for encrypting the messages sent between client and host The Switch supports two types of ...

Страница 397: ...e authorized for the web based management Users can download a certificate file for the SSL function on the Switch from a TFTP server The certificate file is a data record used for authenticating devices on the network It contains information on the owner keys for authentication and digital signatures Both the server and the client must have consistent certificate files for optimal use of the SSL ...

Страница 398: ...buttons to enable or disable this cipher suite This field is Enabled by default Click the Apply button to accept the changes made To download SSL certificates configure the parameters in the SSL Certificate Download section described below Parameter Description Server IP Address Enter the IPv4 address of the TFTP server where the certificate files are located Certificate File Name Enter the path a...

Страница 399: ...is a powerful guardian against numerous existing security hazards that now threaten network communications The steps required to use the SSH protocol for secure communication between a remote PC the SSH client and the Switch the SSH server are as follows Chapter 1 Create a user account with admin level access using the User Accounts window This is identical to creating any other admin level User A...

Страница 400: ...ntication After the maximum number of attempts has been exceeded the Switch will be disconnected and the user must reconnect to the Switch to attempt another login The number of maximum attempts may be set between 2 and 20 The default setting is 2 Rekey Timeout This field is used to set the time period that the Switch will change the security shell encryptions by using the drop down menu The avail...

Страница 401: ...es to use a locally configured password for authentication on the Switch This parameter is enabled by default Public Key This may be enabled or disabled to choose if the administrator wishes to use a public key configuration set on a SSH server for authentication This parameter is enabled by default Host based This may be enabled or disabled to choose if the administrator wishes to use a host comp...

Страница 402: ... disable the HMAC Hash for Message Authentication Code mechanism utilizing the MD5 Message Digest encryption algorithm The default is enabled HMAC SHA1 Use the check box to enable or disable the HMAC Hash for Message Authentication Code mechanism utilizing the Secure Hash algorithm The default is enabled Click the Apply button to accept the changes made The fields that can be configured for the Pu...

Страница 403: ... to re type the password for confirmation Public Key This parameter should be chosen if the administrator wishes to use the public key on a SSH server for authentication Host Name Enter an alphanumeric string of no more than 32 characters to identify the remote SSH user This parameter is only used in conjunction with the Host Based choice in the Auth Mode field Host IP Enter the corresponding IP a...

Страница 404: ...ackets All Tick to select all DoS attack types State Select to enable or disable DoS attack prevention Action Select the action to be taken when detecting the attack DoS Trap State Select to enable or disable DoS prevention trap state DoS Log State Select to enable or disable DoS prevention log state Click the Apply button to accept the changes made for each individual section Click the View Detai...

Страница 405: ...ngs Periodically malicious hosts on the network will attack the Switch by utilizing packet flooding ARP Storm or other methods These attacks may increase the switch load beyond its capability To alleviate this problem the Safeguard Engine function was added to the Switch s software The Safeguard Engine can help the overall operability of the Switch by minimizing the workload of the Switch while th...

Страница 406: ...the time it will discard ingress ARP and IP broadcast packets and packets from the illegal IP addresses In the example above the Switch doubled the time for dropping ARP and IP broadcast packets when consecutive flooding issues were detected at 5 second intervals First stop 5 seconds second stop 10 seconds third stop 20 seconds Once the flooding is no longer detected the wait period for dropping A...

Страница 407: ... been activated by a high CPU utilization rate Mode Used to select the type of Safeguard Engine to be activated by the Switch when the CPU utilization reaches a high rate The user may select Fuzzy If selected this function will instruct the Switch to minimize the IP and ARP traffic flow to the CPU by dynamically allotting an even bandwidth to all traffic flows Strict If selected this function will...

Страница 408: ...r State Click to enable or disable the SFTP server state Session Idle Timeout 30 600 Enter the idle timer for SFTP server If the SFTP server detects no operation after this duration for a specific SFTP session it will close this SFTP session The default value is 120 seconds Click the Apply button to accept the changes made ...

Страница 409: ...ay time threshold the packet will be dropped The range is between 0 and 65 535 seconds with a default value of 0 seconds To view this window click Network Application DHCP DHCP Relay DHCP Relay Global Settings as shown below Figure 9 1 DHCP Relay Global Settings window The fields that can be configured are described below Parameter Description DHCP Relay State Use the drop down menu to enable or d...

Страница 410: ...acket because it is invalid In packets received from DHCP servers the relay agent will drop invalid messages Disabled When the field is toggled to Disabled the relay agent will not check the validity of the packet s Option 82 field DHCP Relay Agent Information Option 82 Policy Use the drop down menu to set the Switch s policy for handling packets when the DHCP Relay Agent Information Option 82 Che...

Страница 411: ...will be ignored If the relay servers are not determined either by Option 60 or Option 61 then per IPIF configured servers will be used to determine the relay servers enable Select this option to enable the DHCP Relay Option 61 state in order to relay DHCP packets disable Select this option to disable the DHCP Relay Option 61 state Click the Apply button to accept the changes made for each individu...

Страница 412: ...ser may add up to four server IPs per IP interface on the Switch Entries may be deleted by clicking the corresponding Delete button To view this window click Network Application DHCP DHCP Relay DHCP Relay Interface Settings as shown below Figure 9 4 DHCP Relay Interface Settings window The fields that can be configured are described below Parameter Description Interface Name The IP interface on th...

Страница 413: ...etwork Application DHCP DHCP Relay DHCP Relay Option 60 Server Settings as shown below Figure 9 6 DHCP Relay Option 60 Server Settings window The fields that can be configured are described below Parameter Description Server IP Address Enter the DHCP Relay Option 60 Server Relay IP Address Mode Use the drop down menu to select the DHCP Relay Option 60 Server mode Click the Add button to add a new ...

Страница 414: ...tion 60 Match Type value Exact Match The Option 60 string in the packet must full match with the specified string Partial Match The Option 60 string in the packet only need partial match with the specified string IP Address Enter the DHCP Relay Option 60 IP address String Enter the DHCP Relay Option 60 String value Click the Add button to add a new entry based on the information entered Click the ...

Страница 415: ...e hardware address of client String The client s client ID which is specified by administrator Relay Rule Drop Specify to drop the packet Relay Specify to relay the packet to an IP address Client ID MAC Address The client s client ID which is the hardware address of client String The client s client ID which is specified by administrator Click the Apply button to accept the changes made Click the ...

Страница 416: ...down menu to select between Circuit ID and Remote ID Value Enter the user defined value Click the Apply button to accept the changes made DHCP Relay Server CVID Settings This window is used to configure DHCP relay agent destination IP address inner VLAN ID To view this window click Network Application DHCP DHCP Relay DHCP Relay Server CVID Settings as shown below Figure 9 10 DHCP Relay Server CVID...

Страница 417: ...erver or the IP address of the default route to another device on the network Users also have the ability to bind IP addresses within the DHCP pool to specific MAC addresses in order to keep consistent the IP addresses of devices that may be important to the upkeep of the network that require a static IP address DHCP Server Global Settings This window is used to configure the DHCP server global pa...

Страница 418: ...all the entries listed Click the Delete button to remove the specific entry DHCP Server Pool Settings This window is used to add and delete the DHCP server pool To view this window click Network Application DHCP DHCP Server DHCP Server Pool Settings as shown below Figure 9 13 DHCP Server Pool Settings Window The fields that can be configured are described below Parameter Description Pool Name Ente...

Страница 419: ... NetBIOS Name Server IP address of WINS server Windows Internet Naming Service WINS is a name resolution service that Microsoft DHCP clients use to correlate host names to IP addresses within a general grouping of networks Up to three IP addresses can be specified Default Router IP address of default router Specifies the IP address of the default router for a DHCP client Up to three IP addresses c...

Страница 420: ...ng table To view this window click Network Application DHCP DHCP Server DHCP Server Dynamic Binding as shown below Figure 9 16 DHCP Server Dynamic Binding Window The fields that can be configured are described below Parameter Description Pool Name Enter the DHCP Server Pool name Click the Clear button to clear all the information entered in the fields Click the Clear All button to remove all the e...

Страница 421: ...meter Description DHCPv6 Relay State Click the radio buttons to enable or disable the DHCPv6 relay function DHCPv6 Relay Hops Count 1 32 Enter the number of relay agents that have to be relayed in this message The default value is 4 Click the Apply button to accept the changes made for each individual section DHCPv6 Relay Settings This window is used to configure the DHCPv6 relay state of one or a...

Страница 422: ...figure the DHCPv6 relay agent information for processing Option 37 within the Switch To view this window click Network Application DHCP DHCPv6 Relay DHCPv6 Relay Option 37 Settings as shown below Figure 9 21 DHCPv6 Relay Option 37 Settings window The fields that can be configured are described below Parameter Description State When enabled the DHCP packet will be inserted with the Option 37 field ...

Страница 423: ...ace ID Specifies the content in the interface ID Default The interface ID will include the VLAN ID Module Port and System MAC address of the device CID The interface ID will include the VLAN ID Module Port and user defined string Vendor1 The interface ID will be System MAC address of the device Click the Apply button to accept the changes made DHCP Local Relay Settings The DHCP local relay setting...

Страница 424: ...able the DHCPv6 local relay global state The default is Disabled VLAN Name Enter the VLAN name to apply to the DHCPv6 local relay operation VLAN ID Enter the VLAN ID to apply to the DHCPv6 local relay operation State Click to enable or disable the configure DHCPv6 local relay for the specified VLAN Click the Apply button to accept the changes made for each individual section DNS Resolver DNS Resol...

Страница 425: ...rver Tick the Primary check box to set the name server as a primary name server Server IPv6 Address Enter the IPv6 address of the DNS resolver name server Click the Add button to add a new entry based on the information entered Click the Delete button to remove the specific entry DNS Resolver Dynamic Name Server Table This window displays the current DNS Resolver name servers To view this window c...

Страница 426: ...tton to add a new entry based on the information entered Click the Delete button to remove the specific entry DNS Resolver Dynamic Host Name Table This window displays the current host name entries To view this window click Network Application DNS Resolver DNS Resolver Dynamic Host Name Table as shown below Figure 9 29 DNS Resolver Dynamic Host Name Table window PPPoE Circuit ID Insertion Settings...

Страница 427: ...hanges made for each individual section SMTP Settings SMTP or Simple Mail Transfer Protocol is a function of the Switch that will send switch events to mail recipients based on e mail addresses entered in the window below The Switch is to be configured as a client of SMTP while the server is a remote device that will receive messages from the Switch place the appropriate information into an e mail...

Страница 428: ...recipient Only one self mail address can be configured for this Switch This string can be no more that 64 alphanumeric characters Add A Mail Receiver Enter an e mail address and click the Add button Up to eight e mail addresses can be added per Switch To delete these addresses from the Switch click the corresponding Delete button in the SMTP Mail Receiver Address table at the bottom of the window ...

Страница 429: ... the primary server from which the SNTP information will be taken IPv4 SNTP Secondary Server The IP address of the secondary server from which the SNTP information will be taken IPv6 SNTP Primary Server The IPv6 address of the primary server from which the SNTP information will be taken IPv6 SNTP Secondary Server The IPv6 address of the secondary server from which the SNTP information will be take...

Страница 430: ... offset from Greenwich Mean Time GMT Parameter Description DST Repeating Settings Using repeating mode will enable DST seasonal time adjustment Repeating mode requires that the DST beginning and ending date be specified using a formula For example specify to begin DST on Saturday during the second week of April and end DST on Sunday during the last week of October From Which Week Of The Month Ente...

Страница 431: ...H MM Enter the time of day that DST will end on each year Click the Apply button to accept the changes made UDP UDP Helper UDP Helper Settings This window is used to configure the UDP helper settings To view this window click Network Application UDP UDP Helper UDP Helper Settings as shown below Figure 9 34 UDP Helper Settings window The fields that can be configured are described below Parameter D...

Страница 432: ...ch system the firmware configuration and log information are saved in a flash with fixed addresses and size This means that the maximum configuration file can only be 2Mb and even if the current configuration is only 40Kb it will still take up 2Mb of flash storage space The configuration file number and firmware numbers are also fixed A compatible issue will occur in the event that the configurati...

Страница 433: ...system of the switch Click the Copy button to copy a specific file to the switch Click the Move button to move a specific file within the switch Tick the List Boot Up Files Only option to display only the boot up files Click the Active button to set a specific config file as the active runtime configuration Click the Boot Up button to set a specific runtime image as the boot up image Click the Ren...

Страница 434: ...fter clicking the Move button the following window will appear Figure 9 40 Flash File System Settings Move window When moving a file to another place the user must enter the Source and Destination path Click the Apply button to initiate the copy Click the Cancel button the discard the process ...

Страница 435: ...able or disable the LCK trap state All MPs Reply LTRs Click to enable or disable all MPs to reply LTRs MD Enter the maintenance domain name MD Index Specify the maintenance domain index used Level Use the drop down menu to select the maintenance domain level MIP This is the control creations of MIPs None Don t create MIPs This is the default value Auto MIPs can always be created on any ports in th...

Страница 436: ...be less than 22 characters After clicking the Add MA button the following window will appear Figure 10 2 CFM MA Settings Window The fields that can be configured are described below Parameter Description MA Here the user can enter the maintenance association name MA Index Here the user can enter the maintenance association index VID VLAN Identifier Different MA must be associated with different VL...

Страница 437: ... ID TLV Chassis Transmit sender ID TLV with chassis ID information Manage Transmit sender ID TLV with manage address information Chassis Manage Transmit sender ID TLV with chassis ID information and manage address information Defer Inherit the setting configured for the maintenance domain that this MA is associated with This is the default value CCM This is the CCM interval 100ms 100 milliseconds ...

Страница 438: ...Port number This port should be a member of the MA s associated VLAN MEP Direction This is the MEP direction Inward Inward facing up MEP Outward Outward facing down MEP Click the Add button to add a new entry based on the information entered Click the Back button to discard the changes made and return to the previous page Click the View Detail link to view more information regarding the specific e...

Страница 439: ...All types of fault alarms will be sent MAC Status Only the fault alarms whose priority is equal to or higher than Some Remote MEP MAC Status Error are sent Remote CCM Only the fault alarms whose priority is equal to or higher than Some Remote MEP Down are sent Errors CCM Only the fault alarms whose priority is equal to or higher than Error CCM Received are sent Xcon CCM Only the fault alarms whose...

Страница 440: ...EP sends AIS PDU The default client MD level is MD level at which the most immediate client layer MIPs and MEPs exist Options to choose from are values between 0 7 Click the Apply button to accept the changes made Click the Back button to discard the changes made and return to the previous page After click the Edit LCK button the following window will appear Figure 10 9 CFM Extension LCK Settings ...

Страница 441: ...as shown below Figure 10 10 CFM Port Settings Window The fields that can be configured are described below Parameter Description Unit Select the unit ID to be configured EI Mode Only From Port To Port Use the drop down menus to select a range of ports to be configuration State Use the drop down menu to enable or disable the state of specific port regarding the CFM configuration Click the Apply but...

Страница 442: ...intenance Association name used MA Index Select and enter the Maintenance Association index used MAC Address Enter the destination MAC address used here LBMs Number 1 65535 Number of LBMs to be sent The default value is 4 LBM Payload Length 0 1500 The payload length of LBM to be sent The default is 0 LBM Payload Pattern An arbitrary amount of data to be included in a Data TLV along with an indicat...

Страница 443: ... and enter the Maintenance Association index used MAC Address Here the user can enter the destination MAC address TTL 2 255 Link trace message TTL value The default value is 64 PDU Priority The 802 1p priority to be set in the transmitted LTM If not specified it uses the same priority as CCMs sent by the MA Click the Apply button to accept the changes made Click the Find button to locate a specifi...

Страница 444: ...electing this option will display all the CFM packets transmitted and received Click the Find button to locate a specific entry based on the information entered Click the Clear button to clear all the information entered in the fields CFM Fault Table This window is used to show the MEPs that have faults To view this window click OAM CFM CFM Fault Table as shown below Figure 10 15 CFM Fault Table W...

Страница 445: ...e described below Parameter Description Port Use the drop down menu to select the unit ID and the port number to view Level 0 7 Enter the level to view Direction Use the drop down menu to select the direction to view Inward Inward facing up MP Outward Outward facing down MP VID 1 4094 Enter the VID to view Click the Find button to locate a specific entry based on the information entered Ethernet O...

Страница 446: ...rnet OAM remote loopback None Select to disable the remote loopback Start Select to request the peer to change to the remote loopback mode Stop Select to request the peer to change to the normal operation mode Received Remote Loopback Use the drop down menu to configure the client to process or to ignore the received Ethernet OAM remote loopback command Process Select to process the received Ether...

Страница 447: ...r Symbol Error Frame Error Frame Period and Error Frame Seconds Critical Link Event Use the drop down menu to select between Dying Gasp and Critical Event Threshold 0 4294967295 Enter the number of error frame or symbol in the period is required to be equal to or greater than in order for the event to be generated Window 1000 6000 Enter the period of error frame or symbol in milliseconds summary e...

Страница 448: ...he unit ID and the port number to view Port List Enter a list of ports Tick the All Ports check box to select all ports Click the Find button to locate a specific entry based on the information entered Click the Clear button to clear all the information entered in the fields Ethernet OAM Statistics The window is used to show ports Ethernet OAM statistics information To view this window click OAM E...

Страница 449: ...Port Use the drop down menu to select the unit ID and the port number to view Port List Enter a list of ports Tick the All Ports check box to select all ports Click the Clear button to clear all the information entered in the fields DULD Settings RI and EI Mode Only This window is used to configure and display the unidirectional link detection on port To view this window click OAM DULD Settings as...

Страница 450: ...lect Mode between Shutdown and Normal Shutdown If any unidirectional link is detected disable the port and log an event Normal Only log an event when a unidirectional link is detected Discovery Time 5 65535 Enter these ports neighbor discovery time If the discovery is timeout the unidirectional link detection will start Click the Apply button to accept the changes made Cable Diagnostics The cable ...

Страница 451: ...is only supported on GE copper ports Ports must be linked up and running at 10 100 1000Mbps Crosstalk errors detection is not supported on FE ports Fault messages Chapter 1 Open The cable in the error pair does not have a connection at the specified position Chapter 2 Short The cables in the error pair has a short problem at the specified position Chapter 3 Crosstalk The cable in the error pair ha...

Страница 452: ...lization CPU Utilization as shown below Figure 11 1 CPU Utilization window The fields that can be configured are described below Parameter Description Time Interval Select the desired setting between 1s and 60s where s stands for seconds The default value is one second Record Number Select number of times the Switch will be polled between 20 and 200 The default value is 200 Show Hide Check whether...

Страница 453: ... Apply button to accept the changes made Port Utilization Users can display the percentage of the total available bandwidth being used on the port To view this window click Monitoring Utilization Port Utilization as shown below Figure 11 3 Port Utilization window The fields that can be configured are described below Parameter Description Unit Select the unit you want to configure EI and SI Mode On...

Страница 454: ...kets The Web manager allows various packet statistics to be viewed as either a line graph or a table Six windows are offered Received RX To select a port to view these statistics for select the port by using the Port drop down menu The user may also use the real time graphic of the Switch at the top of the web page by simply clicking on a port To view this window click Monitoring Statistics Port S...

Страница 455: ...tal number of good packets that were received by a unicast address Multicast Counts the total number of good packets that were received by a multicast address Broadcast Counts the total number of good packets that were received by a broadcast address Show Hide Check whether to display Bytes and Packets Click the Apply button to accept the changes made Click the Clear button to clear all statistics...

Страница 456: ...e for Unicast Multicast and Broadcast Packets The fields that can be configured or displayed are described below Parameter Description Unit Select the unit you want to configure EI and SI Mode Only Port Use the drop down menu to choose the port that will display statistics Time Interval Select the desired setting between 1s and 60s where s stands for seconds The default value is one second Record ...

Страница 457: ... Click the Clear button to clear all statistics counters in this window Click the View Table link to display the information in a table rather than a line graph Click the View Graphic link to display the information in a line graph rather than a table Transmitted TX To select a port to view these statistics for select the port by using the Port drop down menu The user may also use the real time gr...

Страница 458: ...rt Show Hide Check whether or not to display Bytes and Packets Click the Apply button to accept the changes made for each individual section Click the Clear button to clear all statistics counters in this window Click the View Table link to display the information in a table rather than a line graph Click the View Graphic link to display the information in a line graph rather than a table Errors T...

Страница 459: ... table The fields that can be configured or displayed are described below Parameter Description Unit Select the unit you want to configure EI and SI Mode Only Port Use the drop down menu to choose the port that will display statistics Time Interval Select the desired setting between 1s and 60s where s stands for seconds The default value is one second Record Number Select number of times the Switc...

Страница 460: ...ort since the last Switch reboot or clear operation Symbol Counts the number of packets received that have errors received in the symbol on the physical labor Show Hide Check whether or not to display CRCError UnderSize OverSize Fragment Jabber Drop and SymbolErr errors Click the Apply button to accept the changes made for each individual section Click the Clear button to clear all statistics coun...

Страница 461: ...herwise valid packets that did not end on a byte octet boundary LateColl Counts the number of times that a collision is detected later than 512 bit times into the transmission of a packet ExColl Excessive Collisions The number of packets for which transmission failed due to excessive collisions SingColl Single Collision Frames The number of successfully transmitted packets for which transmission i...

Страница 462: ... statistics for select the port by using the Port drop down menu The user may also use the real time graphic of the Switch at the top of the web page by simply clicking on a port To view this window click Monitoring Statistics Packet Size as shown below Figure 11 14 Packet Size window Click the View Table link to display the information in a table rather than a line graph Figure 11 15 RX Size Anal...

Страница 463: ... framing bits but including FCS octets 512 1023 The total number of packets including bad packets received that were between 512 and 1023 octets in length inclusive excluding framing bits but including FCS octets 1024 1518 The total number of packets including bad packets received that were between 1024 and 1518 octets in length inclusive excluding framing bits but including FCS octets Show Hide C...

Страница 464: ...or Settings as shown below Figure 11 17 Port Mirror Settings window The fields that can be configured are described below Parameter Description Mirror Global State Click the radio buttons to enable or disable the Port Mirroring feature Group ID 1 4 Enter a mirror group ID Click the Apply button to accept the changes made for each individual section Click the Find button to locate a specific entry ...

Страница 465: ...has been configured with a source port The RSPAN redirect function will work when RSPAN is enabled and at least one RSPAN VLAN has been configured with redirect ports To view this window click Monitoring Mirror RSPAN Settings as shown below Figure 11 19 RSPAN Settings window The fields that can be configured are described below Parameter Description RSPAN State Click the radio buttons to enable or...

Страница 466: ...raffic in data networks containing switches and routers The sFlow monitoring system consists of an sFlow Agent embedded in a switch or router or in a standalone probe and a central sFlow Collector The architecture and sampling techniques used in the sFlow monitoring system were designed for providing continuous site wide and enterprise wide traffic monitoring of high speed switched and routed netw...

Страница 467: ...The IP address of the analyzer server If not specified or set a 0 address the entry will be inactive Collector Port 1 65535 The destination UDP port for sending the sFlow datagrams If not specified the default value is 6343 Max Datagram Size 300 1400 The maximum number of data bytes that can be packed in a single sample datagram If not specified the default value is 1400 Click the Apply button to ...

Страница 468: ...in the packet which has been sampled that will be encapsulated and forwarded to the server If not specified the default value is 128 Click the Apply button to accept the changes made Click the Delete All button to remove all the entries listed Click the Edit button to re configure the specific entry Click the Delete button to remove the specific entry sFlow Counter Poller Settings This window is u...

Страница 469: ...igure 11 25 Ping Test window The user may click the Infinite times radio button in the Repeat Pinging for field which will tell the ping program to keep sending ICMP Echo packets to the specified IP address until the program is stopped The user may opt to choose a specific number of times to ping the Target IP Address by clicking its radio button and entering a number between 1 and 255 The fields ...

Страница 470: ...ress sent to the remote host or as primary IP address Source IPv6 Address Enter the source IPv6 address If the current switch has more than one IPv6 address you can enter one of them to this field When entered this IPv6 address will be used as the packets source IP address sent to the remote host or as primary IP address Click the Start button to initiate the Ping Test After clicking the Start but...

Страница 471: ...ange for the TTL is 1 to 60 hops Port 30000 64900 The port number The value range is from 30000 to 64900 Timeout 1 65535 Defines the timeout period while waiting for a response from the remote device A value of 1 to 65535 seconds can be specified The default is 5 seconds Probe 1 9 The number of probing The range is from 1 to 9 If unspecified the default value is 1 Click the Start button to initiat...

Страница 472: ... DGS 3120 Series Layer 3 Managed Gigabit Ethernet Switch Web UI Reference Guide 462 Figure 11 29 Device Environment window Click the Refresh button to refresh the display table so that new entries will appear ...

Страница 473: ...guration from the Type drop down menu and enter the File Path in the space provided and click Apply Figure 12 1 Save Configuration window Save Log allows the user to backup the log file of the switch Select Log from the Type drop down menu and click Apply Figure 12 2 Save Log window Save All allows the user to permanently save changes made to the configuration This option will allow the changes to...

Страница 474: ...o 6 total are displayed next to the Tools drop down menu The icons are in the same order as their respective Unit numbers with the Unit 1 switch corresponding to the icon in the upper left most corner of the icon group When the switches are properly interconnected through their optional Stacking Modules information about the resulting switch stack is displayed under the Stacking Information link T...

Страница 475: ...Switch This may be different from the values shown in the illustration Download Firmware The following window is used to download firmware for the Switch From TFTP This window allows the user to download firmware from a TFTP Server to the Switch and updates the switch To view this window click Tools Download Firmware From TFTP as shown below Figure 12 6 Download Firmware from TFTP window The field...

Страница 476: ...se button to navigate to the firmware file for the download Destination File Enter the location of the Destination File Boot Up Tick the check box to set it as a boot up file Click Download to initiate the download Upload Firmware The following window is used to upload firmware from the Switch To TFTP This window allows the user to upload firmware from the Switch to a TFTP Server To view this wind...

Страница 477: ...he fields that can be configured are described below Parameter Description Unit Use the drop down menu to select a unit for uploading the firmware EI and SI Mode Only Source File Enter the location and name of the Source File Click Upload to initiate the upload Download Configuration The following window is used to download the configuration file for the Switch From TFTP This window allows the use...

Страница 478: ...e switch To view this window click Tools Download Configuration From HTTP as shown below Figure 12 11 Download Configuration File from HTTP window The fields that can be configured are described below Parameter Description Unit Use the drop down menu to select a unit for receiving the configuration file Select All for all units EI and SI Mode Only Source File Enter the location and name of the Sou...

Страница 479: ...cation and name of the Source File Filter Use the drop down menu to include begin or exclude a filter like SNMP VLAN or STP Select the appropriate Filter action and enter the service name in the space provided Click Upload to initiate the upload To HTTP This window allows the user to upload the configuration file from the Switch to a computer To view this window click Tools Upload Configuration To...

Страница 480: ...e Click the radio button to enter the TFTP server domain name used Destination File Enter the location and name of the Destination File Log Type Select the type of log to be transferred Selecting the Common Log option here will upload the common log entries Selecting the Attack Log option here will upload the log concerning attacks Click Upload to initiate the upload To HTTP This window allows the...

Страница 481: ...Save Changes is not executed the Switch will return to the last saved configuration when rebooted Figure 12 16 Reset System window The fields that can be configured are described below Parameter Description Reset Selecting this option will factory reset the Switch but not the IP Address User Accounts and the Banner Reset Config Selecting this option will factory reset the Switch but not perform a ...

Страница 482: ...xStack DGS 3120 Series Layer 3 Managed Gigabit Ethernet Switch Web UI Reference Guide 472 Figure 12 18 System Rebooting window ...

Страница 483: ...fore this feature is only applicable when there is a direct connection to the console port of the device It is necessary for the user needs to attach a terminal or PC with terminal emulation to the console port of the switch 2 Power on the Switch After the UART init is loaded to 100 the Switch will allow 2 seconds for the user to press the hotkey Shift 6 to enter the Password Recovery Mode Once th...

Страница 484: ... UI Reference Guide 474 reset password username The reset password command resets the password of the specified user If a username is not specified the passwords of all users will be reset show account The show account command displays all previously created accounts ...

Страница 485: ...ere will no IP information for logging Internal Power failed Unit unitID Internal Power failed Critical Internal Power is recovered Unit unitID Internal Power is recovered Critical Redundant Power failed Unit unitID Redundant Power failed Critical Redundant Power is working Unit unitID Redundant Power is working Critical Side Fan failed Unit unitID Side Fan failed Critical Side Fan recovered Unit ...

Страница 486: ...sfully uploaded Firmware successfully uploaded by console Username username IP ipaddr Informational by console and IP ipaddr are XOR shown in log string which means if user login by console there will no IP information for logging Firmware upload was unsuccessful Firmware upload by console was unsuccessful Username username IP ipaddr Warning by console and IP ipaddr are XOR shown in log string whi...

Страница 487: ...name IP ipaddr Informational Web SSL session timed out Web SSL session timed out Username username IP ipaddr Informational Telnet Successful login through Telnet Successful login through Telnet Username username IP ipaddr Informational Login failed through Telnet Login failed through Telnet Username username IP ipaddr Warning Logout through Telnet Logout through Telnet Username username IP ipaddr ...

Страница 488: ...ver is disabled SSH server is disabled Informational Successfully download client public keys SSH client public keys file was upgraded successfully Username username IP ipaddr ipv6address Informational AAA Authentication Policy is enabled Authentication Policy is enabled Module AAA Informational Authentication Policy is disabled Authentication Policy is disabled Module AAA Informational Successful...

Страница 489: ...e Warning Successful login through Web authenticated by AAA server Successful login through Web from userIP authenticated by AAA server serverIP Username username Informational Login failed through Web authenticated by AAA server Login failed through Web from userIP authenticated by AAA server serverIP Username username Warning Login failed through Web due to AAA server timeout or improper configu...

Страница 490: ... AAA local_enable method Username username Warning Successful Enable Admin through SSH authenticated by AAA local_enable method Successful Enable Admin through SSH from userIP authenticated by AAA local_enable method Username username Informational Enable Admin failed through SSH authenticated by AAA local_enable method Enable Admin failed through Telnet or Web or SSH from userIP authenticated by ...

Страница 491: ...figuration Enable Admin failed through Telnet from userIP due to AAA server timeout or improper configuration Username username Warning Successful Enable Admin through SSH authenticated by AAA server Successful Enable Admin through SSH from userIP authenticated by AAA server serverIP Username username Informational Enable Admin failed through SSH authenticated by AAA server Enable Admin failed thr...

Страница 492: ...limit in a time interval MAC based Access Control recovers from stop learning state Warning per system A host passes the authentication MAC based Access Control host login successful MAC macaddr port unitID portNum VID vid Informational A host is aged out MAC based Access Control host aged out MAC macaddr port unitID portNum VID vid Informational JWAC When a client host authenticated successful JW...

Страница 493: ...ng which means if user login by console there will no IP information for logging Safeguard Engine Safeguard Engine is in normal mode Unit unitID Safeguard Engine enters NORMAL mode Informational Safeguard Engine is in filtering packet mode Unit unitID Safeguard Engine enters EXHAUSTED mode Warning Packet Storm Broadcast strom occurrence Port unitID portNum Broadcast storm is occurring Warning Broa...

Страница 494: ...CCM packet CFM remote down MD Level mdlevel VLAN vlanid Local Port unitID portNum Direction mepdirection Warning Remote MEP s MAC reports an error status CFM remote MAC error MD Level mdlevel VLAN vlanid Local Port unitID portNum Direction mepdirection Warning Remote MEP detects CFM defects CFM remote detects a defect MD Level mdlevel VLAN vlanid Local Port unitID portNum Direction mepdirection In...

Страница 495: ...ble LLDP MED TLV set detected Incompatible LLDP MED TLV set detected on port d chassis id d s port id d s device class d notice Surveillance VLAN When a new surveillance device is detected in the port New surveillance device detected Port portNum MAC macaddr Informational When a port which is enabled surveillance VLAN joins the surveillance VLAN automatically Port portNum add into surveillance VLA...

Страница 496: ...dress is adding into switch L3 table Added a virtual IP vrrp ip addr MAC vrrp mac addr into L3 table Notice A virtual MAC address is deleting from switch L3 table Deleted a virtual IP vrrp ip addr MAC vrrp mac addr from L3 table Notice Failed when adding a virtual MAC into switch chip L2 table Failed to add virtual MAC vrrp mac addr into chip L2 table Errcode vrrp errcode Error Failed when deletin...

Страница 497: ... enabled if there s a new MAC that violates the pre defined port security configuration a trap will be sent out Binding 1 swIpMacBindingPortIndex 2 swIpMacBindingViolationIP 3 swIpMacBindingViolationMac 1 3 6 1 4 1 171 12 23 5 0 1 swIpMacBindingIPv6ViolationTrap When the IP MAC Binding trap is enabled if there s a new MAC that violates the pre defined IPv6 IMPB configuration a trap will be sent ou...

Страница 498: ...5 11 1 0 1 swMacBasedAccessControlLoggedFail The trap is sent when a MAC based Access Control host login fails Binding 1 swMacBasedAuthInfoMacIndex 2 swMacBasedAuthInfoPortIndex 3 swMacBasedAuthVID 1 3 6 1 4 1 171 12 35 11 1 0 2 swMacBasedAccessControlAgesOut The trap is sent when a MAC based Access Control host ages out Binding 1 swMacBasedAuthInfoMacIndex 2 swMacBasedAuthInfoPortIndex 3 swMacBas...

Страница 499: ...Binding 1 dot1agCfmMdIndex 2 dot1agCfmMaIndex 3 dot1agCfmMepIdentifier 1 3 6 1 4 1 171 12 86 100 0 1 swCFMExtAISCleared A notification is generated when local MEP exits AIS status Binding 1 dot1agCfmMdIndex 2 dot1agCfmMaIndex 3 dot1agCfmMepIdentifier 1 3 6 1 4 1 171 12 86 100 0 2 swCFMExtLockOccurred A notification is generated when local MEP enters lock status Binding 1 dot1agCfmMdIndex 2 dot1agC...

Страница 500: ...0 2 swUnitFailure Unit Failure notification Binding 1 swUnitMgmtId 1 3 6 1 4 1 171 12 11 2 2 1 0 3 swUnitTPChange The stacking topology change notification Binding 1 swStackTopologyType 2 swUnitMgmtId 3 swUnitMgmtMacAddr 1 3 6 1 4 1 171 12 11 2 2 1 0 4 swUnitRoleChange The stacking unit role change notification Binding 1 swStackRoleChangeType 2 swUnitMgmtId 1 3 6 1 4 1 171 12 11 2 2 1 0 5 lldpRemT...

Страница 501: ... send swSingleIPMSLinkUp notification to the indicated host when its member generates a link up notification Binding 1 swSingleIPMSID 2 swSingleIPMSMacAddr 3 ifIndex 1 3 6 1 4 1 171 12 8 6 0 14 swSingleIPMSAuthFail The commander switch will send swSingleIPMSAuthFail notification to the indicated host when its member generates an authentation failure notification Binding 1 swSingleIPMSID 2 swSingle...

Страница 502: ...sending agent has become the new root of the Spanning Tree the trap is sent by a bridge soon after its election as the new root e g upon expiration of the Topology Change Timer immediately subsequent to its election Implementation of this trap is optional 1 3 6 1 2 1 17 0 1 topologyChange A topologyChange trap is sent by a bridge when any of its configured ports transitions from the Learning state...

Страница 503: ...e rate limit specified by pimInvalidRegisterNotificationPeriod Binding objects 1 pimGroupMappingPimMode 2 pimInvalidRegisterAddressType 3 pimInvalidRegisterOrigin 4 pimInvalidRegisterGroup 5 pimInvalidRegisterRp 1 3 6 1 2 1 157 0 2 pimInvalidJoinPrune A pimInvalidJoinPrune notification signifies that an invalid PIM Join Prune message was received by this device This notification is generated whene...

Страница 504: ...serName 5 swDot1XAuthFailReason 1 3 6 1 4 1 171 12 30 11 1 0 2 swWACLoggedSuccess The trap is sent when a WAC client pass the authentication Binding objects 1 swWACAuthStatePort 2 swWACAuthStateOriginalVid 3 swWACAuthStateMACAddr 4 swWACAuthUserName 5 swWACClientAddrType 6 swWACClientAddress 1 3 6 1 4 1 171 12 27 11 1 0 1 swWACLoggedFail The trap is sent when a WAC client failed to pass the authen...

Страница 505: ...no_limited and if the bandwidth is configured less than 0 or greater than maximum supported value the bandwidth will be ignored To assign 802 1p default priority by RADIUS Server the proper parameters should be configured on the RADIUS Server The tables below show the parameters for 802 1p default priority The parameters of the Vendor Specific attributes are Vendor Specific Attribute Description V...

Страница 506: ...figured the VLAN attribute of the RADIUS server for example VID 3 and the 802 1X or MAC based Access Control authentication is successful the port will be added to VLAN 3 However if the user does not configure the VLAN attribute and authenticates successfully the port will be kept in its original VLAN If the VLAN attribute configured on the RADIUS server does not exist the port will not be assigne...

Страница 507: ...ccess_id auto_assign ethernet and the 802 1X MAC based Access Control JWAC or WAC authentication is successful the device will assign the ACL profiles and rules according to the RADIUS server For more information about the ACL module please refer to Chapter 22 Access Control List ACL Commands ...

Страница 508: ...ard RADIUS attributes are defined in the RFC 2865 Remote Authentication Dial In User Service RADIUS RFC 2866 RADIUS Accounting RFC 2868 RADIUS Attributes for Tunnel Protocol Support and RFC 2869 RADIUS Extensions The following table lists the IETF RADIUS attributes supported by the D Link switch 1 RADIUS Authentication Attributes Number IETF Attribute 1 User Name 2 User Password 3 CHAP Password 4 ...

Страница 509: ...ddress 5 NAS Port 6 Service Type 8 Framed IP Address 31 Calling Station ID 32 NAS Identifier 40 Acct Status Type 41 Acct Delay Time 42 Acct Input Octets 43 Acct Output Octets 44 Acct Session ID 45 Acct Authentic 46 Acct Session Time 47 Acct Input Packets 48 Acct Output Packets 49 Acct Terminate Cause 52 Acct Input Gigawords 53 Acct Output Gigawords 61 NAS Port Type 95 NAS IPv6 Address ...

Отзывы: