DXS/DWS 3200 Series User Guide
Page 72
Understanding the Stack Topology
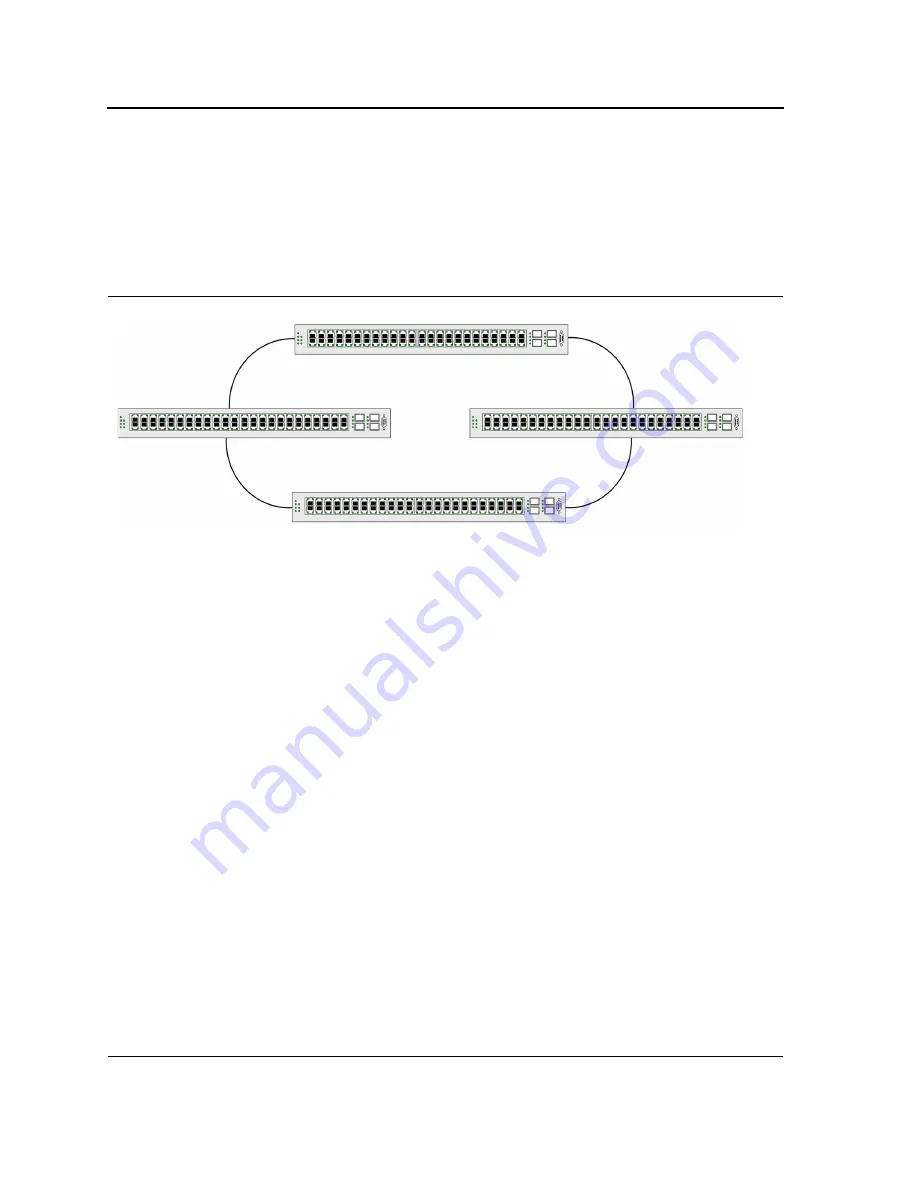
The 32XX series Stacked devices operate in a Ring topology. A stacked Ring topology is where all devices in the
stack are connected to each other forming a circle. Each stacked device accepts data and sends it to the device to
which it is physically connected. The packet continues through the stack until it reaches the destination port. The
system automatically discovers the optimal path on which to send traffic.
Figure 33: Stacking Ring Topology
Most difficulties incurred in Ring topologies occur when a device in the ring becomes non-functional, or a link is
severed. In a stack, the system automatically switches to a Stacking Failover topology without any system down-
time. An SNMP message is automatically generated, but no stack management action is required. However, the
stacking link or stacking member must be repaired to ensure the stacking integrity.
After the stacking issues are resolved, the device can be reconnected to the stack without interruption, and the
Ring topology is restored.
Stacking Failover Topology
If a failure occurs in the stacking topology, the stack reverts to Stacking Failover Topology. In the Stacking Failover
topology, devices operate in a chain formation. The Stacking Master determines where the packets are sent. Each
unit is connected to two neighboring devices, except for the top and bottom units.
Stacking Members and Unit ID
Stacking Unit IDs are essential to the stacking configuration. The stacking operation is determined during the boot
process. The Operation Mode is determined by the Unit ID selected during the initialization process. For example,
if the user selected stand-alone mode, the device boots as a stand-alone device.
The device units are shipped with the default Unit ID of the stand-alone unit. If the device is operating as a stand-
alone unit, all stacking LEDs are off. Once the user selects a different Unit ID, the default Unit ID not erased, and
remains valid, even if the unit is reset.
Unit ID 1 and Unit ID 2 are reserved for Master enabled units. Unit IDs 3 to 8 can be defined for stack members.
When the Master unit boots or when inserting or removing a stack member, the Master unit initiates a stacking dis-
covering process.
Содержание DWS-3227 - xStack Switch - Stackable
Страница 24: ...Device Description Physical Dimensions Page 23 This page is left blank intentionally ...
Страница 25: ...DXS DWS 3200 Series User Guide Page 24 ...
Страница 51: ...DXS DWS 3200 Series User Guide Page 50 This page is left blank intentionally ...
Страница 65: ...DXS DWS 3200 Series User Guide Page 64 This page is left blank intentionally ...
Страница 77: ...DXS DWS 3200 Series User Guide Page 76 This page is left blank intentionally ...
Страница 118: ...Configuring Ports Page 117 3 Modify the fields 4 Click The parameters are saved and the device is updated ...
Страница 121: ...DXS DWS 3200 Series User Guide Page 120 This page is left blank intentionally ...
Страница 171: ...DXS DWS 3200 Series User Guide Page 170 ...
Страница 191: ...DXS DWS 3200 Series User Guide Page 190 ...
Страница 205: ...DXS DWS 3200 Series User Guide Page 204 This page is left intentionally ...
Страница 237: ...DXS DWS 3200 Series User Guide Page 236 This page is left blank intentionally ...
Страница 273: ...DXS DWS 3200 Series User Guide Page 272 This page is left blank intentionally ...
Страница 295: ...DXS DWS 3200 Series User Guide Page 294 This page is left blank intentionally ...
Страница 333: ...DXS DWS 3200 Series User Guide Page 332 This page is left blank intentionally ...
Страница 339: ...DXS DWS 3200 Series User Guide Page 338 ...
Страница 340: ...Contacting D Link Technical Support Page 339 ...
Страница 341: ...DXS DWS 3200 Series User Guide Page 340 ...
Страница 342: ...Contacting D Link Technical Support Page 341 ...
Страница 343: ...DXS DWS 3200 Series User Guide Page 342 ...
Страница 344: ...Contacting D Link Technical Support Page 343 ...
Страница 345: ...DXS DWS 3200 Series User Guide Page 344 ...
Страница 346: ...Contacting D Link Technical Support Page 345 ...
Страница 347: ...DXS DWS 3200 Series User Guide Page 346 ...
Страница 348: ...Contacting D Link Technical Support Page 347 ...
Страница 349: ...DXS DWS 3200 Series User Guide Page 348 ...
Страница 350: ...Contacting D Link Technical Support Page 349 ...
Страница 351: ...DXS DWS 3200 Series User Guide Page 350 ...
Страница 352: ...Contacting D Link Technical Support Page 351 ...
Страница 353: ...DXS DWS 3200 Series User Guide Page 352 ...
Страница 354: ...Contacting D Link Technical Support Page 353 ...
Страница 355: ...DXS DWS 3200 Series User Guide Page 354 ...
Страница 356: ...Contacting D Link Technical Support Page 355 ...
Страница 357: ...DXS DWS 3200 Series User Guide Page 356 ...
Страница 358: ...Contacting D Link Technical Support Page 357 ...
Страница 359: ...DXS DWS 3200 Series User Guide Page 358 ...
Страница 360: ...Contacting D Link Technical Support Page 359 ...
Страница 361: ...DXS DWS 3200 Series User Guide Page 360 ...
Страница 362: ...Contacting D Link Technical Support Page 361 ...
Страница 363: ...DXS DWS 3200 Series User Guide Page 362 ...
Страница 364: ...Contacting D Link Technical Support Page 363 ...
Страница 365: ...DXS DWS 3200 Series User Guide Page 364 ...
Страница 369: ...DXS DWS 3200 Series User Guide Page 368 ...
Страница 371: ...DXS DWS 3200 Series User Guide Page 370 ...


