


DGS-3312SR Gigabit Layer 3 Switch
Area 1
Area 2
Area 3
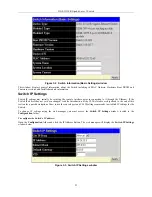
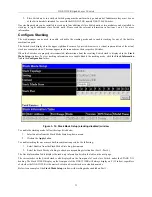
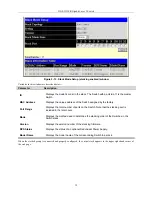
Figure 3-1. Main Web-Manager window
Area Function
1
Presents a graphical near real-time image of the front panel of the Switch. This area displays
the Switch’s ports and expansion modules. When the Switch is stacked a virtual
representation of the Switch stack appears in the right hand portion.
Click on the ports in the front panel to manage the port’s configuration or view data for the
port.
2
Select the window to be displayed. The folder icons can be opened to display the hyperlinked
window buttons and sub-folders contained within them.
3
Presents the information selected for configuration or display.
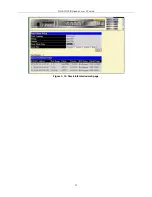
Login to Web Manager
To begin managing the Switch simply run the browser you have installed on your computer and point it to the IP address
you have defined for the device. The URL in the address bar should read something like: http://123.123.123.123, where the
numbers 123 represent the IP address of the Switch.
NOTE:
The Factory default IP address for the Switch is 10.90.90.90.
21
Содержание DGS-3312SR
Страница 13: ...DGS 3312SR Gigabit Layer 3 Switch xii...
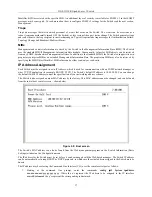
Страница 46: ...DGS 3312SR Gigabit Layer 3 Switch Figure 3 14 Stack Information web page 33...
Страница 53: ...DGS 3312SR Gigabit Layer 3 Switch 40...
Страница 165: ...DGS 3312SR Gigabit Layer 3 Switch Figure 6 22 Enter Network Password dialog box 152...
Страница 228: ...DGS 3312SR Gigabit Layer 3 Switch 215...
Страница 244: ......


