


DGS-3312SR Gigabit Layer 3 Switch
to put the new settings into effect.
If you do not save the changes now, they will be lost.
Saving all configurations to NV-RAM... 15%
Changing the stacking mode in the DGS-3312SR will automatically save the settings and restart the system. It will take a
few minutes to complete the process.
Unit ID Display for Switches in a Switch Stack
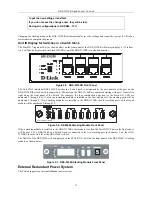
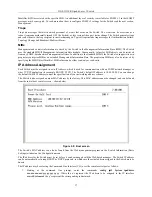
The Stack ID 7-segment LED (as shown below) on the front panel of the DGS-3312SR will always display F (15 in hex).
An F will also be displayed in the Stack ID LED even if the DGS-3312SR is in standalone mode.
Figure 2-5. DGS-3312SR Front Panel
The Unit ID of individual DES-3226S Switches in a Switch stack is determined by the port number of the port on the
DGS-3312SR that the Switch is connected to. The ports on the DGS-3312SR are numbered starting with port 1 from left to
right along the front panel of the Switch. For example, the four combination ports next to the Stack NO. LED are
numbered 1 through 4, so if a four port stacking module is installed in the first module slot, the stacking ports will be
numbered 5 through 8. If two stacking modules are installed in the DGS-3312SR, then the stacking ports on the second
module will be numbered 9 through 12.
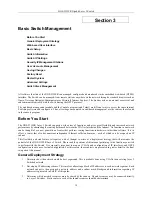
Figure 2-6. DEM-540 Stacking Module Front Panel
If the a stacking module is installed in the DGS-3312SR’s first module slot, then the first IN/OUT pair in the figure above
will be port 5. If a DES-3226S in a Switch stack is connected to the first stacking port (port number 5 on the DGS-
3312SR), then the Unit ID of the DES-3226S will be 5.
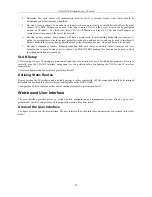
The Unit ID of the DES-3226S will be displayed in the STACK NO. LED on the front panel of the DES-3226S’s stacking
module, as shown below.
Figure 2-7. DES-3226S Stacking Module Front Panel
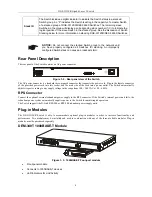
External Redundant Power System
The Switch supports an external redundant power system.
13
Содержание DGS-3312SR
Страница 13: ...DGS 3312SR Gigabit Layer 3 Switch xii...
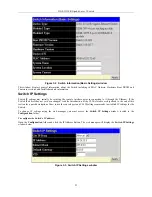
Страница 46: ...DGS 3312SR Gigabit Layer 3 Switch Figure 3 14 Stack Information web page 33...
Страница 53: ...DGS 3312SR Gigabit Layer 3 Switch 40...
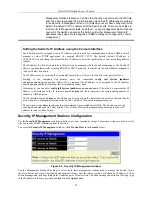
Страница 165: ...DGS 3312SR Gigabit Layer 3 Switch Figure 6 22 Enter Network Password dialog box 152...
Страница 228: ...DGS 3312SR Gigabit Layer 3 Switch 215...
Страница 244: ......


