31
Protecting Your Digital Assets
TM
CRU Ditto Shark User Manual
11.2.2 Remove an NFS or SMB (Samba) Share
a. On the “Home” Screen, click the
Destination Network button
at the bottom of the “Disks” panel.
b. Click on the
NFS tab
or
SMB tab
, depending on the which type of share you are removing.
c. Check the boxes next to the share(s) you want to remove and then click the
Remove button
.
11.3 USING AND CONFIGURING NETWORK CAPTURE FILTERS
Insert the SD Card containing your network capture fi lter(s) into the Ditto Shark and your custom network
capture fi lters will then be available in the “Network Capture Filter” drop-down box when confi guring a
“Network Capture” action. You may also add subdirectories that contain one or more network capture fi lter
XML fi les to the DittoNetCapFilter directory.
To add or edit your own network capture fi lter, choose the way that works best for your usage scenario.
11.3.1 Filter Creation Via Web Browser
a. Insert the SD Card into the SDCard slot on the rear of the Ditto Shark.
b. Using the Browser Interface, select
Network Capture
from the “Action to Perform” drop-down
box.
c. If you are editing an existing network capture fi lter that you created, select it from the “Network
Capture Filter” drop-down box.
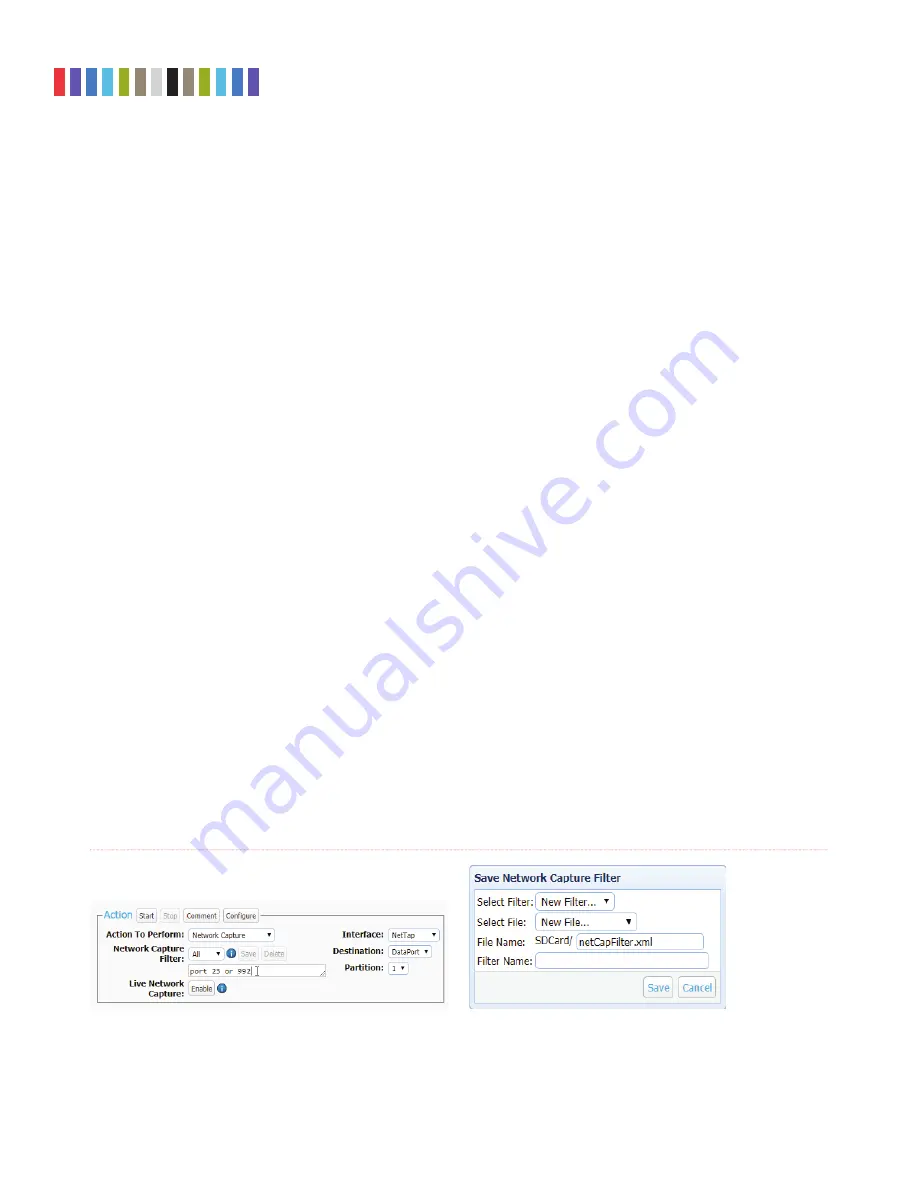
d. Type in the ports you wish to capture in your network capture fi lter in the text box directly below the
“Network Capture Filter” drop-down box (see Figure 30). Use the word ‘or’ to separate each port.
e. Click the
Save button
. The “Save Network Capture Filter” dialog box will pop up (see Figure 31).
f. Use the “Select Filter...” drop-down box and select
New Filter...
to create a new fi lter or select an
existing fi lter to overwrite it.
g. Use the “Select File...” drop-down box and select
New File...
to create a new XML fi le, or select an
existing fi le to add your network capture fi lter to the fi le.
h. Type the desired fi lename into the “File Name” text box.
i. Type the desired name of the fi lter into the “Filter Name” text box.
j. Click the
Save button
to save the fi lter.
Figure 30.
The “Action” screen, showing where to type in the
ports that you wish to capture with the “Network Capture”
action.
Figure 31.
The “Save Network Capture Filter”
dialog box lets you save custom network
capture fi lters.


