background image

User’s Manual 


16 

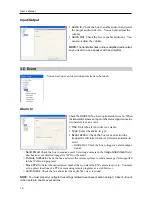
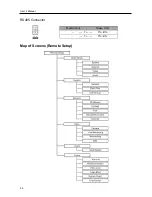
Input/Output 


 Audio In

: Check the box to enable audio in and select 

the proper audio-in device.  You can also adjust the 
volume. 

 Audio Out

: Check the box to enable audio out.  You 

can also adjust the volume. 


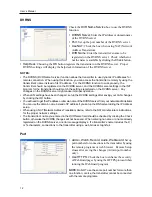
NOTE: 

The transmitter does not have amplified audio output, 

so you need to use a speaker with an amplifier.


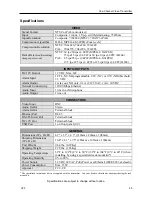
3.6  Event 


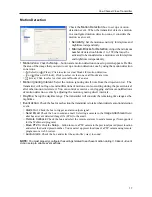
You can set up event detection and actions to be taken.  


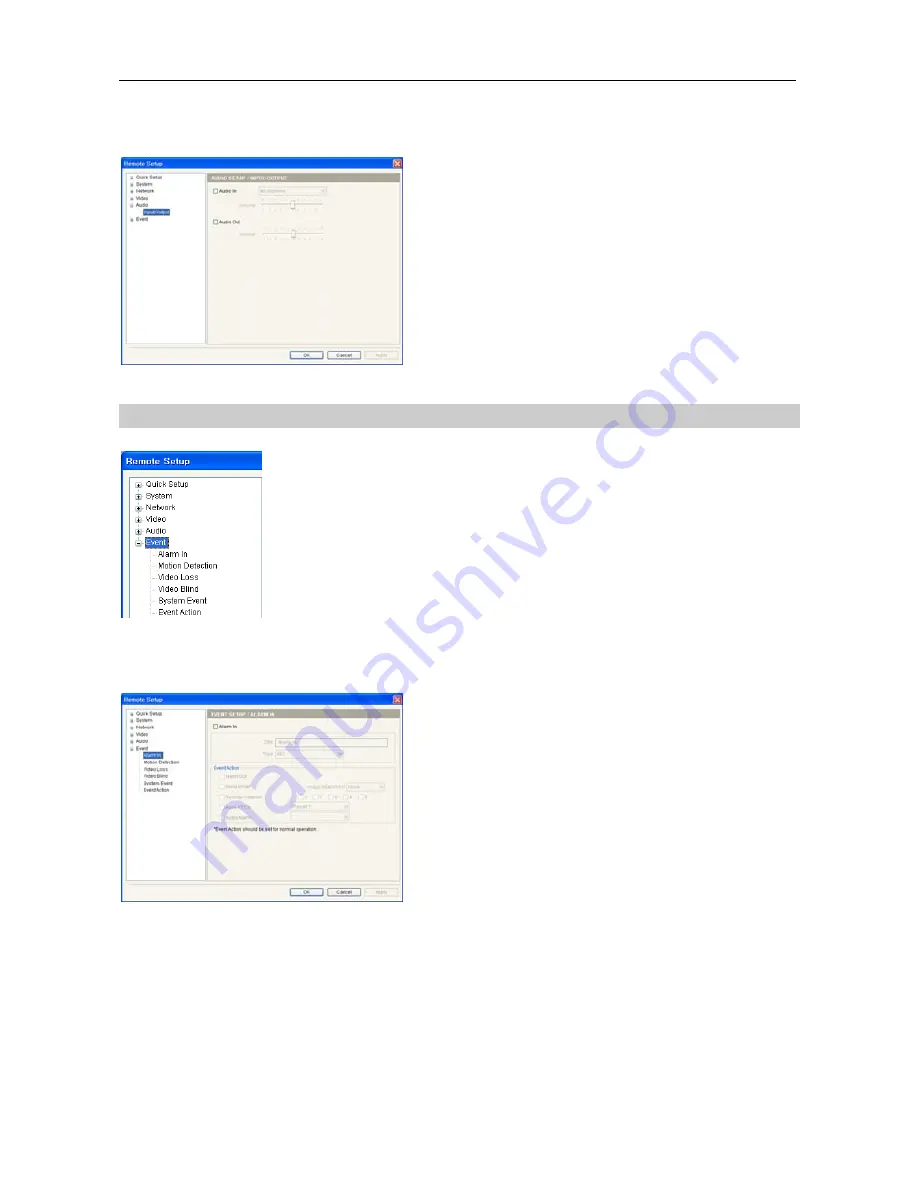
Alarm In 


Check the 

Alarm In

 box to set up an alarm-in event.  When 

the transmitter senses an input on the alarm input connector, 
it considers it as an event. 


 Title

: Enter the alarm-in device’s name. 

 Type

: Select the alarm-in type. 

 Event Action

: Check the box for each action the 

transmitter will take whenever it detects an alarm-in 
event. 

 Alarm Out

: Check the box to trigger an alarm-output 

signal. 

 Send Email

: Check the box to send an email.  Selecting a camera in the 

Image Attachment

 field 

attaches an event detected image file (.JPG) to the email. 

 Remote Callback

: Check the box and select the remote systems to send a message (Not supported 

for the WebGuard program). 

  Move PTZ to

: Select the desired preset number that you want the PTZ camera to move to.  You must 

set up preset locations of a PTZ camera using remote programs or a web browser.


 Audio Alarm

: Check the box and select the audio file (.wav) to sound.


NOTE: 

You must properly configure the settings related to each event action during 

3.6 Event – Event 

Action

 setup to enable event actions.


Содержание CR1000INT

Страница 1: ......

Страница 2: ......

Страница 3: ... of publication We are not responsible for any problems resulting from the use thereof The information contained herein is subject to change without notice Revisions or new editions to this publication may be issued to incorporate such changes The software included in this product contains some Open Sources You may obtain the complete corresponding source code from us See the Open Source Guide on ...

Страница 4: ...batteries according to the instructions 18 Tmra A manufacturer s maximum recommended ambient temperature Tmra for the equipment must be specified so that the customer and installer may determine a suitable maximum operating environment for the equipment 19 Elevated Operating Ambient Temperature If installed in a closed or multi unit rack assembly the operating ambient temperature of the rack envir...

Страница 5: ...up 8 3 2 System 9 General 9 Date Time 10 User Group 10 3 3 Network 11 IP Address 11 DVRNS 12 Port 12 Bandwidth Control 13 Security 13 3 4 Video 14 Camera 14 Live Monitoring 14 Webcasting 15 MAT 15 3 5 Audio 15 Input Output 16 3 6 Event 16 Alarm In 16 Motion Detection 17 Video Loss 18 Video Blind 18 System Event 19 Event Action 19 Chapter 4 Web Monitoring 20 Appendix 23 LED Indicators 23 Troublesho...

Страница 6: ...User s Manual iv ...

Страница 7: ...video stream buffering to enhance reliability of network recording Remote monitoring via web browser or remote software Compatibility with Genetec Omnicast software using Genetec Protocol RTSP Port 554 Automatic HTML code generation for webcasting on a user s website Up to 20 simultaneous connections to the transmitter Enhanced security using IP address filtering HTTPS and SSL functions and passwo...

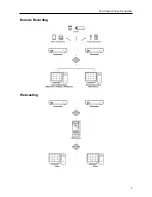
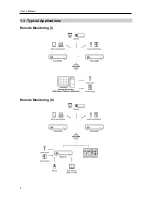
Страница 8: ...User s Manual 2 1 3 Typical Applications Remote Monitoring I Remote Monitoring II ...

Страница 9: ...One Channel Video Transmitter 3 Remote Recording Webcasting ...

Страница 10: ...User s Manual 4 Control Center ...

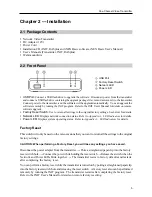
Страница 11: ...twork connection status Refer to Appendix A LED Indicators for details Power LED Displays system operating status Refer to Appendix A LED Indicators for details Factory Reset This switch will only be used on the rare occasions that you want to return all the settings to the original factory settings CAUTION When performing a Factory Reset you will lose any settings you have saved Disconnect the po...

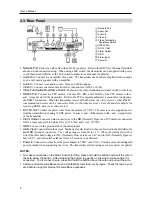
Страница 12: ...receiver DC 12V Out Connect the power wires from the camera 12 VDC The camera can be supplied power from the transmitter when using 12 VDC power Connect and of the camera to the and respectively of the transmitter Alarm Output Connect an alarm out device to the NO Normally Open and C Common connectors NO is a relay output which sinks 0 3A 125 VAC and 1A 30 VDC GND Connect to the ground side of the...

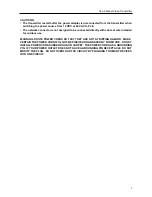
Страница 13: ...ected directly with cable or wire intended for outdoor use WARNING ROUTE POWER CORDS SO THAT THEY ARE NOT A TRIPPING HAZARD MAKE CERTAIN THE POWER CORD WILL NOT BE PINCHED OR ABRADED BY FURNITURE DO NOT INSTALL POWER CORDS UNDER RUGS OR CARPET THE POWER CORD HAS A GROUNDING PIN IF YOUR POWER OUTLET DOES NOT HAVE A GROUNDING PIN RECEPTACLE DO NOT MODIFY THE PLUG DO NOT OVERLOAD THE CIRCUIT BY PLUGG...

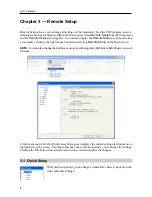
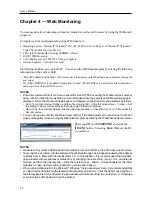
Страница 14: ...ght mouse button and selecting Remote Setup on the Main screen NOTE You can also change the settings by using remote programs RASplus or iNEX Basic or a web browser Clicking a menu in the left of the Remote Setup screen displays the current settings for that menu on the right side of the screen Clicking submenus under each menu allows you to change the settings Clicking the OK button closes the Re...

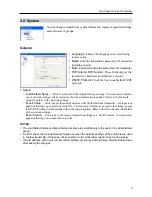
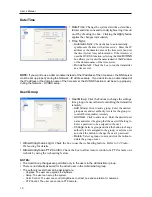
Страница 15: ...he network settings Import Setup Click to apply the settings saved as a dat file format to the transmitter A setup screen appears allowing you to select the setup file You can select whether or not network settings except the DVRNS setting will be included when the setup is applied Refer to the Network menu for details of the network settings Export Setup Click to save the current transmitter sett...

Страница 16: ...group or a user allowed controlling the transmitter remotely Add Group Click to add a group Enter the desired group name and set authority levels for the group to control the transmitter remotely Add User Click to add a user Enter the desired user name and select the group that the user will belong to Enter a password to be assigned to the user Change Select a group and click the button to change ...

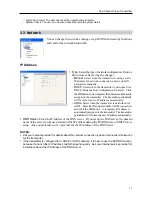
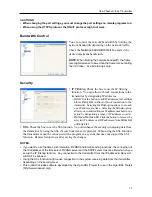
Страница 17: ...a new IP address automatically ADSL Select when the transmitter is networked via ADSL Enter the ID and password for ADSL connection and click the OK button A temporary IP address is automatically assigned to the transmitter The transmitter periodically will be issued a new IP address automatically DNS Server Enter the IP address of the DNS server If you set up the DNS server the domain name of the...

Страница 18: ...ation When LAN settings have been changed set up the DVRNS settings after saving your LAN changes by clicking the OK button You will need to get the IP address or domain name of the DVRNS server from your network administrator You can use the domain name instead of IP address if you set up the DNS server during the IP Address setup When using a NAT Network Address Translation device refer to the N...

Страница 19: ...ows you to add continuous IP address numbers in one action by designating a range of IP addresses to add Remove Remove All Click the button to remove the selected IP address or all IP addresses from Allow List or Deny List SSL Check the box to use the SSL function You can enhance the security of outgoing data from the transmitter by using the SSL Secure Sockets Layer protocol When using the SSL fu...

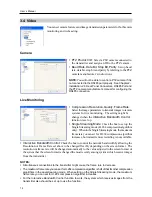
Страница 20: ...reaming mode H 264 compression algorithm only When in the Single Streaming mode the maximum frame rate you can set for H 264 compression algorithm increases but instead remote recording is not available Interactive Bandwidth Control Check the box to control the network bandwidth by allowing the Resolution or Frame Rate set above to be changed flexibly depending on the screen format The resolution ...

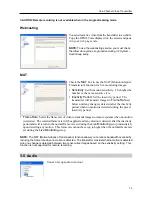
Страница 21: ...d after the inactivity period when no motion is detected during the preset inactivity period Frame Rate Select the frame rate of video to transmit images to remote systems when no motion is detected The selected frame rate will be applied until any motion is detected after the inactivity period and will return to the normal frame rate set during the Live Monitoring setup immediately upon detecting...

Страница 22: ...type Event Action Check the box for each action the transmitter will take whenever it detects an alarm in event Alarm Out Check the box to trigger an alarm output signal Send Email Check the box to send an email Selecting a camera in the Image Attachment field attaches an event detected image file JPG to the email Remote Callback Check the box and select the remote systems to send a message Not su...

Страница 23: ... or send notifications of motion events occurring during the preset interval after other motion is detected You can control excessive event logging and remote notifications of motion detection events by adjusting the motion ignoring dwell intervals Daytime Set up the daytime range The transmitter will consider the remaining time range as the nighttime Event Action Check the box for each action the...

Страница 24: ...ot consider any video blind as a video blind event if it is shorter than the preset time Use Ignoring Time Set up the event ignoring time The transmitter will not consider video blind that occurs during the preset time span as an event Event Action Check the box for each action the transmitter will take whenever it detects a video blind event Alarm Out Check the box to trigger an alarm output sign...

Страница 25: ...lect Use SSL TLS if the SMTP server requires SSL Secure Sockets Layer authentication Authentication ID Password Enter the ID and password if the SMTP server requires user authentication Sender Recipient Enter the sender s and recipients email address Up to 10 recipients can be added Image Attachment Select the resolution of the image to be attached when sending an Email Remote Callback Check the b...

Страница 26: ...b Click the Custom level button Set the setting of Reset custom settings to Medium high default or Medium Go to Tools then Internet Options and then the Advanced tab Check the Use TLS 1 0 box under the Security option You do not need to enter the WebGuard port number if the WebGuard port number is set to 80 443 when entering https when running the WebGuard program by entering the IP address and po...

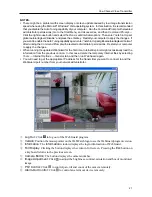
Страница 27: ...n running the updated WebGuard for the first time Internet Explorer might occasionally load the information from the previous version In this case delete the temporary Internet files by selecting Tools Internet Options General tab and then run WebGuard again You will need to get the appropriate IP address for the transmitter you want to connect to and the WebGuard port number from your network adm...

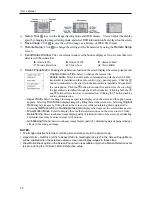
Страница 28: ... Clicking both the and buttons allows two way communication Clicking the button disables audio communication Aspect Ratio Select to change the image aspect ratio displayed on the screen and the option menu appears Selecting Fit to Screen displays images by fitting them to the screen size Selecting Original Ratio displays images by fitting them to the screen size while maintaining their original ra...

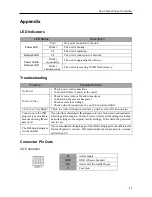
Страница 29: ...lens settings Check network connections on your PC and a transmitter Live Video Very Bright Check if a video termination resistance switch is set to ON downward Connection to the INIT program is not available because of wrong ID and password If you lost the administrator ID and password do a factory reset and customize all settings all over again The factory reset returns all the settings includin...

Страница 30: ...User s Manual 24 RS485 Connector Master Unit Slave Unit To TX RX To TX RX Map of Screens Remote Setup ...

Страница 31: ...work Connectivity 10 100 Mbps Ethernet Audio Input 1 line in or Microphone Audio Output 1 line out CONNECTORS Video Input BNC Audio In Out Stereo Alarm In Out Terminal block Ethernet Port RJ 45 RS 485 Serial Port Terminal block DC 12V Out Terminal block USB Port 1 on front panel 2 0 GENERAL Dimensions W x H x D 4 7 x 1 1 x 4 3 119mm x 29mm x 108mm Shipping Dimensions W x H x D 10 4 x 4 1 x 7 5 265...

Отзывы: