135
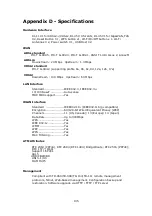
Appendix D - Specifications
Hardware Interface
RJ-11 X1 for ADSL2+/VDSL2, RJ-45 X 4 for LAN, RJ-45 X 1 for GigaWAN, FXS
X2, Reset Button X 1, WPS button x1, Wi-Fi On/Off button x 1, Wi-Fi
Antennas X 2, Power switch X 1, USB Host X2
WAN
ADSL standard
ITU-T G.992.5, ITU-T G.992.3, ITU-T G.992.1, ANSI T1.413 Issue 2, AnnexM
ADSL2+
Downstream : 24 Mbps Upstream : 1.3 Mbps
VDSL2 standard
ITU-Y G.993.2 (supporting profile 8a, 8b, 8c, 8d, 12a, 12b, 17a)
VDSL2
Downstream : 100 Mbps Upstream : 60 Mbps
LAN Interface
Standard ......................IEEE 802.3, IEEE 802.3u
10/100 BaseT ...............Auto-sense
MDI/MDX support ..........Yes
WLAN Interface
Standard ....................IEEE802.11n (IEEE802.11b/g compatible)
Encryption ....................64/128-bit Wired Equivalent Privacy (WEP)
Channels ......................11 (US, Canada)/ 13 (Europe)/ 14 (Japan)
Data Rate .....................Up to 300Mbps
WPA ............................Yes
IEEE 802.1x .................Yes
WMM ...........................Yes
WEP ............................Yes
WPS ............................Yes
MAC Filtering ................Yes
ATM Attributes
RFC 2364 (PPPoA), RFC 2684 (RFC 1483) Bridge/Route; RFC 2516 (PPPoE);
RFC 1577 (IPoA)
Support 16 PVCs
AAL5
UBR/CBR/VBR
UNI 3.1/4.0
OAM F4/F5
Management
Compliant with TR-069/TR-098/TR-104/TR-111 remote management
protocols, Telnet, Web-based management, Configuration backup and
restoration, Software upgrade via HTTP / TFTP / FTP server
Содержание VI-3223u
Страница 1: ...VI 3223u Multi DSL WLAN IAD User Manual Version B1 0 July 19 2013 261099 020...
Страница 7: ...6 1 2 Application The following diagram depicts a typical application of the VI 3223u...
Страница 16: ...15 STEP 3 After successfully logging in for the first time you will reach this screen...
Страница 26: ...25...
Страница 32: ...31 Chapter 5 Advanced Setup The following screen shows the advanced menu options...
Страница 67: ...66 5 11 UPnP Select the checkbox provided and click Apply Save to enable UPnP protocol...
Страница 72: ...71 5 15 1 Storage Device Info Display after storage device attached for your reference...
Страница 74: ...73 Automatically Add Clients With Following DHCP Vendor IDs...
Страница 98: ...97 Click Apply Save to set new advanced wireless options...
Страница 103: ...102 7 1 SIP Basic Setting 7 1 1 Global Parameters A common parameter setting...
Страница 104: ...103 7 1 2 Service Provider This screen contains basic SIP configuration settings...
Страница 106: ...105 7 2 SIP Advanced This screen contains the advanced SIP configuration settings...
Страница 107: ...106 7 2 1 Global Parameters A common parameter setting...
Страница 144: ...143 STEP 6 Click Have Disk and insert the printer driver CD STEP 7 Select driver file directory on CD ROM and click OK...
Страница 146: ...145 STEP 11 Check the status of printer from Windows Control Panel printer window Status should show as Ready...
Страница 172: ...171 Click Next to continue or click Back to return to the previous step...

