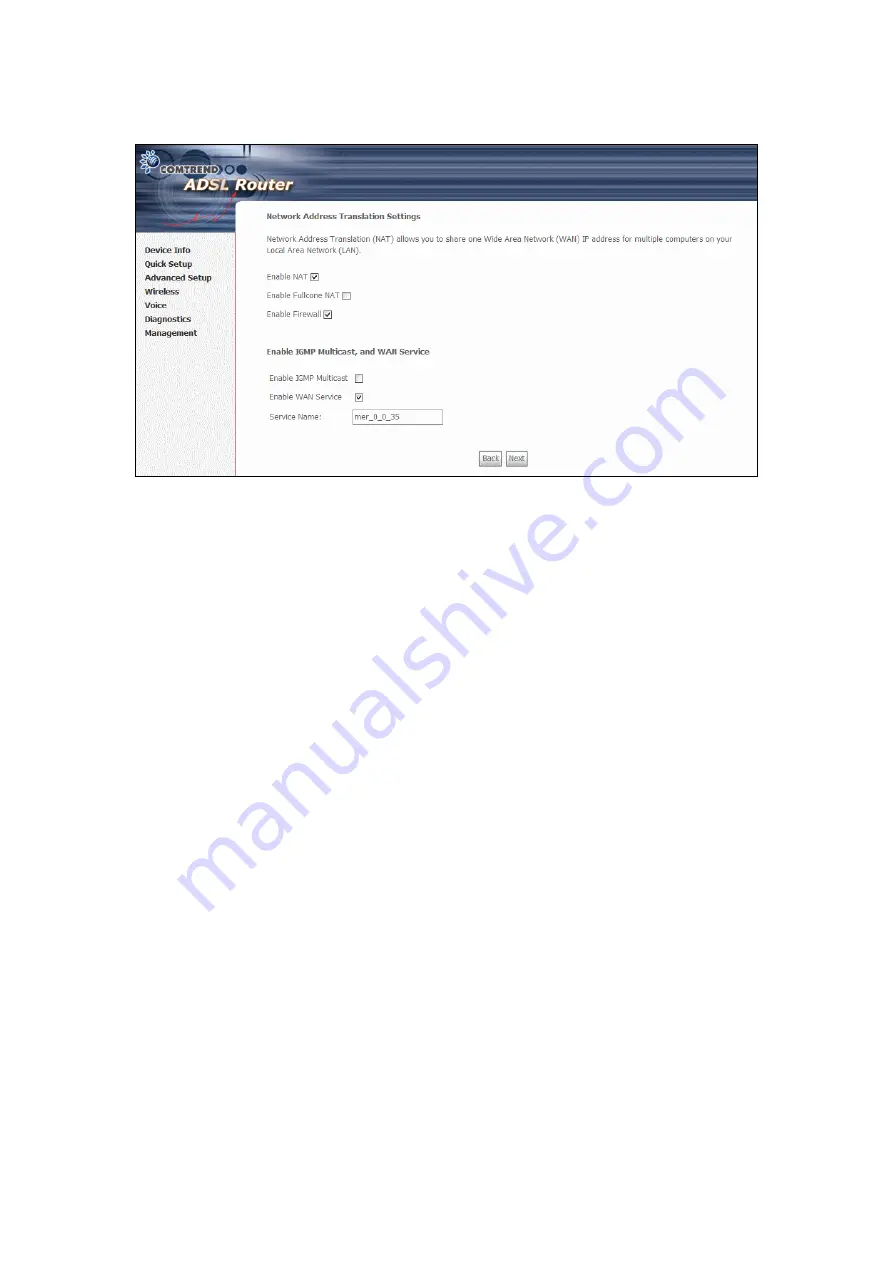
Step 5:
Click
Next
to display the following screen.
Enable NAT checkbox
If the LAN is configured with a private IP address, the user should select this
checkbox. The NAT submenu will be displayed after reboot. The user can then
configure NAT-related features after the system comes up. If a private IP address
is not used on the LAN side, this checkbox should be de-selected to free up system
resources for better performance. When the system comes back after reboot, the
NAT submenu will be gone.
Enable Fullcone NAT
This option becomes available when NAT is enabled.
Known as one-to-one NAT,
all requests from the same internal IP address and port are mapped to the same
external IP address and port. An external host can send a packet to the internal host,
by sending a packet to the mapped external address.
Enable Firewall checkbox
If the firewall checkbox is selected, the Security submenu will be displayed after
system reboot. The user can then configure firewall features after the system
comes up. If firewall is not used, this checkbox should be de-selected to free up
system resources for better performance. When system comes back after reboot,
the Security submenu will be gone.
Enable IGMP Multicast
Tick the checkbox to enable IGMP multicast (proxy). IGMP (Internet Group
Membership Protocol) is a protocol used by IP hosts to report their multicast group
memberships to any immediately neighboring multicast routers.
Enable WAN Service
Tick the checkbox to enable the WAN service. If this item is not selected, you will
not be able to use the WAN service.
Service Name:
This is User-defined
.
30
Содержание CT-6373
Страница 1: ...CT 6373 Wireless Multi DSL VoIP WLAN IAD User Manual Version A2 0 October 7 2009 261082 003...
Страница 16: ...15...
Страница 17: ...STEP 7 Click the Finish button when the window displays as below STEP 8 Installation is complete 16...
Страница 40: ...Front Panel LED Indicators 39...
Страница 41: ...Chapter 5 Device Info Select Device Info from the main menu to display Summary information as below 40...
Страница 49: ...5 3 Route 5 4 ARP 48...
Страница 50: ...5 5 DHCP 49...
Страница 56: ...55...
Страница 113: ...Step 7 Select driver file directory on CD ROM and click OK 112...
Страница 115: ...Step 11 Check the status of printer from Windows Control Panel printer window Status should show as Ready 114...


