H.
PC will detect the plug-in of the printer. Continue to follow the installation
manual of the printer to do the rest jobs of installation. If the USB device is
a MFP, the installation will also install scanner driver.
I.
After the installation, you can see the newly created printer on the PC. If the
USB device is a MFP, you can also see a newly created scanner from the
“Control Panel”. Now you can try to issue a print job to this printer from any
Windows application like Microsoft Word.
J.
Once the print job is finished, from the “Remote Connect Center”, click the
“Unlink” button to do the unlink operation and to release the printer
ownership.
K.
The “Remote Connect Center” doesn’t really quit if you click the “X” box
(close box) at the top right corner of the window. Instead, the “Remote
Connect Center” just minimizes itself to the system tray. There are two ways
to really close the “Remote Connect Center. The first way is choosing “Exit”
item in the “File” menu in the “Remote Connect Center”. The second way is
right-clicking on the icon in the system tray and choosing the “Exit” item. The
“Remote Connect Center” will automatically “unlink” necessary devices
before really quitting.
9.4 Auto
Link/Unlink
It is a little bit tedious to do link and unlink every time before and after a print job,
respectively. The “Remote Connect Center” provides a feature – auto link / unlink so
that users do not need to manually link and unlink printers. Please note that auto link
/ unlink only applies to printers. For scanners, the only solution is manual link / unlink.
To enable auto link / unlink, please follow to steps below.
75
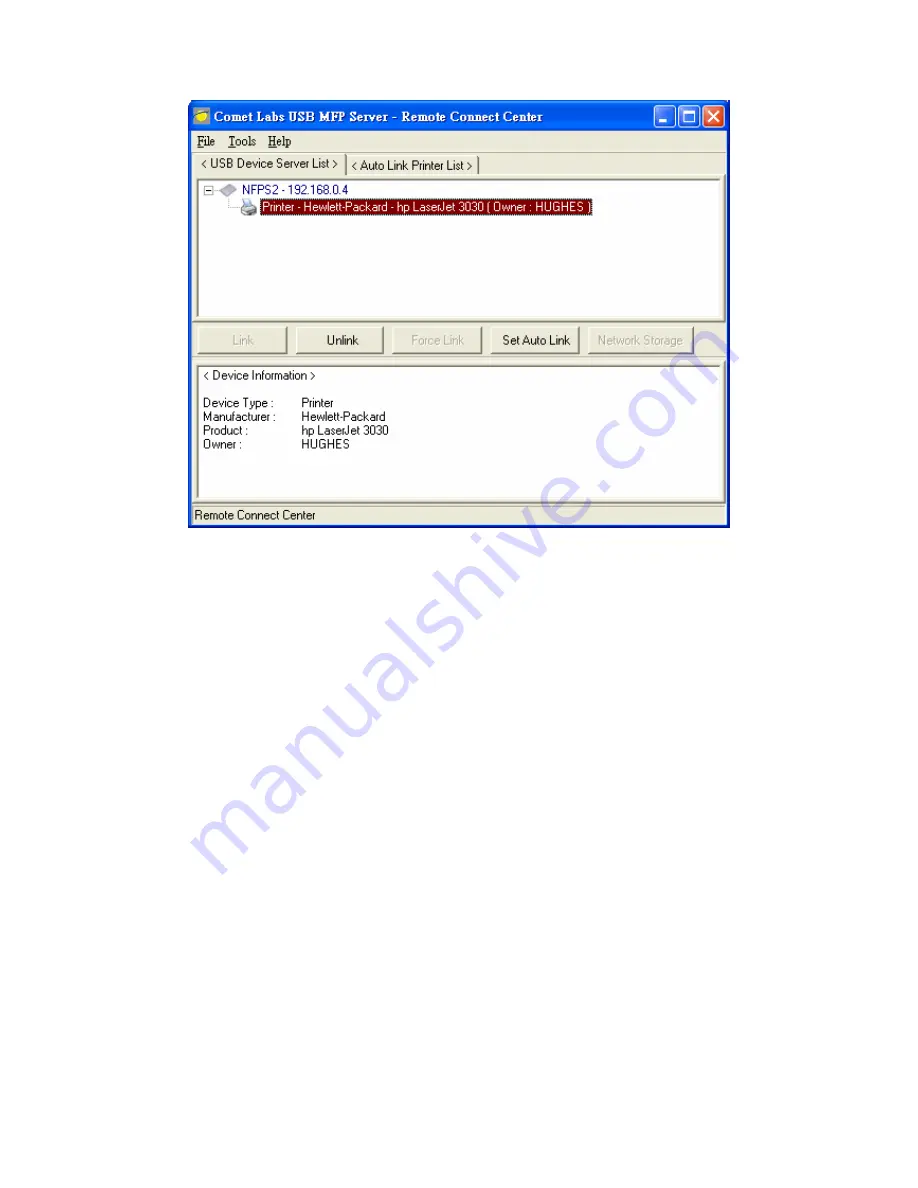
A.
Click the printer you want to do auto link / unlink, as the following figure.
Содержание NFPS2
Страница 1: ...Comet Labs NFPS2 WFPS2 2 USB 2 0 Hi Speed Port MFP Server User s Manual Version 1 21 1...
Страница 12: ...8 If the wireless network is secured by WPA PSK TKIP the shared key must be set correctly 12...
Страница 16: ...7 If the wireless network is secured by WPA PSK TKIP the shared key must be set correctly 16...
Страница 30: ...9 Click Finish 30...
Страница 33: ...9 Click Finish 33...
Страница 40: ...5 Click Next and then continue Windows Add Printer Wizard 40...
Страница 48: ...8 Click Finish button 48...
Страница 63: ...63...
Страница 70: ...70...


