15.
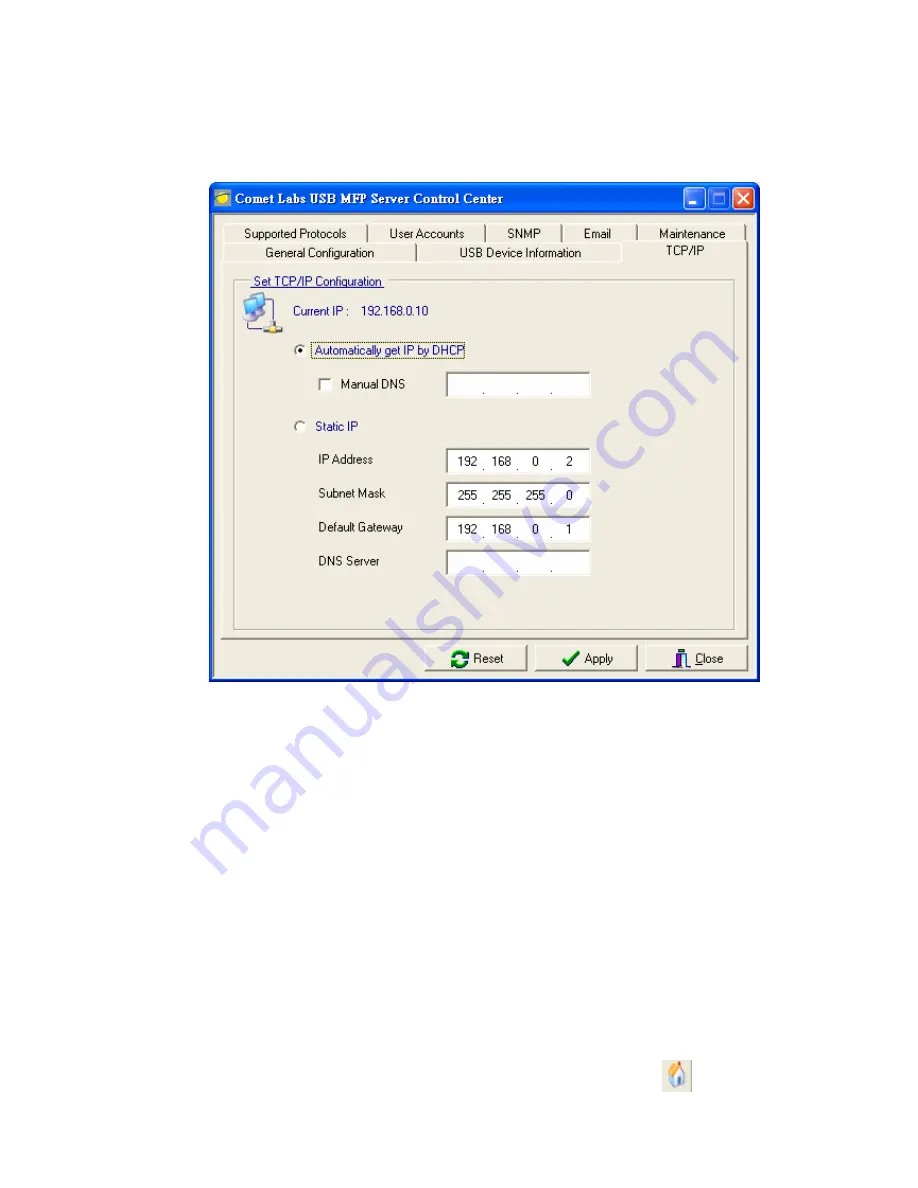
After you have logged in successfully, select TCP/IP from the Server’s menu.
The Set IP Address dialog appears.
16.
Click the button corresponding to your choice of IP setting method (static or
dynamic using DHCP). When assigning a static IP address you also have to
define Subnet Mask and Default Gateway. If you choose Automatically get
IP by DHCP, you can use desired DNS by clicking the Manual DNS button
and manually assigning a DNS.
17.
Click Apply to save your settings. And the Server will reboot.
18.
You have now finished the procedure of setting the IP address.
3.3.8 Setting the IP Address Using the Server’s Web Pages
1.
If you don’t know the current IP of you Server, you have to do the Step1~Step4
of Set the IP Address Using the Control Center.
2.
You can see the IP address of you Server in the Server List. Open IE Browser
and enter the Server’s IP address or click the Home Icon
of the Control
Center.
20
Содержание NFPS2
Страница 1: ...Comet Labs NFPS2 WFPS2 2 USB 2 0 Hi Speed Port MFP Server User s Manual Version 1 21 1...
Страница 12: ...8 If the wireless network is secured by WPA PSK TKIP the shared key must be set correctly 12...
Страница 16: ...7 If the wireless network is secured by WPA PSK TKIP the shared key must be set correctly 16...
Страница 30: ...9 Click Finish 30...
Страница 33: ...9 Click Finish 33...
Страница 40: ...5 Click Next and then continue Windows Add Printer Wizard 40...
Страница 48: ...8 Click Finish button 48...
Страница 63: ...63...
Страница 70: ...70...


