


InteliVision 8
35
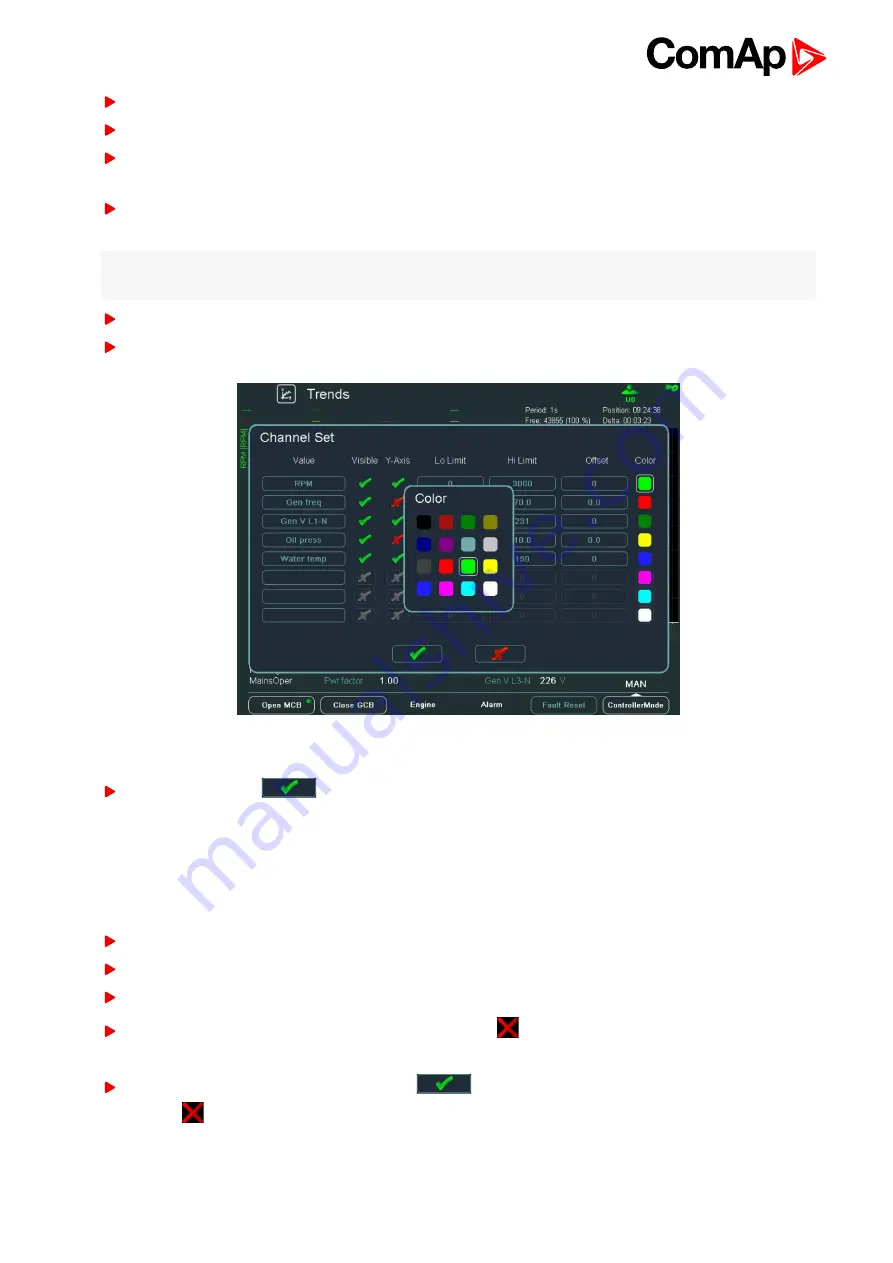
Use → ← buttons to go to
Visible
column and use
Enter
button to switch on/off channel visibility.
Use → ← buttons to go to
Y-Axis
column and use Enter button to switch on/off Y-Axis visibility.
Use → ← buttons to go to
Lo Limit
column and press
Enter
. Here you can set the low limit of the displayed
value range.
In
Lo Limit
screen use → ← buttons to go to a certain position of the field and use ↑ ↓ buttons to change the
value. Then press
Enter
.
see Change of the numerical value on page 41
Note:
Parameters “Low Limit and Hi Limit” are accessible only when analog signal is selected as “Value” in
Channel dialog.
Similarly set how much the value range will be set away out of zero in the
Offset
column and press
Enter
.
In the column
Color
choose the color of the trend curve and press
Enter
.
Image 4.21 Choosing of a trend line color
Use ↓ button to go to
button and confirm the action by pressing
Enter
Binary value selection
When binary value is selected in Trend channel dialog, there is displayed binary information indicating visibility
of particular bits of binary signal in Trend screen
see Trends - channels on page 34
. In default all bits are
selected to be logged in Trend window – they are set to 1. A user has possibility to change visibility of the bits in
pop-up window:
The steps 1 – 5 are the same as in paragraph
Use → ← buttons to go to "bits" item and press
Enter
button.
The pop-up window appears
Use ↑ ↓ buttons to move within "Visibility column" and set
by pressing
Enter
button in row relating to bit
which should not be logged.
The final selection has to be confirmed by big
button in bottom of pop-up window or cancelled by
pressing
button.
Содержание InteliVision 8
Страница 27: ...InteliVision 8 27 Image 4 7 Power screen Image 4 8 Main screen ...
Страница 28: ...InteliVision 8 28 Image 4 9 Gen screen Image 4 10 Synchroscope screen ...
Страница 29: ...InteliVision 8 29 Image 4 11 Statistics screen Image 4 12 Analog Inputs screen ...
Страница 31: ...InteliVision 8 31 Image 4 15 Analog inputs screen Image 4 16 Binary 1 0 screen ...
Страница 32: ...InteliVision 8 32 Image 4 17 Statistics screen ...
Страница 49: ...InteliVision 8 49 Image 4 36 Help Others screen part 1 Image 4 37 Help Others screen part 2 ...
Страница 72: ...InteliVision 8 72 9 2 Mounting system Image 9 2 Mounting system 9 3 Recommended wiring Image 9 3 IG NT wiring ...
Страница 73: ...InteliVision 8 73 Image 9 4 IS NT wiring Image 9 5 InteliDrive DCU wiring ...


