


InteliVision 8
15
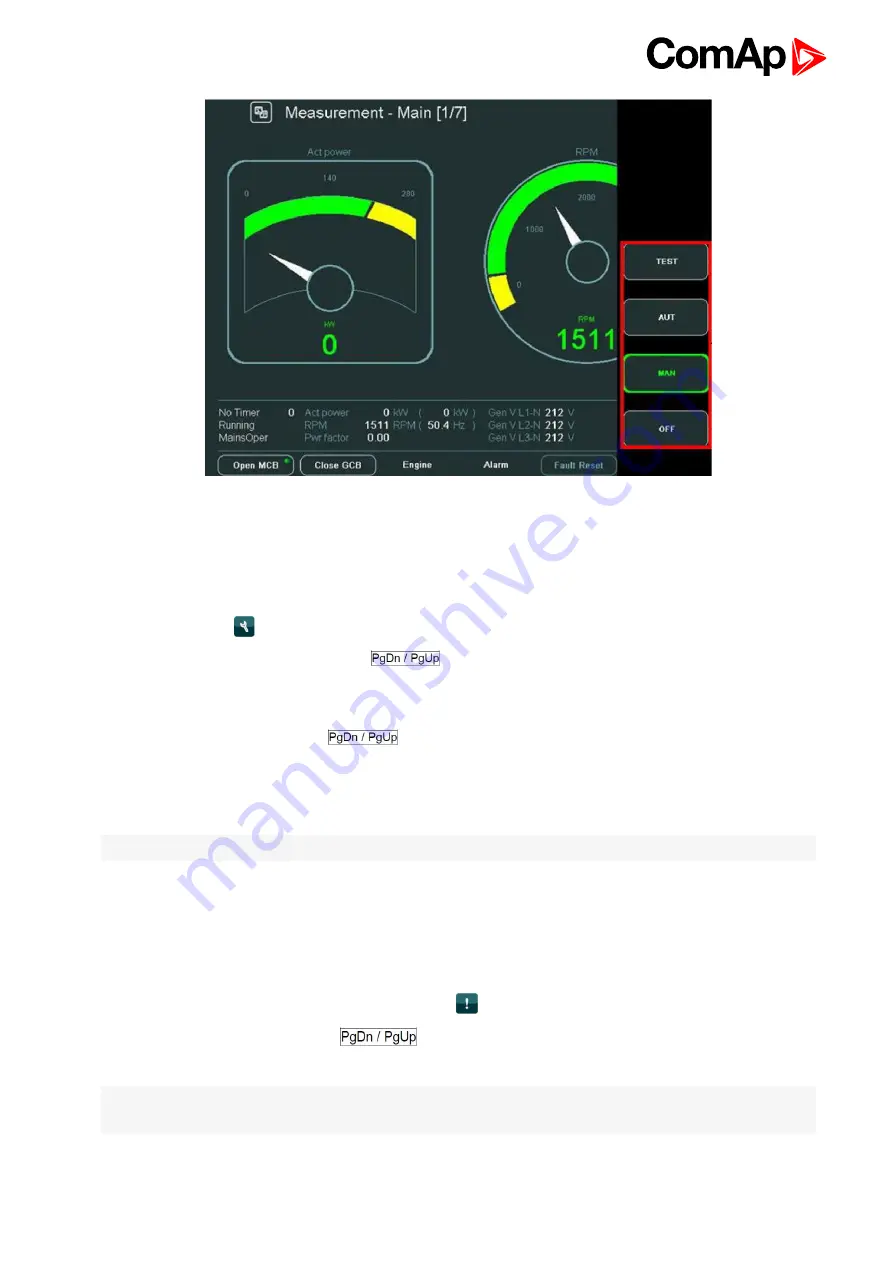
Image 3.8 Change of mode
3.8 How to change setpoints?
To change setpoints:
1. Press
Setpoints
button.
2. To scroll/see all setpoints groups, use
buttons to scroll menu (when context menu is active).
3. Select a setpoint group by pressing the context button on the right side of the display (e.g.
Basic settings
button).
4. To select a certain setpoint use
and/or ↑ ↓ buttons (when context menu is NOT active) and press
Enter
. A dialog for setpoint value adjustment appears.
5. Use → ← buttons to go to the character position.
6. To change a value of the setpoint use ↑ ↓ buttons and press
Enter
Note:
If you insert a wrong value (which is e.g. out of range), the field colours in red.
You can find more information about setpoints in
3.9 How to find alarms?
To find alarms:
1. If they do not appear automatically, press
AlarmList
button.
2. To go through alarms press ↑ ↓ or
buttons.
You can find more information about alarms in
Note:
When a new alarm appears the AlarmList page is displayed automatically only when the actual GUI
position is Home metering screen. From the other GUI location the AlarmList button must be pressed.
Содержание InteliVision 8
Страница 27: ...InteliVision 8 27 Image 4 7 Power screen Image 4 8 Main screen ...
Страница 28: ...InteliVision 8 28 Image 4 9 Gen screen Image 4 10 Synchroscope screen ...
Страница 29: ...InteliVision 8 29 Image 4 11 Statistics screen Image 4 12 Analog Inputs screen ...
Страница 31: ...InteliVision 8 31 Image 4 15 Analog inputs screen Image 4 16 Binary 1 0 screen ...
Страница 32: ...InteliVision 8 32 Image 4 17 Statistics screen ...
Страница 49: ...InteliVision 8 49 Image 4 36 Help Others screen part 1 Image 4 37 Help Others screen part 2 ...
Страница 72: ...InteliVision 8 72 9 2 Mounting system Image 9 2 Mounting system 9 3 Recommended wiring Image 9 3 IG NT wiring ...
Страница 73: ...InteliVision 8 73 Image 9 4 IS NT wiring Image 9 5 InteliDrive DCU wiring ...


