Victory 3_en.pdf http://en.codelight.com.cn
12
4.
Controlling Fixtures and Dimmers
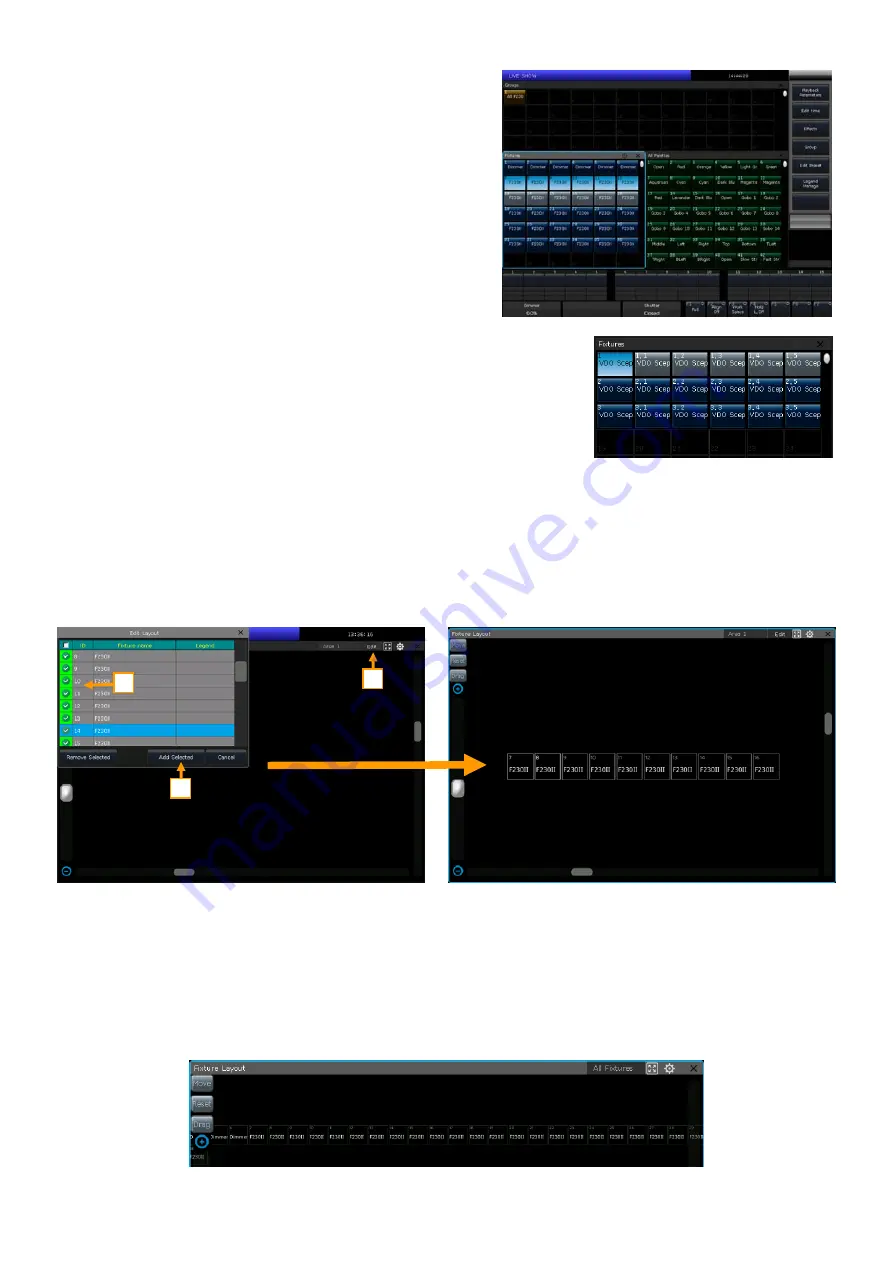
We will find the patched fixtures in the
‘Fixtures’
window. If the
‘Load Preset’
and
‘Auto Group’
options are selected during
patching, the corresponding option windows will be attached
with the data.
The patched fixtures show in dark blue, while selected ones are
shown in pale blue, and those fixtures that have been selected
are shown in gray.
Attributes of the fixtures are set by the control wheels and the
channel names are shown on the bottom of the screen.
If a fixture has multiple cells of control and its personality supports it, you can
select and control the fixture either as a whole or as independent cells. This is
particularly useful when using Shapes.
The patched sub fixtures occupy multiple consecutive fixture grids on the
‘Fixtures’
window. It will be shown as a master unit ID and its series cell IDs.
4.1.
Setup Fixture Layout
All patched fixtures will be listed in the
‘Fixtures’
window, but we can also find them from the
‘Fixture Layout’
window.
The
‘Fixture Layout’
window offers 7 display areas, the area
‘All Fixtures’
and the areas 1 to 6. Areas 1 to 6 do not
display any fixtures by default.
Select
[All Fixtures]
and set it to another area (Any of area 1 to 6);
Select
[Edit]
and select the fixtures to be displayed on the area;
Press
[Add Selected]
to display the selected fixtures, or
[Remove Selected]
to remove the selected
fixtures; Press the small frame on left top corner can help to select/unselect all fixtures.
The fixtures in the
‘Fixture Layout’
window will be initially listed in lines, each of which with 32 units. You can edit
a 2D position layout which to display the fixtures
approximately as their actual physical location.
1
2
3


