


11
Chapter 5: Configuring the Router
EtherFast Cable/DSL VPN Router with 4-Port 10/100 Switch
Chapter 5: Configuring the Router
Now that the Router is connected to your network, this chapter will walk you through a quick configuration.
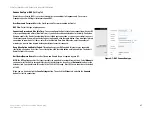
1. Open your web browser and type
http://192.168.1.1
in the browser’s Address box. This number is the
Router’s default IP address. Press the
Enter
key.
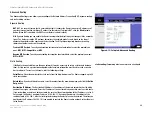
2. A User Name and Password prompt will appear. Leave the User Name field empty, and type
admin
(the
default password) in the
Password
field. Click the
OK
button. If the screen does not appear, make sure your
network adapter is working properly, the network cable is connected, and the Router’s LED is lit up for the
port where you’re connected.
Figure 5-2: Router Login screen
Figure 5-1: Router’s IP Address for Basic Setup
Note:
The directions included in this Chapter are meant for quick configuration of the Router
and do not include all you need to know to use all of the Router’s functions. Complete
directions on all of the Router’s functions, configured through the Web-based Utility, can be
found in Chapter 6: Using the Router’s Web-based Utility.
Note:
If the TCP/IP protocol is not configured on your PC, go to “Appendix D: Windows Help”
for instructions on how Windows can help you configure this protocol on your PC.
browser:
an application program that provides a way to look at
and interact with all the information on the World Wide Web