4-7
Cisco Unified IP Phone 7962G and 7942G Administration Guide for Cisco Unified Communications Manager 7.0
OL-15483-01
Chapter 4 Configuring Settings on the Cisco Unified IP Phone
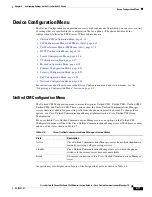
Network Configuration Menu
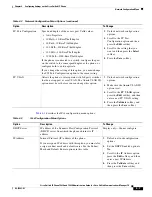
Table 4-3
describes the IPv4 configuration menu options.
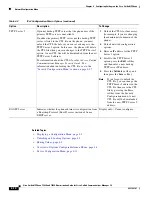
PC Port Configuration
Speed and duplex of the access port. Valid values:
•
Auto Negotiate
•
10 Half—10-BaseT/half duplex
•
10 Full—10-BaseT/full duplex
•
100 Half—100-BaseT/half duplex
•
100 Full—100-BaseT/full duplex
•
1000 Full—1000-BaseT/full duplex
If the phone is connected to a switch, configure the port
on the switch to the same speed/duplex as the phone, or
configure both to auto-negotiate.
If you change the setting of this option, you must change
the SW Port Configuration option to the same setting.
1.
Unlock network configuration
options.
2.
Scroll to the PC Port
Configuration option and then
press the
Edit
softkey.
3.
Scroll to the setting that you
want and then press the
Select
softkey.
4.
Press the
Save
softkey.
PC VLAN
Allows the phone to interoperate with 3rd party switches
that do not support a voice VLAN. The Admin VLAN ID
option must be set before you can change this option.
1.
Unlock network configuration
options.
2.
Make sure the Admin VLAN ID
option is set.
3.
Scroll to the
PC VLAN
option,
press the
Edit
softkey, and then
enter a new PC VLAN setting.
4.
Press the
Validate
softkey and
then press the
Save
softkey.
Table 4-2
Network Configuration Menu Options (continued)
Option
Description
To Change
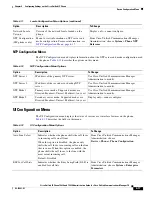
Table 4-3
IPv4 Configuration Menu Options
Option
Description
To Change
DHCP Server
IP address of the Dynamic Host Configuration Protocol
(DHCP) server from which the phone obtains its IP
address.
Display only—Cannot configure.
IP Address
Internet Protocol (IP) address of the phone.
If you assign an IP address with this option, you must also
assign a subnet mask and default router. See the Subnet
Mask and Default Router options in this table.
1.
Unlock network configuration
options.
2.
Set the DHCP Enabled option to
No
.
3.
Scroll to the IP Address option,
press the
Edit
softkey, and then
enter a new IP Address.
4.
Press the
Validate
softkey and
then press the
Save
softkey.

