


77
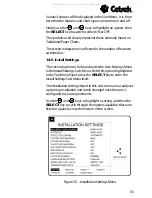
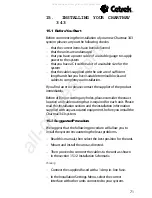
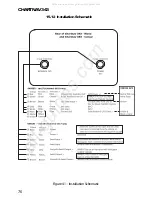
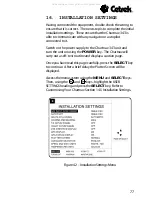
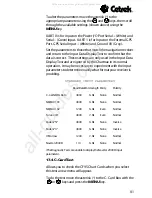
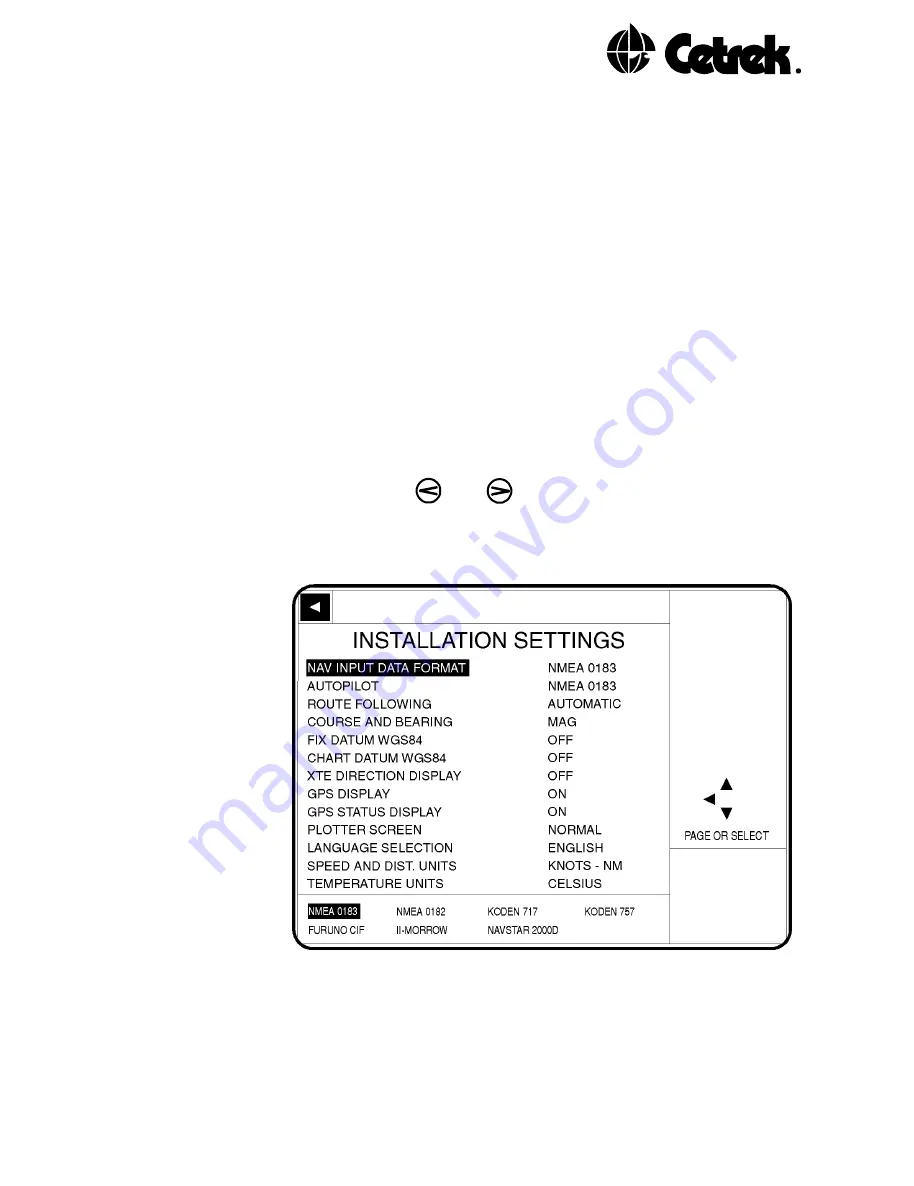
16. INSTALLATION SETTINGS
Having connected the equipment, double check the wiring to
ensure that it is correct. The next step is to complete the initial
installation settings. These ensure that the Chartnav 343 is
able to communicate with any navigator or autopilot
connected to it.
Switch on the power supply to the Chartnav 343 unit and
turn the unit on using the
POWER
key. The Chartnav will
carry out a self-test routine and display a caution page.
Once you have read this page carefully, press the
SELECT
key
to continue. After a brief delay the Plotter Screen will be
displayed.
Access the menu system using the
MENU
and
SELECT
keys.
Then, using the
and
keys, highlight the USER
SETTINGS heading and press the
SELECT
key. Refer to
Customising Your Chartnav Section 14.5 Installation Settings.
Figure 42 - Installation Settings Menu
All manuals and user guides at all-guides.com
Содержание Chartnav 343
Страница 1: ...Chartnav343 User sGuide Issue03 All manuals and user guides at all guides com a l l g u i d e s c o m ...
Страница 34: ...CHARTNAV343 34 All manuals and user guides at all guides com ...
Страница 46: ...CHARTNAV343 46 All manuals and user guides at all guides com a l l g u i d e s c o m ...


