


31
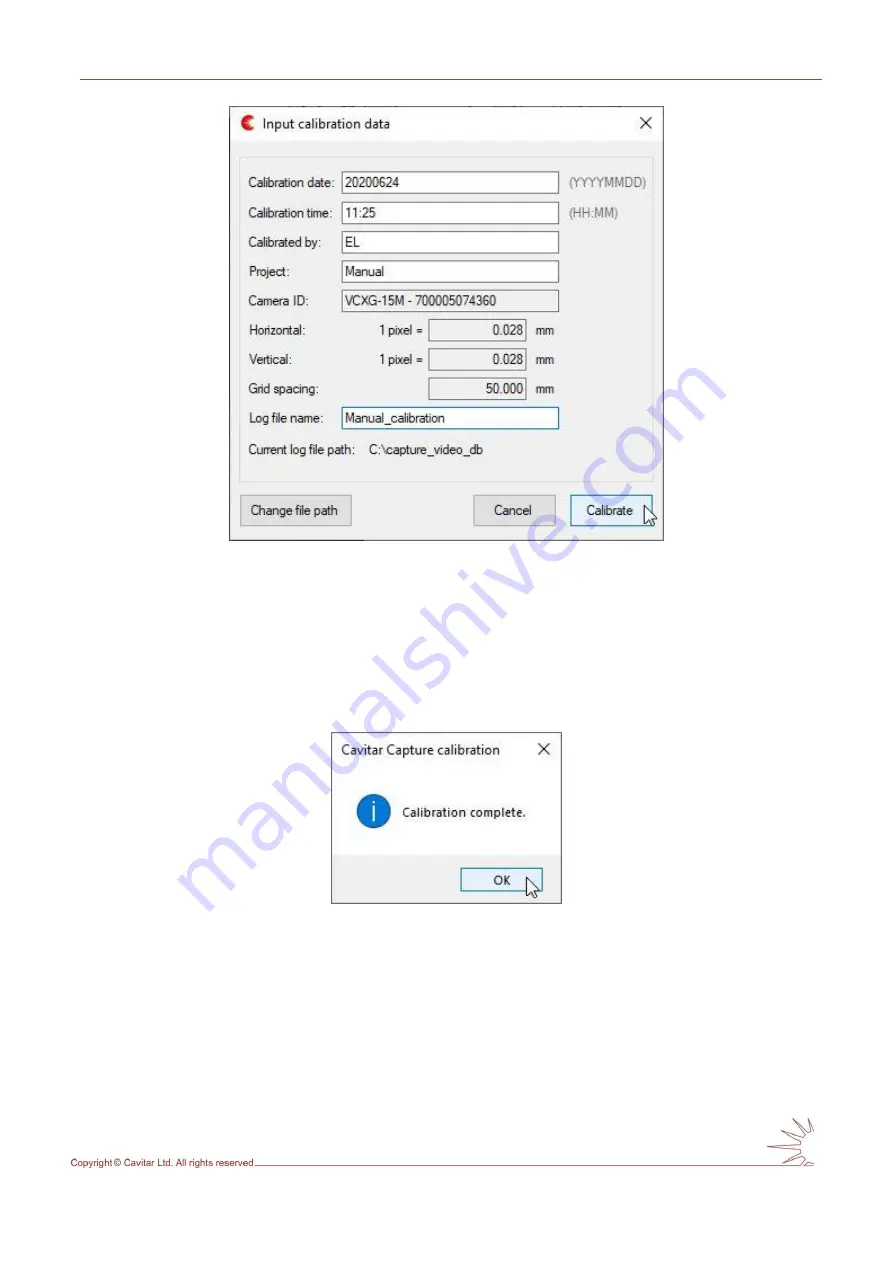
Fig. 5.19. Calibration data window.
In order to enable the “Calibrate” button (in Fig. 5.19), all fields in the calibration data
window need to be filled. When performing calibration for the first time, also the log file path
has to be defined by pressing “Change file path” button. After all information has been
successfully filled, the “Calibrate” button becomes active and the calibration can be
completed. A confirmation window will appear after pressing “Calibrate” button (Fig. 5.20).
Fig. 5.20. Calibration complete window.
Fig 5.21 shows the view after successful calibration. As can be seen, the distances between
the vertical and horizontal lines are now in millimetres (instead of pixels as in Fig. 5.17).
Содержание C300
Страница 1: ...CAVITAR Welding Camera C300 Operating Manual ...
Страница 14: ...12 Fig 4 2 close all other applications and click Next to start installation Fig 4 3 Click I Agree to continue ...
Страница 30: ...28 Fig 5 16 Guideline and grid properties ...
Страница 34: ...32 Fig 5 21 View after calibration ...