ImageBrowser Software User Guide
35
Saving the “My Camera Settings” to the Camera (4/8)
Repeat steps 1-3 to replace all the settings files with those you
wish to save to the camera.
Up to this stage, only the settings in the Camera list change,
not those in the camera itself.
3.
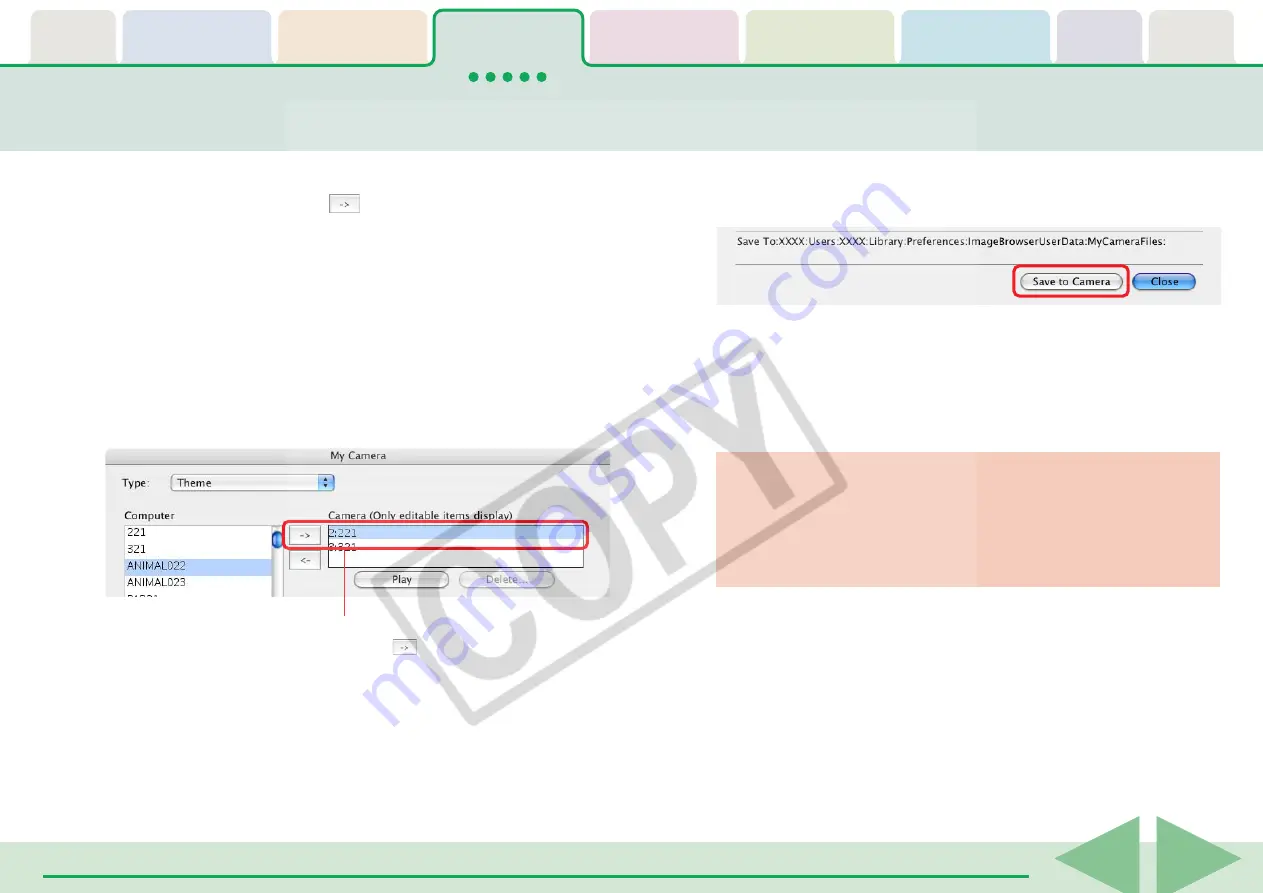
In the [Camera] list, select a setting that you would
like to change and click
.
When you click [OK] in the confirmation dialog, the settings file
in the camera will now be replaced with the one you specified
from the computer.
○
○
○
○
○
○
○
○
○
○
○
○
○
○
○
○
○
○
○
○
○
○
○
○
○
○
○
○
○
○
○
○
○
○
○
○
○
○
○
○
○
○
REFERENCE
• Please note that the original settings file in the camera is
overwritten and permanently erased. To restore the original
settings file, you must add it once more to the camera. Before
you overwrite a settings file in the camera, confirm that it
appears in the Computer list.
4.
Click the [Save to Camera] button.
The settings files in the Camera list are saved to the camera.
5.
Click the [Close] button to close the window.
This concludes the procedure for adding settings to the camera.
See your
Camera User Guide
for instructions on changing the
start-up image, start-up sound and other settings.
○
○
○
○
○
○
○
○
○
○
○
○
○
○
○
○
○
○
○
○
○
○
○
○
○
○
○
○
○
○
○
○
○
○
○
○
○
○
○
○
○
IMPORTANT
• Never detach the interface cable, turn off the camera power
or do anything to stop communication between the camera
and computer while the My Camera Settings are being saved
to the camera.
Select the setting you want to replace
and click
.


