Note
• If you specify the number of copies for each photo, use the
button to display the photo
you want to print and use the
+
or
-
button to specify the number of copies when the desired
photo is displayed.
• You can also display the screen to specify the number of copies by pressing the
OK
button
when the desired photo is displayed. When the screen to specify the number of copies is
displayed, specify the number of copies by using the
+
or
-
buttons. Press the
OK
button to
display the photo selection screen.
2. Selection photo
Select the photo you want to print by using the
button.
3.
Print settings
By pressing the right
Function
button, the print settings confirmation screen is displayed.
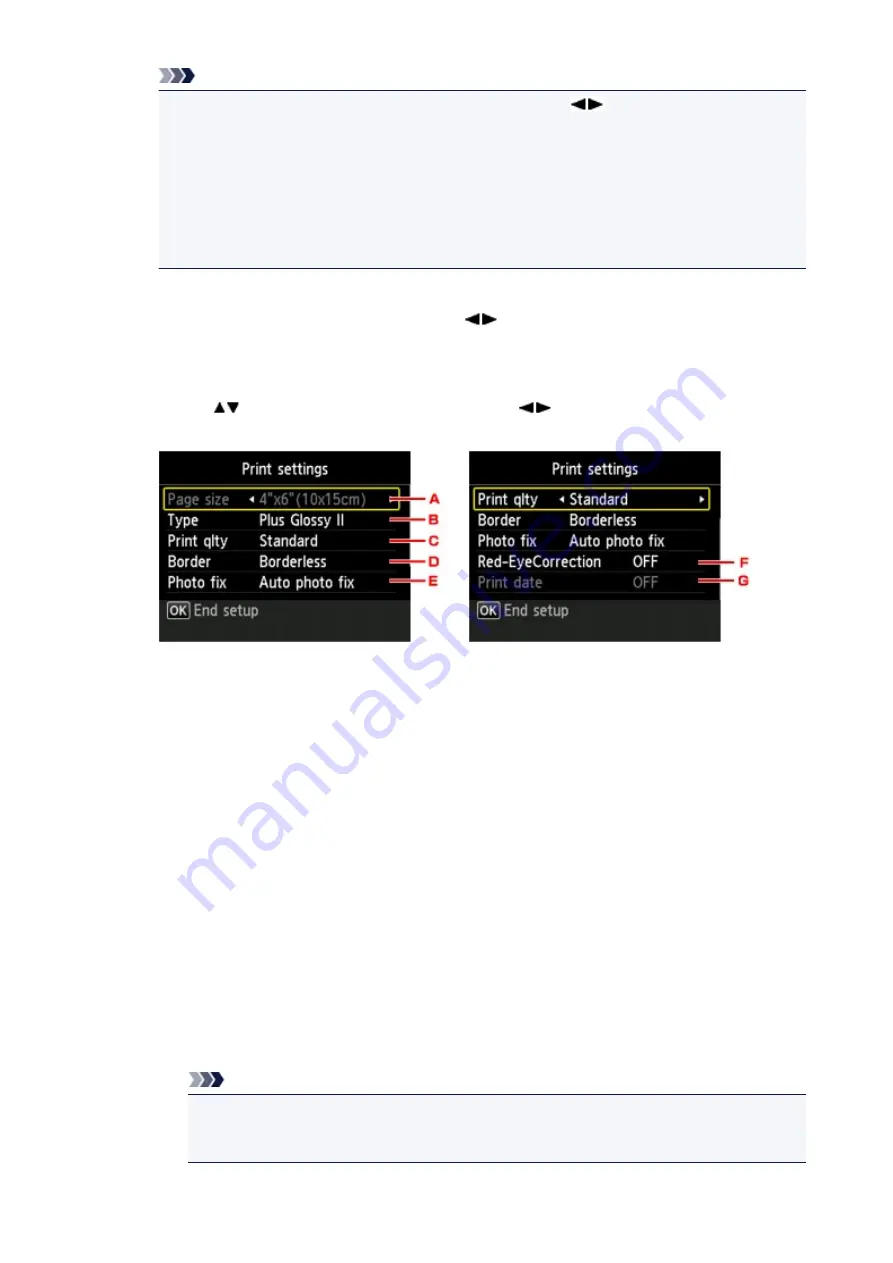
Use the
button to change the setting item, use the
button to change the setting, then use
the
OK
button to confirm the selection.
A.
Page size
The page size is set to
4"x6"(10x15cm)
.
B.
Type
(Media type)
Select the media type of the loaded paper.
C.
Print qlty
(Print quality)
Select print quality according to the photo.
D.
Border
(Bordered/Borderless print)
Select bordered or borderless print.
E.
Photo fix
When
Auto photo fix
is selected, the scene or person's face of a shot photo is recognized and
the most suitable correction for each photo is made automatically. It makes a darkened face by
backlight brighter to print. It also analyzes a scene such as scenery, night scene, person, etc.
and corrects each scene with the most suitable color, brightness, or contrasts automatically to
print.
Depending on the type of the photo, the photo may not be corrected.
Note
• As a default, photos on the photo sharing site are printed with auto correction applied.
• If
No correction
is selected, photos are printed without correction.
F.
Red-EyeCorrection
187
Содержание PIXMA MG55500
Страница 1: ...MG5500 series Online Manual Printing Copying English...
Страница 6: ...Printing from a Computer Printing with Application Software that You are Using Printer Driver 6...
Страница 43: ...Related Topics Registering a Stamp Registering Image Data to be Used as a Background 43...
Страница 51: ...3 Complete the setup Click OK then it returns to Stamp Background dialog box 51...
Страница 70: ...Adjusting Colors with the Printer Driver Printing with ICC Profiles Interpreting the ICC Profile 70...
Страница 87: ...Adjusting Contrast Adjusting Intensity Contrast Using Sample Patterns Printer Driver 87...
Страница 103: ...In such cases take the appropriate action as described 103...
Страница 117: ...Adjusting Intensity Contrast Using Sample Patterns Printer Driver Registering a Frequently Used Printing Profile 117...
Страница 177: ...Related Topics Obtaining the Latest MP Drivers Deleting the Unnecessary MP Drivers Before Installing the MP Drivers 177...
Страница 178: ...Printing Using the Operation Panel of the Machine Printing Template Forms Such As Lined Paper or Graph Paper 178...
Страница 190: ...8 Load paper according to the print settings 9 Press the Color button The machine starts printing 190...


