CHAPTER 2 STANDARDS AND ADJUSTMENTS
2-43
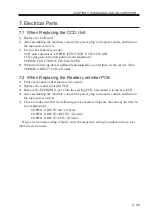
7. Electrical Parts
7.1 When Replacing the CCD Unit
1) Replace the CCD unit.
2) After assembling the machine, connect the power plug to the power outlet, and turn on
the main power switch.
3) Execute the following modes:
CCD auto adjustment: COPIER>FUNCTION>CCD>CCD-ADJ
CCD edge gain correction position auto adjustment:
COPIER>FUNCTION>CCD>EGGN-POS
6) When the following data is updated (automatically), record them on the service label:
COPIER>ADJUST>CCD>all items
7.2 When Replacing the Reader controller PCB
1) Print out the data of user mode/service mode.
2) Replace the reader controller PCB.
3) Remove the EEPROM (1 pc.) from the existing PCB, and mount it to the new PCB.
4) After assembling the machine, connect the power plug to the power outlet, and turn on
the main power switch.
5) Check to make sure that the following service mode settings are the same as the data be-
fore replacement:
COPIER>ADJUST>AE>all items
COPIER>ADJUST>ADJ-XY>all items
COPIER>ADJUST>CCD>all items
If any service mode setting is faulty, enter the respective setting recorded on the service
label in service mode.
Содержание IR5000 - iR B/W Laser
Страница 72: ...CHAPTER 2 STANDARDS AND ADJUSTMENTS 2 52 Blank Page ...
Страница 104: ......
Страница 121: ...CHAPTER 4 SERVICE MODE 4 17 ALARM 1 Indicates alarm data ALRM 1 1 1 READY BODY 00 DF 00 SORTER ww xx yy zz F04 201 04 ...
Страница 123: ...CHAPTER 4 SERVICE MODE 4 19 2 2 FEEDER FEEDSIZE Indicates the size of an original detected by the ADF FEEDER DISPLAY ...
Страница 224: ......
Страница 234: ......

