background image

8

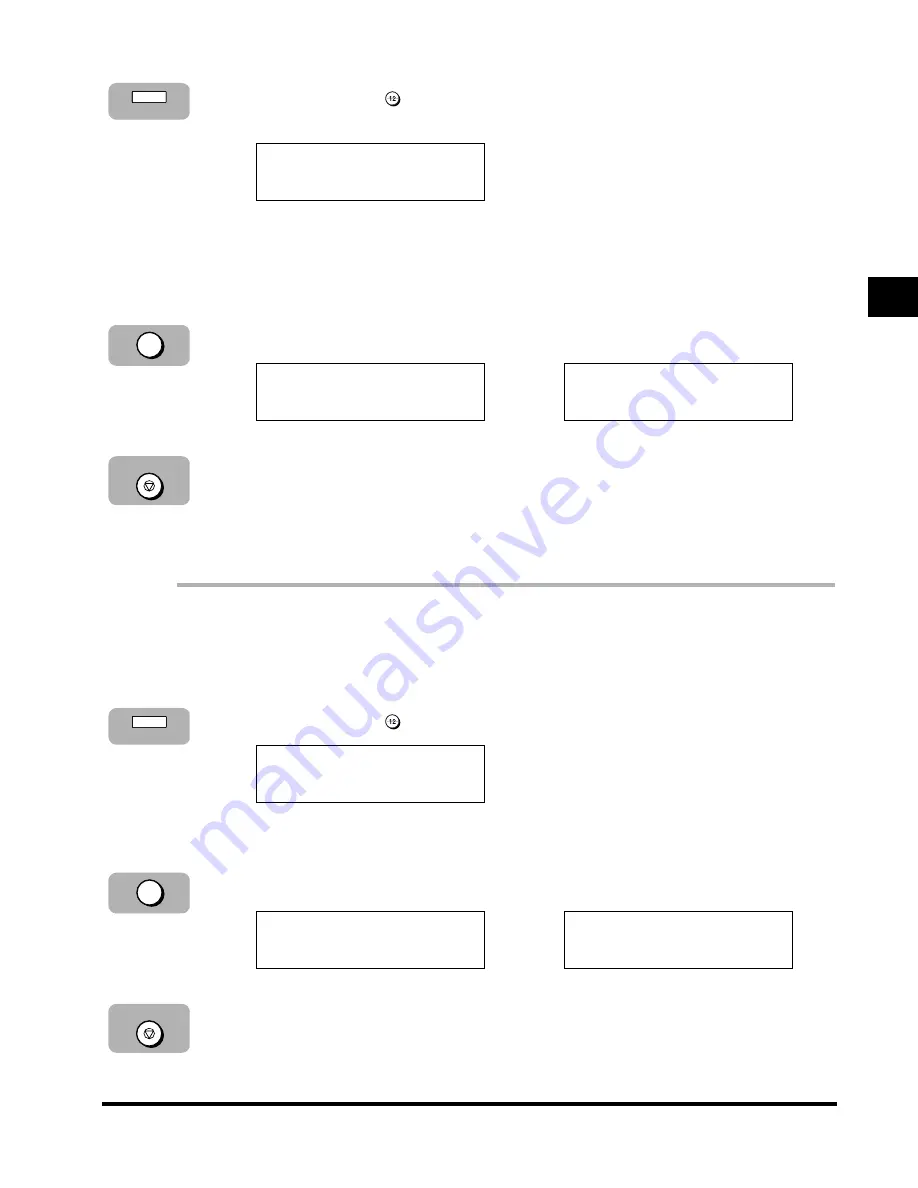
Press [Clear] 

to delete the previous entry 

➞ 

re-enter the

name.

If you do not want to change the name, proceed to step 9.

If you are unsure how to enter characters, see “Entering Names, Numbers, and
Symbols,” on p. 1-7.

9

Press [Set].

10

Press [Stop/Reset] to return the machine to the Standby mode.

Deleting a One-Touch Speed Dialing Entry

Perform steps 1 through 5 in “Changing/Deleting an Entry,”
on p. 2-5.

6

Press [Clear] 

to delete the fax/telephone number.

If you do not want to delete the fax/telephone number, proceed to step 8.

7

Press [Set].

8

Press [Stop/Reset] to return the machine to the Standby mode.

The registered name is automatically cleared when you clear the fax/telephone
number.

Stop/Reset

1-TOUCH SPD DIAL

2.NAME

TEL NUMBER ENTRY

ERASING END

Set

TEL NUMBER ENTRY

TEL=

Clear

Stop/Reset

1-TOUCH SPD DIAL

3.OPTIONAL SETTING

:A

DATA ENTRY OK

Set

:A

Canon OPTICS

Clear

One-Touch Speed Dialing

2-7

2

Speed Dialing

**FG_Chap 02  3/5/04  10:37 AM  Page 7

Содержание IMAGERUNNER 1670F

Страница 1: ...Facsimile Guide Facsimile Guide Please read this guide before operating this equipment After you finish reading this guide store it in a safe place for future reference ENG ...

Страница 2: ...imageRUNNER 1670F Facsimile Guide ...

Страница 3: ... Advanced Printing Technology Software CD ROM Printer Guide Facsimile Guide This Document Reference Guide Quick Start Guide CD ROM Guides with this symbol are PDF manuals included on the accompanying CD ROM See footnote To view the manual in PDF format Adobe Reader Acrobat Reader Acrobat is required If Adobe Reader Acrobat Reader Acrobat is not installed on your system please download it from the ...

Страница 4: ... and Lists Troubleshooting Appendix Includes the specifications of the machine and the index Chapter 9 Chapter 8 Chapter 7 Chapter 6 Chapter 5 Chapter 4 Chapter 3 Chapter 2 Chapter 1 Considerable effort has been made to ensure that this manual is free of inaccuracies and omissions However as we are constantly improving our products if you need an exact specification please contact Canon ...

Страница 5: ...e Menus and Keys 1 5 General Guidelines for Registering Information 1 5 Using the Menus 1 5 Open a Menu and Select an Item 1 6 Return to the Previous Level 1 6 Return to the Standby Mode 1 7 Entering Names Numbers and Symbols 1 7 Correcting a Mistake 1 8 Menu Key Summary Table 1 9 Things You Must Do Before Using This Machine 1 10 Checking and Setting the Telephone Line Type 1 10 Registering Requir...

Страница 6: ... Speed Dialing Lists 2 18 Printing Speed Dialing Lists 2 18 1 Touch List Sample 2 19 1 Touch Detail Sample 2 20 Coded Dial List Sample 2 20 Coded Detail Sample 2 21 Group Dial List Sample 2 21 Canceling the Print Job 2 22 Registering a Password and Subaddress 2 23 Chapter 3 Sending Documents 3 1 Preparing to Send a Fax 3 2 Preparing the Documents 3 2 Image Quality Adjustment 3 2 Adjusting the Scan...

Страница 7: ...Destination 3 18 One Touch Speed Dialing 3 19 Coded Speed Dialing 3 19 Regular Dialing 3 20 Delayed Sending 3 21 Checking the Status of Faxes 3 23 Confirming Transmission Status 3 23 Confirming Sending Reservation 3 24 Chapter 4 Receiving Documents 4 1 Overview of Receiving Modes 4 2 Setting the Receive Mode 4 3 FaxTel Mode Options 4 4 What Happens When the FaxTel Mode Is Selected 4 5 Fax Tel Opti...

Страница 8: ...Deleting a Document from Memory 5 10 Chapter 6 Customizing Fax Settings 6 1 About Additional Functions 6 2 Accessing the Additional Functions Menu 6 2 Additional Functions Fax Settings 6 4 Common Settings 6 4 Fax Settings 6 6 User Settings 6 6 Report Settings 6 8 TX Settings 6 9 RX Settings 6 10 Printer Settings 6 11 System Settings 6 12 ADD Registration 6 13 1 TOUCH SPD DIAL 6 13 Coded SPD Dial 6...

Страница 9: ...ssages 8 2 If Trouble Occurs 8 4 Sending Documents 8 4 Receiving Documents 8 6 Using the Telephone 8 9 If a Power Outage Occurs 8 10 If You Cannot Solve the Problem 8 11 Chapter 9 Appendix 9 1 Specifications 9 2 Facsimile 9 2 Telephone 9 3 Index 9 4 viii ...

Страница 10: ...s a warning concerning operations that may lead to death or injury to persons if not performed correctly In order to use the machine safely always pay attention to these warnings Indicates a caution concerning operations that may lead to injury to persons or damage to property if not performed correctly In order to use the machine safely always pay attention to these cautions Indicates operational...

Страница 11: ...settings from which you select an item to set up or change A menu has a title that appears on the LCD display Available menus and the display differ depending on the machine type and the standby display Copy mode or Fax mode Transaction number When you send or receive a document your machine automatically assigns the document a unique transaction number A transaction number is a four digit number ...

Страница 12: ... SETTINGS appears Standby Display The standby display differs depending on whether the machine is in the Copy mode or Fax mode In the Copy mode the display looks like this You can switch from the Copy mode to the Fax mode by pressing FAX In the Fax mode the display looks like this Receive Mode Fax Resolution Date Time Copy Ratio Exposure Copy Quantity Paper Size Image Quality ADDITIONAL FUNCTIONS ...

Страница 13: ...not possible 3 Order a normal business line from your telephone company s business representative The line should be a regular voice grade line or an equivalent one Use one line per machine DDD Direct Distance Dial line or IDDD International Direct Distance Dial line if you communicate overseas Canon recommends an individual line following industry standards such as the 2500 Touch Tone or 500 Rota...

Страница 14: ...eas the sum of the RENs should not exceed five 5 0 To be certain of the number of devices that may be connected to a line as determined by the total RENs contact the local telephone company The REN for this product is part of the product identifier that has the format US AAAEQ TXXXX The digits represented by are the REN without a decimal point e g 03 is a REN of 0 3 An FCC compliant telephone line...

Страница 15: ...ile a complaint with the FCC if he she believes it is necessary The Telephone Consumer Protection Act of 1991 makes it unlawful for any person to use a computer or other electronic device to send any message via a telephone facsimile machine unless such message clearly contains in a margin at the top or bottom of each transmitted page or on the first page of the transmission the date and time it i...

Страница 16: ...ne Use one line per machine DDD Direct Distance Dial line or IDDD International Direct Distance Dial line if you communicate overseas Canon recommends an individual line following industry standards such as 2500 Touch Tone or 500 Rotary Pulse Dial telephones A dedicated extension off a PBX Private Branch Exchange unit without Call Waiting can be used with your facsimile unit Key telephone systems ...

Страница 17: ...t that the sum of the RENs of all the devices does not exceed five The REN of this product is 0 3 Repairs to certified equipment should be made by an authorized Canadian maintenance facility designated by the supplier Any repairs or alterations made by the user to this equipment or equipment malfunctions may give the telecommunications company cause to request the user to disconnect the equipment ...

Страница 18: ... trademarks of their respective owners Copyright Copyright 2004 by Canon Inc All rights reserved No part of this publication may be reproduced or transmitted in any form or by any means electronic or mechanical including photocopying and recording or by any information storage or retrieval system without the prior written permission of Canon Inc Disclaimers The information in this document is subj...

Страница 19: ...xviii ...

Страница 20: ...urn to the Previous Level 1 6 Return to the Standby Mode 1 7 Entering Names Numbers and Symbols 1 7 Correcting a Mistake 1 8 Menu Key Summary Table 1 9 Things You Must Do Before Using This Machine 1 10 Checking and Setting the Telephone Line Type 1 10 Registering Required Sender Information 1 12 About Sender Information 1 12 Entering the Date and Time 1 13 Registering the Machine s Fax Telephone N...

Страница 21: ...machine s operation try to solve it by using the information in Chapter 8 Troubleshooting in this guide and or in Chapter 6 Troubleshooting in the Reference Guide If you cannot solve the problem or if you think your machine needs servicing contact your local authorized Canon dealer 1 2 Customer Support 1 Before You Start Using This Machine ...

Страница 22: ...or sent Lights green when the reservation of fax transmission is set or a fax is received into the memory Flashes orange when the machine has a problem such as a paper jam The error message is displayed in the LCD Sets or cancels the Energy Saver mode manually The key lights green when the Energy Saver mode is set and goes off when the mode is canceled Determines the contents you set or register A...

Страница 23: ...ifies the fax sending time for the delayed sending function Book Sending Key This key is used to send documents from the platen glass Key Enters a plus sign Space Key Enters a space between letters and numbers Delete Key Deletes characters one by one Clear Key Deletes all characters Function Key After you press this key you can use the keys marked 01 to 12 except for 06 to 08 for the fax functions...

Страница 24: ...hen start the procedure from the beginning You can use the AUTO CLEAR setting to change this time frame See Chapter 4 Timer Settings in the Reference Guide If your machine is set to manually receive and the machine rings while you are registering information pick up the handset If you hear a slow beep tone the sender is trying to send you a document Press Stop Start to receive the document Using t...

Страница 25: ...enu you want to open is displayed press Set 2 Press 4 or e to browse through the menu items press Set to go to the next level Return to the Previous Level 1 Press Additional Functions to return to the previous level and continue browsing If you continue to press Additional Functions the machine returns to the Standby mode Set TX SETTINGS 1 ECM TX FAX SETTINGS 3 TX SETTINGS Set FAX SETTINGS 1 USER ...

Страница 26: ...r in the upper right corner of the LCD display tells you the entry mode You must press Function before you can use the Space Delete or Clear key When you press Function the key lights up 1 Press A on the numeric keypad to change the entry mode The keys on the numeric keypad are clearly labeled with one number and some letters Display Entry Mode What It Does A Text Allows you to enter upper and low...

Страница 27: ...irst letter of that group Follow these steps to enter the word Canon Press 2 until you see an uppercase C press e to move the cursor to the right press 2 until you see a lowercase a Press 6 until you see a lowercase n press e to move the cursor to the right press 6 until an o appears press e to move the cursor to the right press 6 again until an n appears You can also enter symbols Press until you...

Страница 28: ...nuously until it appears If the next letter is under a different key press that key to display the first letter of the group and press the key continuously until the letter you want appears If the next letter is under the same key press e to move the cursor to the right one space then press the key again to display the first letter of the group Press the key continuously until the letter you want ...

Страница 29: ...uch tone or rotary pulse line The machine can be set to operate with either type of telephone line The machine is set to operate through a touch tone line without making adjustments Use this procedure to switch the Fax setup between tone and pulse dialing 1 Press Additional Functions 2 Press 4 or e to display 3 FAX SETTINGS 3 Press Set three times TEL LINE SETTINGS 1 USER TEL NO USER SETTINGS 1 TE...

Страница 30: ...from the following ROTARY PULSE TOUCH TONE 6 Press Set 7 Press Stop Reset to return the machine to the Standby mode Stop Reset TEL LINE SETTINGS 3 TX START SPEED Set TEL LINE TYPE ROTARY PULSE TEL LINE TYPE TOUCH TONE TEL LINE SETTINGS 2 TEL LINE TYPE Set Things You Must Do Before Using This Machine 1 11 1 Before You Start Using This Machine ...

Страница 31: ...ea send one transmission from the home office on the East coast and then have the document relayed to you locally We hope you will have these features set up in the very near facsimile communications December 28 Dear Member By now you have all had a chance to become familiar with your new Canon fax units and are ready to set up a reliable economical communications network that offers many exciting...

Страница 32: ...number Enter only the last two digits of the year Use the 24 hour format for the time setting such as 13 00 for 1 00 p m 5 Press Set 6 Press Stop Reset to return the machine to the Standby mode Stop Reset TIMER SETTING 2 AUTO CLEAR DATE TIME SETTING DATA ENTRY OK Set DATE TIME SETTING 09 03 04 15 30 ABC DEF GHI JKL MNO PRS TUV WXY OPER SYMBOLS Tone DATE TIME SETTING 09 03 04 12 10 TIMER SETTINGS 1...

Страница 33: ...change your fax telephone number use the numeric keys Press Space to enter a space To enter a plus sign before the number press If you make a mistake press Delete or 4 to delete the last number or press Clear to delete the entire entry 5 Press Set TEL LINE SETTINGS 2 TEL LINE TYPE USER TEL NO DATA ENTRY OK Set USER TEL NO TEL 123 4567 ABC DEF GHI JKL MNO PRS TUV WXY OPER SYMBOLS Tone USER TEL NO T...

Страница 34: ...e the previous entry and re enter the name Press Space to enter a space and move the cursor to the right If you make a mistake press 4 or e to move the cursor under the character you want to delete press Delete or press Clear to delete all the characters 9 Press Set 10 Press Stop Reset to return the machine to Standby mode Stop Reset USER SETTING 3 TX TERMINAL ID A DATA ENTRY OK Set A CANON ABC DE...

Страница 35: ...Report See Report and List Summary on p 7 2 The sender information is shown at the top of the list The current settings of the machine are listed after this USER S DATA LIST 1 COMMON SETTINGS DEFAULT SETTINGS COPY SW AFTER AUTO CLR DEFAULT MODE VOLUME CONTROL KEYPAD VOLUME ON VOLUME 1 ALARM VOLUME ON VOLUME 1 TX DONE TONE ERROR ONLY VOLUME 1 RX DONE TONE ERROR ONLY 12 03 2004 16 40 FAX 123 4567 CA...

Страница 36: ...ed Dialing 2 8 Registering Numbers 2 8 Changing Deleting a Coded Speed Dialing Entry 2 11 Changing a Coded Speed Dialing Entry 2 12 Deleting a Coded Speed Dialing Entry 2 13 Group Dialing 2 14 Creating Groups 2 14 Speed Dialing Lists 2 18 Printing Speed Dialing Lists 2 18 1 Touch List Sample 2 19 1 Touch Detail Sample 2 20 Coded Dial List Sample 2 20 Coded Detail Sample 2 21 Group Dial List Sample...

Страница 37: ...ng allows you to start a document transmission by pressing Coded Dial followed by a two digit code of your choice While coded speed dialing requires you to press more keys it allows you to register up to 100 numbers Group Dialing Group dialing allows you to dial a group of registered one touch and or coded speed dialing fax numbers By registering each group under a one touch speed dialing key or a...

Страница 38: ...REGISTRATION 3 Press Set twice 4 Press 4 or e to display a one touch speed dialing key 01 to 12 If a fax telephone number is already registered in the key that number is displayed If a group is already registered in the key GROUP DIAL appears If fax functions have been programmed into keys marked 01 to 12 using the PROG 1 TOUCH KEY setting in the ADDITIONAL FUNCTIONS menu PROG 1 TOUCH KEY appears ...

Страница 39: ...e to delete one number at a time or press Clear to clear the entire entry 7 Press Set twice 8 Enter the name that goes with the number max 16 characters including spaces using the numeric keys If you are unsure how to enter characters see Entering Names Numbers and Symbols on p 1 7 A Canon ITALIA ABC DEF GHI JKL MNO PRS TUV WXY OPER SYMBOLS Tone A _ 1 TOUCH SPD DIAL 2 NAME TEL NUMBER ENTRY DATA EN...

Страница 40: ... on your machine for easy reference when dialing Changing Deleting an Entry Function must be lit for you to use the Space Delete or Clear keys If Function is not lit press Function 1 Press Additional Functions 2 Press 4 or e to display 4 ADD REGISTRATION 3 Press Set twice 1 TOUCH SPD DIAL 01 123 456 7890 ADD REGISTRATION 1 1 TOUCH SPD DIAL Set ADDITIONAL FUNCTIONS 4 ADD REGISTRATION Stop Reset 1 T...

Страница 41: ...to enter a space and move the cursor to the next digit Spaces are optional and ignored during dialing Press Redial Pause to enter a pause If you make a mistake move the cursor under the number you want to delete by pressing 4 or e Press Delete to delete one number at a time 7 Press Set twice A Canon OPTIX_ 1 TOUCH SPD DIAL 2 NAME TEL NUMBER ENTRY DATA ENTRY OK Set TEL NUMBER ENTRY TEL 1 123 456 78...

Страница 42: ... 5 in Changing Deleting an Entry on p 2 5 6 Press Clear to delete the fax telephone number If you do not want to delete the fax telephone number proceed to step 8 7 Press Set 8 Press Stop Reset to return the machine to the Standby mode The registered name is automatically cleared when you clear the fax telephone number Stop Reset 1 TOUCH SPD DIAL 2 NAME TEL NUMBER ENTRY ERASING END Set TEL NUMBER ...

Страница 43: ...mbers Function must be lit for you to use the Space Delete or Clear keys If Function is not lit press Function 1 Press Additional Functions 2 Press 4 or e to display 4 ADD REGISTRATION press Set 3 Press 4 or e to display 2 CODED SPD DIAL press Set CODED SPD DIAL A00 2131 1250 ADD REGISTRATION 2 CODED SPD DIAL Set ADD REGISTRATION 1 1 TOUCH SPD DIAL ADDITIONAL FUNCTIONS 4 ADD REGISTRATION Set NOTE ...

Страница 44: ... the cursor to the next digit Spaces are optional and ignored during dialing Press Redial Pause to enter a pause If you make a mistake move the cursor under the number you want to delete by pressing 4 or e Press Delete to delete one number at a time or press Clear to clear the entire entry 7 Press Set twice A _ CODED SPD DIAL 2 NAME TEL NUMBER ENTRY DATA ENTRY OK Set TEL NUMBER ENTRY TEL 1 49 39 2...

Страница 45: ...ed dialing codes press Additional Functions repeat the procedure from step 4 11 Press Stop Reset to return the machine to the Standby mode You can print the Coded Dial List showing all the numbers and names registered for coded speed dialing See Speed Dialing Lists on p 2 18 Keep this list near your machine for easy reference when dialing Stop Reset CODED SPD DIAL 3 OPTIONAL SETTING A DATA ENTRY O...

Страница 46: ...4 ADD REGISTRATION press Set 3 Press 4 or e to display 2 CODED SPD DIAL press Set 4 Press 4 or e to display the speed dialing code assigned to the entry you want to change or delete 5 Press Set twice TEL NUMBER ENTRY TEL 81 773 3115_ CODED SPD DIAL 1 TEL NUMBER ENTRY Set CODED SPD DIAL A32 81 773 3115 CODED SPD DIAL A00 2131 1250 ADD REGISTRATION 2 CODED SPD DIAL Set ADD REGISTRATION 1 1 TOUCH SPD...

Страница 47: ...al and ignored during dialing Press Redial Pause to enter a pause If you make a mistake move the cursor under the number you want to delete by pressing 4 or e Press Delete to delete one number at a time 7 Press Set twice 8 Press Clear to delete the previous entry re enter the name If you do not want to change the name proceed to step 9 A Canon UK Clear A Canon UC_ CODED SPD DIAL 2 NAME TEL NUMBER ...

Страница 48: ...e number If you do not want to delete the fax terephone number proceed to step 8 7 Press Set 8 Press Stop Reset to return the machine to the Standby mode The registered name is automatically cleared when you clear the fax telephone number Stop Reset CODED SPD DIAL 2 NAME TEL NUMBER ENTRY ERASING END Set TEL NUMBER ENTRY TEL Clear Stop Reset CODED SPD DIAL 3 OPTIONAL SETTING A DATA ENTRY OK Set Cod...

Страница 49: ...ng code under which you want to register the group If you wish to register a group under an already registered one touch speed dialing key or speed dialing code or if you want to re enter a group you must delete the previous information first Do not register a group under a one touch speed dialing key or speed dialing code in which SUBADDRESS TX or POLLING RX has been set If you do so you cannot s...

Страница 50: ...he ADDITIONAL FUNCTIONS menu PROG 1 TOUCH KEY appears See Fax Settings on p 6 6 for details Registering a group under a speed dialing code Press Coded Dial enter the two digit code under which you want to register the group 00 to 99 using the numeric keys If a fax telephone number is already registered in this key the message CODED SPD DIAL or GROUP DIAL appears 5 Press Set twice TEL GROUP DIAL 1 ...

Страница 51: ...me is not deleted even if you delete all of the numbers You can cancel registering numbers and return the machine to the Standby mode by pressing Stop Reset anytime before pressing Set in step 7 Entering a destination registered for one touch speed dialing Press the one touch speed dialing key assigned to each number you want to register in the group Repeat for the other keys Entering a destinatio...

Страница 52: ...ss Additional Functions repeat the procedure from step 4 11 Press Stop Reset to return the machine to the Standby mode You can print the Group Dial List showing all the numbers and names registered for group dialing See Speed Dialing Lists on p 2 18 Keep this list near your machine for easy reference when dialing Stop Reset GROUP DIAL 3 TX TIME SETTING 1 DATA ENTRY OK Set 1 Canon GROUP 2_ ABC DEF ...

Страница 53: ...Press 4 or e to display 7 PRINT LISTS press Set 3 Press 4 or e to display 2 SPEED DIAL LIST press Set 4 Press 4 or e to display the list you want to print You can select from the following 1 1 TOUCH LIST 2 CODED DIAL LIST 3 1 TOUCH DETAIL 4 CODED DETAIL 5 GROUP DIAL LIST SPEED DIAL LIST 2 CODED DIAL LIST SPEED DIAL LIST 1 1 TOUCH LIST PRINT LISTS 2 SPEED DIAL LIST Set PRINT LISTS 1 USER DATA ADDIT...

Страница 54: ...from step 4 above 1 Touch List Sample 1 TOUCH SPD DIAL LIST 12 03 2004 17 02 FAX 123 4567 CANON 001 NO CONNECTION TEL CONNECTION ID 01 905 795 1111 Canon CANADA 03 GROUP DIAL Canon EUROPA 04 2 50921 Canon ITALIA 06 1 432 2060 Canon OPTICS 12 2 887 0166 Canon AUSTRALIA 1 TOUCH SPD DIAL LIST ONE TOUCH SPEED DIAL TEL LIST 1 NO DESTINATION TEL DESTINATION ID TX TYPE 12 2 887 0166 Canon AUSTRALIA REGUL...

Страница 55: ...488 6700 Canon U S A REGULAR TX A 32 81 773 3173 Canon UK REGULAR TX Sorted List Destinations listed in alphabetical order Unsorted List Destinations listed in code order 12 03 2004 17 07 FAX 123 4567 CANON 001 1 TOUCH DETAIL 01 DESTINATION TEL 2 887 0166 DESTINATION ID Canon AUSTRALIA TX TYPE REGULAR TX 03 DESTINATION TEL 905 795 1111 DESTINATION ID Canon CANADA 12 03 2004 17 07 FAX 123 4567 CANO...

Страница 56: ...50921 Canon I TA L I A 12 03 2004 17 10 FAX 123 4567 CANON 001 1 TOUCH DETAIL A 00 DESTINATION TEL 2 887 0166 DESTINATION ID Canon AUSTRALIA TX TYPE REGULAR TX A 02 DESTINATION TEL 905 795 1111 DESTINATION ID Canon CANADA 12 03 2004 17 09 FAX 123 4567 CANON 001 CODED SPEED DIAL TEL LIST 2 A 00 DESTINATION TEL 2131 1250 DESTINATION ID Canon DEUTSCH TX TYPE REGULAR TX A 02 DESTINATION TEL 1 49 39 25...

Страница 57: ...Printing is canceled If you change your mind and want to continue printing press e NO You can also cancel the print job by pressing Report You must perform this procedure in the Fax mode Press Function Function lights press Report select 5 CANCEL REPORT press Set Continue from step 3 above CANCEL REPORT YES NO PRINT LISTS 3 CANCEL REPORT Set PRINT LISTS 1 USER DATA ADDITIONAL FUNCTIONS 7 PRINT LIS...

Страница 58: ...o not know the password and subaddress contact the other party Function must be lit to use the Space Delete or Clear keys If Function is not lit press Function 1 Press Additional Functions 2 Press 4 or e to display 4 ADD REGISTRATION press Set 3 Press 4 or e to display 1 1 TOUCH SPD DIAL or 2 CODED SPD DIAL press Set 4 Press 4 or e to display the one touch speed dialing number or speed dialing cod...

Страница 59: ...Press 4 or e to display SUBADDRESS TX 9 Press Set twice PASSWORD SUBADDRESS TX 1 PASSWORD Set TX TYPE SUBADDRESS TX TX TYPE REGULAR TX OPTIONAL SETTING 2 TX TYPE Set OPTIONAL SETTING 1 TX TIME SETTING OPTIONAL SETTING ON Set OPTIONAL SETTING OFF 1 TOUCH SPD DIAL 3 OPTIONAL SETTING Set 2 Speed Dialing 2 24 Registering a Password and Subaddress ...

Страница 60: ...clear your entire entry 11 Press Set twice 12 Enter a subaddress You can enter a subaddress up to 20 digits using the numeric keys A or Space Be sure to enter the subaddress of the other party correctly taking into account the position of spaces If you make a mistake press Delete or 4 to delete the last character or press Clear to clear your entire entry 13 Press Set 1 TOUCH SPD DIAL 03 GROUP DIAL...

Страница 61: ...g other passwords and subaddresses press Additional Functions repeat the procedure from step 3 15 Press Stop Reset to return the machine to the Standby mode Stop Reset 2 26 Registering a Password and Subaddress 2 Speed Dialing ...

Страница 62: ...ing the ADF 3 10 Using the Platen Glass 3 12 Canceling Sending a Document 3 14 While Documents Are Being Scanned 3 14 After All Documents Are Scanned 3 14 While Documents Are Being Sent 3 14 While Documents Are Waiting to be Sent 3 15 Redialing When the Line Is Busy 3 16 Manual Redialing 3 16 Canceling Manual Redialing 3 16 Automatic Redialing 3 16 Canceling Automatic Redialing 3 17 Sequential Bro...

Страница 63: ... to adjust the resolution and contrast to best suit your particular document You cannot change settings while your machine is scanning a document Adjusting the Scan Settings Resolution is a measure of the fineness or clarity of a printout Low resolutions may cause text and graphics to have a jagged appearance while higher resolutions provide smoother curves and lines sharper text and graphics and ...

Страница 64: ...ANDARD ULTRA FINE Suitable for documents that contain fine print and images the resolution is eight times that of STANDARD 3 Press Set You can set the Fax Resolution so that the desired resolution such as STANDARD or FINE is automatically returned after the AUTO CLEAR function is activated or documents are scanned See System Settings on p 6 12 Because RESOLUTION of FAX DEFAULT is set to OFF as the...

Страница 65: ... the machine One Touch Speed Dialing Coded Speed Dialing Group Dialing Directory Dialing If you are unsure of the registered fax number check the destination label or print each list and check the numbers See Speed Dialing Lists on p 2 18 For details on registering a fax number for speed dialing see Chapter 2 Speed Dialing The machine must be set to the Fax mode when dialing 3 4 Dialing Methods 3 ...

Страница 66: ...t for you to use the Clear key If Function is not lit press Function TEL 123 456 7890 5J HJ 2 on 1 Collate Paper Select Enlarge Reduce Image Quality Exposure Additional Functions Stop Reset Start Energy Saver ABC DEF GHI JKL MNO PRS TUV WXY OPER SYMBOLS Tone Report Memory Reference Fax Monitor Delayed Transmission Book Sending Clear Delete Space Function Redial Pause Coded Dial Directory Receive M...

Страница 67: ...press Stop Reset press the correct key NO TEL appears if a fax number is not assigned to the one touch speed dialing key you pressed TEL 123 456 7890 01 Canon CANADA 2 on 1 Collate Paper Select Enlarge Reduce Image Quality Exposure Additional Functions Stop Reset Start Energy Saver ABC DEF GHI JKL MNO PRS TUV WXY OPER SYMBOLS Tone Report Memory Reference Fax Monitor Delayed Transmission Book Sendi...

Страница 68: ...not assigned to the speed dialing code you entered TEL 1 23 45 67 89 A02 Canon FRANCE 2 on 1 Collate Paper Select Enlarge Reduce Image Quality Exposure Additional Functions Stop Reset Start Energy Saver ABC DEF GHI JKL MNO PRS TUV WXY OPER SYMBOLS Tone Report Memory Reference Fax Monitor Delayed Transmission Book Sending Clear Delete Space Function Redial Pause Coded Dial Directory Receive Mode FA...

Страница 69: ... the one touch speed dialing key you pressed Entering a Group Registered Under a Speed Dialing Code 1 Press Coded Dial enter the two digit code assigned to the group you wish to fax using the numeric keys For details see Coded Speed Dialing on p 3 7 If you enter the wrong code press Stop Reset press Coded Dial enter the correct code 2 The name of the group is displayed NO TEL appears if a fax numb...

Страница 70: ...r For example if you want to search for a name that starts with the letter H press 4 GHI twice 3 Press Set The names registered in the machine are displayed according to the letter you entered If there is no name that starts with the letter you entered the next name in alphabetical order appears 4 Press 4 or e to display other names Pressing e displays the names registered in the machine in alphab...

Страница 71: ...message MEMORY FULL may be displayed depending on the documents to be sent or the machine can neither store the scanned documents in memory nor send them In this case print or delete any documents in memory or select a lower fax resolution such as STANDARD and then send the documents Using the ADF 1 Press FAX to set the machine to the Fax mode 2 Prepare the document and load it face down in the AD...

Страница 72: ...re scanned into memory If you use speed dialing or redialing and the TIME OUT setting is on scanning starts automatically See TX Settings on p 6 9 To cancel sending once dialing has started press Stop Reset 4 You can scan a document up to 14 inches 356 mm long You can load up to 30 pages of letter size paper in the ADF After the machine finishes scanning the document into memory it returns to the ...

Страница 73: ...KEY from the ADDITIONAL FUNCTIONS menu See Fax Settings on p 6 6 1 Press FAX to set the machine to the Fax mode 2 Prepare the document and place it face down on the platen glass To adjust the resolution see Adjusting the Scan Settings on p 3 2 To adjust the contrast see Fax Settings on p 6 6 3 Press Function 4 Press Book Sending 5 Press 4 or e to display the document size 6 Press Set Function Func...

Страница 74: ...tart to begin scanning 9 Place the next document on the platen glass press Start to begin scanning the next document Repeat this step for other documents 10 After all of the documents have been scanned press Set to begin sending To cancel sending after dialing has started press Stop Reset press 4 YES See Canceling Sending a Document on p 3 14 You can scan approximately 255 pages for memory sending...

Страница 75: ...eing Sent 1 Press Stop Reset The machine asks you to confirm that you want to cancel 2 Press 4 YES to cancel sending If you change your mind and want to continue sending press e NO The machine prints an ERROR TX REPORT See TX Transmission REPORT on p 7 5 CANCEL DURING TX RX YES NO Stop Reset Stop Reset 3 14 Canceling Sending a Document 3 Sending Documents ...

Страница 76: ...VE STATUS press Set 4 Press 4 or e to display the document to be canceled by checking the reservation number and the fax number press Delete The machine asks you to confirm that you want to delete the document 5 Press 4 YES to cancel sending If you change your mind and want to continue sending press e NO You can also cancel sending using the MEMORY REFERENCE setting See Deleting a Document from Me...

Страница 77: ...his feature is called automatic redialing After the initial dial attempt the machine waits two minutes and tries to dial again If the second attempt fails the machine waits for two more minutes and then makes the third final attempt to complete the call These are the default settings You can adjust the number of redialing attempts and the time interval between attempts by changing the settings in ...

Страница 78: ...ence See Deleting a Document from Memory on p 5 10 1 Wait until the machine starts to redial 2 Press Stop Reset The machine asks you to confirm that you want to cancel 3 Press 4 YES to cancel redialing If you change your mind and want to continue redialing press e NO The machine prints an ERROR TX REPORT See TX Transmission REPORT on p 7 5 CANCEL DURING TX RX YES NO Stop Reset 3 Sending Documents ...

Страница 79: ... using the numeric keys redialing 10 destinations You can enter the destinations in any order Be sure to press Set after each number you enter with the numeric keys If you frequently send documents to the same group of destinations you should register these numbers for group dialing You can register up to 111 fax numbers for group dialing and send the same document to these numbers See Group Diali...

Страница 80: ...e contrast see Fax Settings on p 6 6 3 Enter up to 122 fax numbers using any of the following methods One Touch Speed Dialing Press the desired one touch speed dialing key s Coded Speed Dialing Press Coded Dial enter the two digit code using the numeric keys Repeat for other codes TEL 1 23 45 67 89 A02 Canon FRANCE Coded Dial TEL 2 50921 04 Canon ITALIA DOCUMENT READY MEM IN USE 0 Sequential Broad...

Страница 81: ...ocument to the one touch speed dialing destinations then the coded speed dialing destinations and finally to the destinations dialed using regular dialing To cancel sending press Stop Reset press 4 Sending to all destinations specified in step 3 is canceled You cannot cancel just one destination After canceling the machine prints a MULTI TX RX REPORT See MULTI TX RX Transaction REPORT on p 7 6 If ...

Страница 82: ...ever you do not need to press Function in step 1 or 2 to execute the Delayed Transmission function or Book Sending function if DELAYED TX or BOOK SENDING is programmed in PROG 1 TOUCH KEY from the ADDITIONAL FUNCTIONS menu See Fax Settings on p 6 6 1 Prepare the document and place it on the platen glass or load it face down in the ADF When using the platen glass press Function Book Sending press 4...

Страница 83: ...ar to delete it Or press Delete to delete the last number you entered using the numeric keys 7 Press Start to begin scanning When you use speed dialing and the TIME OUT setting is on scanning starts automatically See TX Settings on p 6 9 Your documents will be sent when the delayed transmission time is reached If you placed the document on the platen glass follow steps 8 and 9 on p 3 12 5J HJ TEL ...

Страница 84: ...s 1 Press Function while In Use Memory is flashing 2 Press Fax Monitor Set To return the machine to the Standby mode press Stop Reset If you perform the procedure above when the machine is not sending or receiving faxes NO CURRENT RX TX JOB appears and the display returns to the first screen shown above The transaction number TX RX represents the following 0001 to 4999 A sent document 5001 to 9999...

Страница 85: ...andby mode press Stop Reset If you perform the procedure above when there is no sending reservation the message NO DOC STORED appears and the display returns to the display shown in step 2 You can also check the reservations by printing the Document Memory List See Printing a List of Documents in Memory on p 5 7 17 00 0058 TX STNDBY 20 545 8584 16 00 0056 TX STNDBY 905 795 1111 FAX MONITOR 2 TX RE...

Страница 86: ...the FaxTel Mode Is Selected 4 5 FaxTel Options 4 6 Distinctive Ring Pattern Detection Feature DRPD Options 4 8 Types of Ring Patterns 4 8 Receiving Documents Manually 4 10 Printing a Received Document in the Correct Page Order 4 12 Canceling Receiving 4 13 Polling Receiving 4 14 Registering a Password and Subaddress for Polling 4 14 4 1 4 CHAPTER Receiving Documents ...

Страница 87: ...alls Receives the machine faxes automatically and rings for voice calls To set the details see FaxTel Mode Options on p 4 4 FaxOnly Fax Machine answers all calls as fax Separate telephone line for calls It receives faxes automatically fax use only and disconnects voice calls DRPD FaxTel Allows you to have separate fax Subscription to a DRP and telephone numbers that you service Telephone distingui...

Страница 88: ...s and voice calls FaxOnly The machine receives only faxes DRPD Distinguishes between fax and voice calls using Distinctive Ring Patterns Manual If a telephone is connected to the machine you can receive faxes by pressing Start before replacing the handset on the telephone AnsMode Receives faxes automatically and routes voice calls to an answering machine You can set details for the FaxTel and DRPD...

Страница 89: ...ing When recording the outgoing message on the answering machine the entire message must be no longer than 15 seconds For example Hello I can t answer the phone right now but please leave a message after the beep I ll return your call as soon as possible FaxTel Mode Options When you select the FaxTel mode you can also set the following options Adjust the time the machine takes to check whether a c...

Страница 90: ...ry default setting and DISCONNECT DISCONNECT RECEIVE The machine receives the fax The fax tone is detected and the machine switches to the receive mode The machine disconnects the call Not all fax machines are capable of sending a fax tone In this case set F T SWITCH ACTION to RECEIVE The machine switches to the receive mode automatically and starts receiving the document If no document comes in i...

Страница 91: ... to set the time the machine waits before ringing when it receives a call You can select from 0 to 30 seconds The default setting is eight seconds You can also use the numeric keys to set the time RING START TIME 09SEC RING START TIME 08SEC FAX TEL OPT SET 1 RING START TIME Set RX SETTINGS 2 FAX TEL OPT SET RX SETTINGS 1 ECM RX FAX SETTINGS 4 RX SETTINGS Set FAX SETTINGS 1 USER SETTINGS ADDITIONAL...

Страница 92: ...to do if no one picks up the handset within the specified ring time set in step 8 Select RECEIVE to receive the call or DISCONNECT to disconnect the call The default setting is RECEIVE 11 Press Set 12 Press Stop Reset to return the machine to the Standby mode Stop Reset RX SETTINGS 3 DRPD SELECT FAX Set F T SWITCH ACTION DISCONNECT F T SWITCH ACTION RECEIVE FAX TEL OPT SET 3 F T SWITCH ACTION Set ...

Страница 93: ...voice call Use the information in this section to set up the machine for use with a DRP service For more details on the DRP service contact your local telephone company Your telephone company may have a different name for this service Also this service may not be offered in all areas Types of Ring Patterns Your telephone company will assign a distinctive ring pattern to each number when you order ...

Страница 94: ...ern that your telephone company assigned for the number You can select from the following DOUBLE RING SHORT SHORT LONG SHORT LONG SHORT OTHER RING TYPE NORMAL RING 6 Press Set 7 Press Stop Reset to return the machine to the Standby mode Stop Reset RX SETTINGS 4 INCOMING RING Set DRPD SELECT FAX SHORT SHORT LONG DRPD SELECT FAX DOUBLE RING RX SETTINGS 3 DRPD SELECT FAX Set 4 Receiving Documents ...

Страница 95: ... Make sure there are no documents in the ADF Make sure the REMOTE RX setting is enabled See RX Settings on p 6 10 If your telephone line uses rotary pulse dialing and the telephone connected to the machine cannot be switched to tone dialing you cannot activate remote receiving 1 Make sure Manual is displayed on the LCD display 2 Make sure you have connected a telephone to the machine 3 When you he...

Страница 96: ... your telephone before dialing 25 You can change the number for the remote receiving ID with a combination of two characters using 0 to 9 A and or you can disable remote receiving See RX Settings on p 6 10 If you have an answering machine connected to your machine that can carry out remote control operations controlling your answering machine from a remote telephone the security code for this func...

Страница 97: ...g If you enable the PRINT IN ORDER setting the machine receives all pages of the document in memory first and then prints them out In this case reception takes longer If there is insufficient memory to receive a document the document will not print in page order even if PRINT IN ORDER is set to ON 4 12 Printing a Received Document in the Correct Page Order 2 1 1 2 3 3 2 1 Document sent in page ord...

Страница 98: ...ception is complete 1 Press Stop Reset The machine asks you to confirm if you want to cancel 2 Press 4 YES to cancel receiving If you change your mind and want to continue receiving press e NO CANCEL DURING TX RX YES NO Stop Reset Canceling Receiving 4 13 4 Receiving Documents ...

Страница 99: ...e You can register a password and subaddress in a one touch speed dialing key or speed dialing code You must know if the other party s fax is holding the document under both a password and subaddress or only a password or a subaddress You must also know the password and subaddress so that you can enter them on your fax If you do not know the password and subaddress contact the other party Function...

Страница 100: ...or e to display 3 OPTIONAL SETTING press Set 6 Press 4 or e to display ON press Set 7 Press 4 or e to display 2 TX TYPE press Set 8 Press 4 or e to display POLLING RX TX TYPE POLLING RX TX TYPE SUBADDRESS TX OPTIONAL SETTING 2 TX TYPE Set OPTIONAL SETTING 1 TX TIME SETTING OPTIONAL SETTING ON Set OPTIONAL SETTING OFF 1 TOUCH SPD DIAL 3 OPTIONAL SETTING Set 1 TOUCH SPD DIAL 1 TEL NUMBER ENTRY 1 TOU...

Страница 101: ...ce 12 Enter a subaddress You can enter a subaddress up to 20 digits using the numeric keys A or Space Be sure to enter the subaddress of the other party correctly taking into account the position of spaces If you make a mistake press Delete or 4 to delete the last character or press Clear to clear your entire entry SUBADDRESS 123456789012 ABC DEF GHI JKL MNO PRS TUV WXY OPER SYMBOLS Tone SUBADDRES...

Страница 102: ...her passwords and subaddresses press Additional Functions repeat the procedure from step 3 15 Press Stop Reset to return the machine to the Standby mode Stop Reset 1 TOUCH SPD DIAL 03 GROUP DIAL Set Polling Receiving 4 17 4 Receiving Documents ...

Страница 103: ...4 18 Polling Receiving ...

Страница 104: ...s Dialing With Pauses 5 2 Tone Dialing on a Rotary Pulse Line 5 4 Memory Features 5 6 Receiving Documents into Memory 5 6 Receiving While Performing Other Tasks 5 6 Receiving Faxes in Memory If a Problem Occurs 5 6 Printing a List of Documents in Memory 5 7 Resending a Document from Memory 5 8 Printing a Document in Memory 5 9 Deleting a Document from Memory 5 10 5 1 Special Sending and Receiving ...

Страница 105: ...party you are calling Overseas Dialing With Pauses When you dial or register an overseas number you may need to insert a pause within or after the number The length and location of the pause depends on the telephone system of your country 1 Press FAX to set the machine to the Fax mode 2 Prepare the document and load it face down into the ADF The currently used memory is displayed Standby to scan I...

Страница 106: ...t another two second pause Alternatively you can change the length of the pause See TX Settings on p 6 9 5 Dial the country code the area code and the fax telephone number of the other party using the numeric keys If you enter the wrong number press Stop Reset start again from step 3 6 If necessary press Redial Pause to enter a pause at the end of the number A pause at the end of a number P is fix...

Страница 107: ...ollow this procedure to set the machine temporarily for tone dialing 1 Press FAX to set the machine to the Fax mode 2 Pick up the handset of your telephone 3 Enter a destination using the numeric keys on your telephone a one touch speed dialing key a speed dialing code Redial Pause or the numeric keys on the machine 4 When the recorded message of the information service answers press A Tone to swi...

Страница 108: ...er pressing A Tone you cannot use the numeric keys on your telephone Use the numeric keys on the machine 6 If you want to receive faxes press Start 7 Hang up to disconnect the call Tone dialing is canceled when you disconnect the call 5J HJ TEL T34 ABC DEF GHI JKL MNO PRS TUV WXY OPER SYMBOLS Tone Special Dialing Features 5 5 5 Special Sending and Receiving Features ...

Страница 109: ... the problem is cleared the machine automatically prints the stored fax in memory For an explanation of the messages that appear on the LCD display and for details on the actions you can take see List of LCD Display Messages on p 8 2 The machine s memory can store approximately 255 pages Once the pages are printed they are deleted from memory If memory becomes full you will not be able to receive ...

Страница 110: ...ne prints the DOCUMENT MEMORY LIST and returns to the Standby mode Once you know the transaction number of a document stored in memory you can print it or delete it You can also print the list by pressing Report See Report and List Summary on p 7 2 0046 DELAYED TX A 01 Canon TOKYO 3 12 03 16 30 14 00 0047 DELAYED TX 04 Canon ITALIA 2 12 03 16 37 14 05 0048 DEL SQ BDCST A 02 Canon FRANCE 1 12 03 16...

Страница 111: ...ansmission error 1 Press Function 2 Press Memory Reference 3 Press 4 or e to display 4 RESEND DOCUMENT The document can also be resent if you select 2 MEMORY RETRANSMT 4 Press Set 5 Press 4 or e to display the transaction number TX RX NO of the document you want to resend RESEND DOCUMENT TX RX NO 0053 RESEND DOCUMENT TX RX NO 0051 Set MEMORY REFERENCE 4 RESEND DOCUMENT MEMORY REFERENCE 1 DOC MEMOR...

Страница 112: ...r e to display 3 PRINT DOCUMENT press Set 4 Press 4 or e to display the transaction number TX RX NO of the document you want to print You can also enter the transaction number using the numeric keys PRINT DOCUMENT TX RX NO 0003 PRINT DOCUMENT TX RX NO 0001 MEMORY REFERENCE 3 PRINT DOCUMENT Set MEMORY REFERENCE 1 DOC MEMORY LIST Memory Reference Function Set TEL RESEND DOCUMENT SELECT LOCATIONS Set...

Страница 113: ...ue printing other documents in memory repeat the procedure from step 4 8 Press Stop Reset to return the machine to the Standby mode Deleting a Document from Memory 1 Press Function 2 Press Memory Reference 3 Press 4 or e to display 5 DELETE DOCUMENT press Set DELETE DOCUMENT TX RX NO 0001 MEMORY REFERENCE 5 DELETE DOCUMENT Set Memory Reference Function Stop Reset PRINT 1st PAGE ONLY YES NO Set 5 1...

Страница 114: ...lete the document 6 Press 4 YES to delete the document The document is deleted If you change your mind and want to keep the document in memory press e NO 7 To continue deleting other documents in memory repeat the procedure from step 4 8 Press Stop Reset to return the machine to the Standby mode Stop Reset OK TO DELETE YES NO Set DELETE DOCUMENT TX RX NO 0004 Memory Features 5 11 5 Special Sending...

Страница 115: ...5 12 Memory Features ...

Страница 116: ...ional Functions Menu 6 2 Additional Functions Fax Settings 6 4 Common Settings 6 4 Fax Settings 6 6 User Settings 6 6 Report Settings 6 8 TX Settings 6 9 RX Settings 6 10 Printer Settings 6 11 System Settings 6 12 ADD Registration 6 13 1 TOUCH SPD DIAL 6 13 Coded SPD Dial 6 14 Group Dial 6 14 Print Lists 6 15 Count Check 6 15 6 1 Customizing Fax Settings 6 CHAPTER ...

Страница 117: ...djusting any settings you may want to print the USER S DATA LIST to check the current settings See Checking the Registered Information on p 1 16 Accessing the Additional Functions Menu 1 Press Additional Functions to display the menus The Additional Functions light blinks 2 Press 4 or e to display the menu you want to change press Set 3 Press 4 or e to display the submenu you want to change FAX SE...

Страница 118: ...Set to enter the setting If you press Stop Reset before Set is pressed the item you have selected will not be registered Press Stop Reset to exit the ADDITIONAL FUNCTIONS menu If you press Additional Functions the display returns to the previous screen REPORT SETTINGS 1 TX REPORT Set About Additional Functions 6 3 6 Customizing Fax Settings NOTE ...

Страница 119: ...ode is selected SW AFTER AUTO CLR Selects whether the machine switches to the mode you set in DEFAULT SETTINGS after the AUTO CLEAR function activates DEFAULT MODE The machine automatically switches to the mode you set in DEFAULT SETTINGS after the AUTO CLEAR function activates default CURRENT MODE The machine does not automatically switch to the mode you set in DEFAULT SETTINGS even after the AUT...

Страница 120: ...e volume is turned off 5 PRINTING END TONE Adjusts the volume of the done tone sounded when printing is complete ON 1 to 3 1 is the default ERROR ONLY default 1 to 3 1 is the default OFF The volume is turned off 6 SCANNING END TONE Adjusts the volume of the done tone sounded when scanning is complete ON 1 to 3 1 is the default ERROR ONLY default 1 to 3 1 is the default OFF The volume is turned off...

Страница 121: ...ps default 14400bps 9600bps 7200bps 4800bps 2400bps 4 RX START SPEED Sets the transmission speed for all documents you receive 33600bps default 14400bps 9600bps 7200bps 4800bps 2400bps 2 UNIT NAME You can register your name or your company s name p 1 14 3 TX TERMINAL ID Prints your ID transmitting terminal ID on each page you send p 1 12 1 TTI POSITION OUTSIDE IMAGE Terminal ID is printed outside ...

Страница 122: ...tion USE Uses the PROGRAM 1 TOUCH KEY function The following functions can be programmed 1 REPORT 2 DELAYED TX 3 FAX MONITOR 4 MEMORY REFERENCE 5 BOOK SENDING DO NOT USE Disables the PROGRAM 1 TOUCH KEY function default 6 OFFHOOK ALARM Enables disables the offhook alarm that alerts you when the handset is not in the handset cradle ON After reception the offhook alarm sounds when the handset of ext...

Страница 123: ...r the report ON Prints the first page default OFF The first page is not printed OUTPUT YES Prints a report every time you send a document 2 RX REPORT Enables disables automatic printing of a reception report OUTPUT NO No report is printed default PRINT ERROR ONLY Prints a report only if a reception error occurs OUTPUT YES Prints a report every time you receive a document 3 ACTIVITY REPORT Enables ...

Страница 124: ...on error occurs ON RESEND TX FROM Sets the number of pages to be sent when redialing is attempted default ERROR 1st PAGE default ERROR PAGE ALL PAGES OFF Redialing is not attempted if a transmission error occurs OFF After the first attempt at dialing fails redialing is not attempted 4 ERASE FAILED TX Sets the ERASE FAILED TX function ON The document is deleted from memory if a transmission error o...

Страница 125: ...t DISCONNECT The machine disconnects the call 3 DRPD SELECT FAX Selects a ring pattern for when the machine receives faxes See Distinctive Ring Pattern Detection Feature DRPD Options on p 4 8 NORMAL RING The norrmal ring type of the telephone line DOUBLE RING Two short rings at regular intervals default SHORT SHORT LONG Short short long rings at regular intervals SHORT LONG SHORT Short long short ...

Страница 126: ... default OFF Arranges received faxes in reverse page order Setting Item Description 5 MAN AUTO SWITCH Sets the machine to switch to the document receive mode after ringing for a specified length of time in the manual receive mode OFF The machine keeps ringing until someone answers the call manually with the handset or a connected extension telephone default ON F T RING TIME Sets the length of time...

Страница 127: ...LTRA FINE Suitable for documents that contain fine print and images the resolution is eight times that of STANDARD 2 BOOK TX SCAN SIZE Selects the scanning size for the book sending function SHEET default LGL LTR 2 LOCK PHONE Sets the LOCK PHONE functions OFF The telephone and fax transmission can be used normally default ON You can receive phone calls and you can send receive faxes you cannot mak...

Страница 128: ... the time press Function Clear enter the correct time Sending procedure 1 Place the document face down in the ADF or on the platen glass 2 Press the one touch speed dialing key containing the set transmission time The document is scanned and stored in memory The machine transmits the document at the transmission time If you have set more than two transmission time settings the document will be tra...

Страница 129: ...ling keys or speed dialing codes 3 TX TIME SETTING Sets the transmission time Five transmission times can be specified To set them perform the same procedure as described in 1 TOUCH SPD DIAL Setting Item Description If you have set more than two transmission time settings repeat this procedure to delete all the preset times Alternatively when OFF is selected in 3 OPTIONAL SETTING the TX TIME SETTI...

Страница 130: ...e numbers registered for one touch speed dialing 1 NO SORT The list is not sorted 2 SORT The list is sorted 2 CODED DIAL LIST Prints the numbers registered for coded speed dialing 1 NO SORT The list is not sorted 2 SORT The list is sorted 3 1 TOUCH DETAIL Prints the details of the 1 TOUCH LIST 1 NO SORT The list is not sorted 2 SORT The list is sorted 4 CODED DETAIL Prints the details of the CODED...

Страница 131: ...6 16 Additional Functions Fax Settings ...

Страница 132: ... and lists that you can generate with the machine Report and List Summary 7 2 Printing Reports 7 3 Activity Report 7 3 TX Transmission REPORT 7 5 MULTI TX RX Transaction REPORT 7 6 RX Reception REPORT 7 6 7 1 Reports and Lists 7 CHAPTER ...

Страница 133: ...the machine to print this report only if an error occurs You can also set the machine to print the first page of the document under the transmission report to remind you of the contents of the document RX Reception REPORT Prints after reception of a document You can p 7 6 enable or disable this feature or set the machine to print this report only if an error occurs DOCUMENT MEMORY Lists the docume...

Страница 134: ...atically printed follow the steps below If you prefer not to print an ACTIVITY REPORT after every 20 transactions set ACTIVITY REPORT to OFF See Report Settings on p 6 8 You do not need to press Function in step 1 to execute the Report function if REPORT is programmed in PROG 1 TOUCH KEY from the ADDITIONAL FUNCTIONS menu See Fax Settings on p 6 6 1 Press Function 2 Press Report 3 Press 4 or e to ...

Страница 135: ...45 8545 0003 TRANSMIT ECM 1 OK 04 12 12 03 16 53 03 3758 2111 5005 AUTO RX ECM 1 OK 01 16 12 03 17 08 Canon AUSTRALIA 2 887 0166 0004 TRANSMIT 3 NG 00 51 12 03 17 20 CANON OPTICS 1 432 2060 0005 TRANSMIT 0 NG 00 01 ACTIVITY REPORT 12 03 2001 17 28 FAX 123 4567 CANON 001 3 STOP 0 0018 ST TIME DESTINATION TEL ID NO MODE PGS RESULT Transaction TX RX Number Transaction Mode A Indicates an entry that h...

Страница 136: ... COMPLETED TX RX NO 0004 DESTINATION TEL 20 545 8545 DESTINATION ID Canon EUROPE ST TIME 12 03 17 21 TIME USE 00 18 PAGES SENT 1 RESULT NG 0018 BUSY NO SIGNAL THE SLEREXE COMPANY LIMITED SAPORS LANE BOOLE DORSET BH25 8ER TELEPHONE BOOLE 945 13 51617 FAX 1234567 Our Ref 350 PJC EAC December 3 2004 Dr P N Cundall Mining Surveys Ltd Holroyd Road Reading Berks 12 03 2004 17 21 FAX 123 4567 CANON 001 E...

Страница 137: ...e machine to print a report an RX REPORT similar to the one shown below is printed RX REPORT RECEPTION OK TX RX NO 5004 DESTINATION TEL 905 795 1111 DESTINATION ID Canon CANADA ST TIME 12 03 17 52 TIME USE 01 59 PGS 4 RESULT OK 12 03 2004 17 52 FAX 123 4567 CANON 001 OK Reception Successful NG Some or No Pages Received Number of Pages Received Reception Duration Reception Time MULTI TX RX REPORT T...

Страница 138: ...ions you can take in the event that trouble occurs List of LCD Display Messages 8 2 If Trouble Occurs 8 4 Sending Documents 8 4 Receiving Documents 8 6 Using the Telephone 8 9 If a Power Outage Occurs 8 10 If You Cannot Solve the Problem 8 11 8 1 Troubleshooting 8 CHAPTER ...

Страница 139: ...otates without feeding documents Fan the edges of the document that will feed into the machine first then tap the edges on a flat surface to even the stack HANG UP PHONE The handset is not placed in the handset cradle correctly Replace the handset correctly INCORRECT PAPER SIZE The size of the paper in the paper drawer and that specified in DRAWER PAPER SIZE from the ADDITIONAL FUNCTIONS menu are ...

Страница 140: ...t to release the document automatically NO TEL The one touch speed dialing key or speed dialing code you entered has not been registered Register the one touch speed dialing key or speed dialing code See One Touch Speed Dialing on p 2 3 or Coded Speed Dialing on p 2 8 RECEIVED IN MEMORY The machine received the fax in memory because paper or toner ran out or a paper jam occurred Load paper in the ...

Страница 141: ...he one touch speed dialing key or speed dialing code you entered may not be registered for the feature you want to use Make sure the one touch speed dialing key or speed dialing code is registered correctly See Chapter 2 Speed Dialing You have dialed or have been provided with an incorrect number Check that you have the correct number and dial the number again The other party s fax machine may be ...

Страница 142: ...chine may not be working properly Check the machine by making a copy If the copy is clear the problem may be in the receiving fax machine If the copy is spotted or dirty clean the platen glass or the rollers inside the main unit See Chapter 5 Routine Maintenance in the Reference Guide The document may not have been loaded properly Remove the document stack it if necessary and place it on the plate...

Страница 143: ...nd fax reception The machine may not be set to switch automatically between telephone and fax reception For the machine to switch automatically the receive mode must be set to FaxTel AnsMode or DRPD If you have set AnsMode confirm that an answering machine is connected to the machine and that it is turned on with an outgoing message properly recorded See Setting the Receive Mode on p 4 3 In the Ma...

Страница 144: ...s on their fax machine is clean ECM Error Correction Mode may be disabled Make sure ECM is on See RX Settings on p 6 10 Faxes do not print The drum or toner cartridge may not be installed properly Make sure the drum or toner cartridge is installed properly See Chapter 5 Routine Maintenance in the Reference Guide The toner in the toner cartridge may be low Replace the toner cartridge if necessary S...

Страница 145: ...chine is clean Cannot receive using ECM Error Correction Mode The other party s fax machine may not support ECM If the other party s fax machine does not support ECM the document will be received in the normal mode without error checking ECM may be disabled Make sure ECM is on See RX Settings on p 6 10 Errors occur frequently while receiving The telephone lines may be in poor condition or you may ...

Страница 146: ...ecking and Setting the Telephone Line Type on p 1 10 The LOCK PHONE function may be set to ON Make sure that the LOCK PHONE function is set to OFF See System Settings on p 6 12 The telephone disconnects while you are talking The telephone line may not be connected securely Check that the modular cords are connected securely to the jacks on the machine the telephone jack on your wall and the connec...

Страница 147: ...f documents that were stored in memory at the time of the power outage Make sure that letter size paper is loaded in the paper drawer If a different paper size is loaded the report will not be printed Also you cannot use the stack bypass to print the report If there is no paper in the paper drawer or no toner in the toner cartridge when power is restored the MEMORY CLEAR REPORT is not printed MEMO...

Страница 148: ...de contact your local authorized Canon dealer Canon s support personnel are trained in the technical support of Canon s products and should be able to help you with your problem For details on contacting your local authorized canon dealer see Chapter 1 Before You Start Using This Machine in the Reference Guide If You Cannot Solve the Problem 8 11 8 Troubleshooting ...

Страница 149: ...8 12 If You Cannot Solve the Problem ...

Страница 150: ...This chapter includes the specifications of the machine and the index Specifications 9 2 Facsimile 9 2 Telephone 9 3 Index 9 4 9 1 9 CHAPTER Appendix ...

Страница 151: ...emory Based on ITU T No 1 Chart Standard mode Scanning Image Processing UHQ Ultra High Quality image enhancement Transmission Reception Transmission Maximum approximately 255 pages Memory Reception Maximum approximately 255 pages Based on ITU T No 1 Chart Standard mode Fax Scanning Speed Approximately 3 2 seconds page Based on Standard mode Fax Resolution STANDARD 203 pels in 98 lines in 8 pels mm...

Страница 152: ...tial broadcast Max 122 destinations Automatic reception Automatic Fax Tel switchover Remote reception by telephone Default ID 25 No ring reception ECM deactivation DRPD Distinctive Ring Pattern Detection ACTIVITY REPORT after every 20 transactions No report delivery TTI Transmit Terminal Identification Telephone Connection Telephone answering machine CNG Calling Tone detecting signal data modem Sp...

Страница 153: ... SIZE setting 6 12 Broadcasting sequential 3 18 BUSY NO SIGNAL 8 5 C CANCEL REPORT setting 6 15 Canceling automatic redialing 3 17 manual redialing 3 16 printing lists 2 21 receiving 4 13 sending 3 14 CHANGE DOCUMENT message 8 2 Checking status 3 23 Clear key 1 4 Coded Dial key 1 4 CODED DIAL LIST description 7 2 printing 2 18 sample 2 20 2 21 CODED SPD DIAL settings 2 8 Coded speed dialing changi...

Страница 154: ... description 7 2 printing 5 7 sample 5 7 DOCUMENT TOO LONG message 8 2 DOUBLE RING setting 6 10 DRPD mode description 4 2 setting options for 4 8 settings 6 10 types of ring patterns 4 8 E ECM RX setting 6 10 TX setting 6 9 Energy Saver key 1 3 ERASE FAILED TX setting 6 9 F F T RING TIME setting 6 10 F T SWITCH ACTION setting 6 10 FAX key 1 3 FAX DEFAULT settings 6 12 Fax Monitor key 1 4 FaxOnly m...

Страница 155: ...s 5 6 resending 5 8 MEMORY CLEAR REPORT description 8 10 sample 8 10 MEMORY FULL message 8 3 Memory Reference key 1 4 Memory sending canceling 3 14 using ADF 3 10 using platen glass 3 11 Menu descriptions 6 4 keys 1 9 using 1 5 Messages LCD descriptions 8 2 Mistake correcting 1 8 MULTI TX RX REPORT description 7 6 sample 7 6 N NAME setting for 1 TOUCH SPD DIAL 6 13 for GROUP DIAL 6 14 Names enteri...

Страница 156: ...ial Pause key 1 4 REDIAL INTERVAL setting 6 9 REDIAL TIMES setting 6 9 Redialing automatic 3 16 manual 3 16 Registering coded speed dialing 2 8 information 1 5 one touch speed dialing 2 3 password and subaddress 2 23 sender information 1 12 via control panel 1 5 Regular dialing 3 5 REGULAR TX setting 6 14 REMOTE RX ID setting 6 11 REMOTE RX setting 6 11 Report key 1 4 REPORT SETTINGS 6 8 Reports p...

Страница 157: ... mode xi Start key 1 3 Stop Reset key 1 3 Subaddress 2 23 4 14 SUBADDRESS TX setting 6 14 SUPER FINE description 3 3 setting 3 3 6 12 Support customer 1 2 SW AFTER AUTO CLR setting 6 4 Symbols entering 1 7 SYSTEM SETTINGS 6 12 T TEL LINE SETTINGS 6 6 TEL LINE TYPE settings 6 6 TEL NUMBER ENTRY setting 6 13 for 1 TOUCH SPD DIAL 6 13 for GROUP DIAL 6 14 TEL NUMBER MARK setting 6 6 Telephone problems...

Страница 158: ...NE description 3 3 setting 3 3 6 12 UNIT NAME setting 6 6 USER DATA setting 6 15 USER SETTINGS 6 6 USER TEL NO setting 6 6 USER S DATA LIST description 7 2 printing 1 16 sample 1 16 V VOLUME CONTROL setting 6 4 9 Appendix ...

Страница 159: ...MEMO ...

Страница 160: ...MEMO ...

Страница 161: ...MEMO ...

Страница 162: ... A 17 quai du Président Paul Doumer 92414 Courbevoie Cedex France CANON U K LTD Woodhatch Reigate Surrey RH2 8BF United Kingdom CANON DEUTSCHLAND GmbH Europark Fichtenhain A10 47807 Krefeld Germany CANON ITALIA S p A Via Milano 8 20097 San Donato Milanese MI Italy CANON LATIN AMERICA INC 703 Waterford Way Suite 400 Miami Florida 33126 U S A CANON AUSTRALIA PTY LTD 1 Thomas Holt Drive North Ryde Sy...

Отзывы: