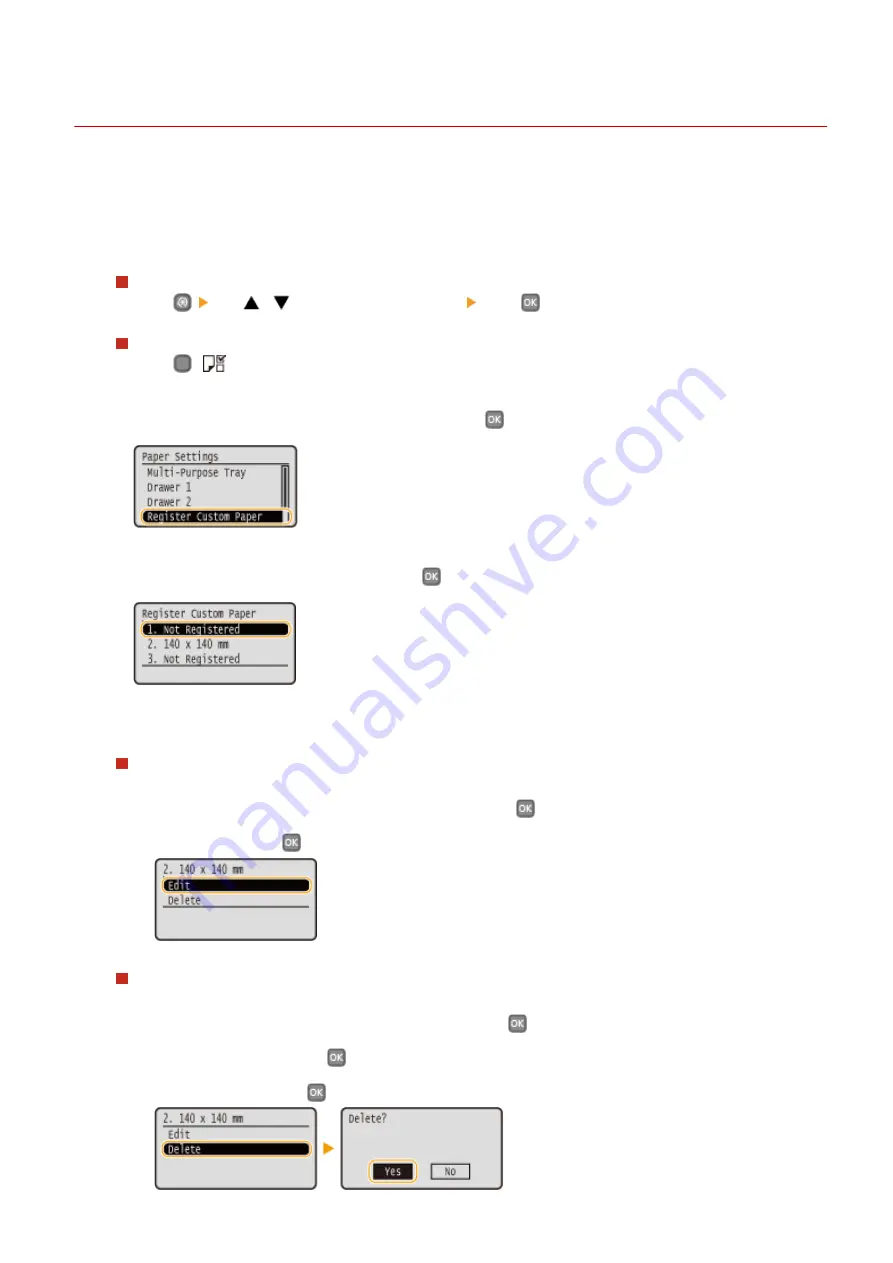
Registering a Custom Paper Size
0W20-013
You can register up to three frequently used custom paper sizes.
1
Display the <Paper Settings> screen.
LBP252dw
Press
use
/
to select <Paper Settings> press
.
LBP251dw
Press
(
).
2
Select <Register Custom Paper>, and press
.
3
Select <Not Registered>, and press
.
●
If paper sizes <1> to <3> have already been registered, either change or delete the setting to continue. The
procedures for changing and deleting these settings are described below.
Changing a setting
1
Select the registered size you want to change, and press
.
2
Select <Edit>, press
, and proceed to step 4.
Deleting a setting
1
Select the registered size you want to delete, and press
.
2
Select <Delete>, and press
.
3
Select <Yes>, and press
.
Basic Operations
57
Содержание imageclass LBP251dw
Страница 1: ...LBP252dw LBP251dw User s Guide USRMA 0786 00 2016 06 en Copyright CANON INC 2015 ...
Страница 35: ...LINKS Using the Operation Panel P 30 Basic Operations 29 ...
Страница 69: ...Exiting Sleep Mode Press any key on the operation panel Basic Operations 63 ...
Страница 75: ...Printing 69 ...
Страница 83: ...LINKS Basic Printing Operations P 70 Checking the Printing Status and Log P 78 Printing 77 ...
Страница 101: ...LINKS Basic Printing Operations P 70 Printing Borders P 93 Printing Watermarks P 96 Printing 95 ...
Страница 117: ...LINKS Printing via Secure Print P 112 Printing 111 ...
Страница 122: ...Checking the Printing Status and Log P 78 Printing 116 ...
Страница 127: ...LINKS Basic Printing Operations P 70 Registering Combinations of Frequently Used Print Settings P 118 Printing 121 ...
Страница 164: ...4 Click Edit in IPv6 Settings 5 Select the Use IPv6 check box and configure the required settings Network 158 ...
Страница 178: ...3 Click OK 4 Click Close LINKS Setting Up Print Server P 173 Network 172 ...
Страница 233: ...LINKS Configuring Printer Ports P 168 Security 227 ...
Страница 316: ...0 Auto Shutdown is disabled 1 to 4 to 8 hr Setting Menu List 310 ...
Страница 355: ...Troubleshooting 349 ...
Страница 405: ...4 Install the toner cartridge Fully push it in until it cannot go any further 5 Close the front cover Maintenance 399 ...
Страница 469: ...4 Click Next Uninstall begins Wait a moment This process may take some time 5 Click Exit 6 Click Back Exit Appendix 463 ...
Страница 470: ...Appendix 464 ...
Страница 478: ...Manual Display Settings 0W20 08J Appendix 472 ...


