CHAPTER 2 STANDARDS AND ADJUSTMENTS
2-6
d. Adjusting the Transfer Delay (TR-
DELAY)
1) Select FUNCTION>ATTRACT>TR1-
CHK in service mode.
2) Set TR1-CHK to '1' (2-sheet retention;
both sides B and A), and press OK.
3) Select TR1-ON, and press OK.
•
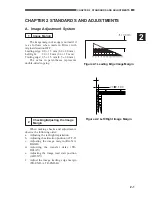
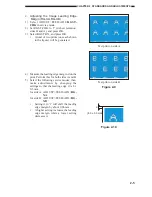
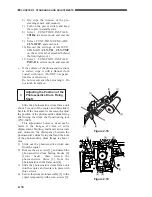
A total of two prints (one each shown
in the figure) will be generated.
Figure 2-11
Test print on side A
Test print on side B
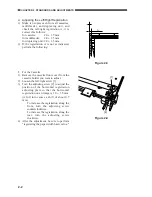
Figure 2-12
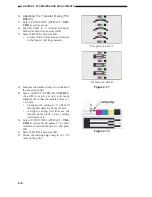
4) Measure the transfer delay d on side B on
the generated print.
5) Select ADJUST>FEED-ADJ>TR-DLY
-A or B in service mode, and make
adjustments so that the transfer delay is 3
± 0.5 mm.
•
Changing the setting to '1' will shift
the transfer delay by about 0.4 mm.
•
A higher setting will increase the
transfer delay while a lower setting
will decrease it.
6) Select FUNCTION>ATTRACT>TR2-
CHK in service mode, and set '1' (2-sheet
retention; both sides B and A), and press
OK.
7) Select TR2-ON, and press OK.
8) Check the leading edge margin (8 ± 0.5
mm) on the print.


