1-11
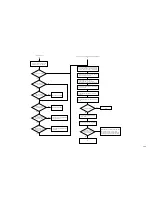
YES
NO
YES
NO
YES
NO
NO
YES
NO
YES
YES
NO
NO
YES
YES
NO
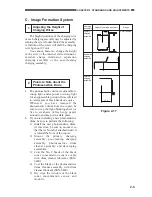
Adjusting Transfer
[D]
[C]
Check the locked condition of the
transfer blade in service mode.
Is a transfer fault noted?
Are there white spots
(transfer fault)?
Is the fault limited to
a specific color?
Are there white spots in
vertical direction?
Are there vertical
lines corresponding to
separation claws?
Make several
test prints. Does the
copy density decrease
(become light)?
Check the transfer blade.
Check the transfer blade.
Check the output of the separation
charging assembly.
Check the internal/external static
eliminator.
Adjusting the Original Exposure System/Color Balance
Check the positions of the copyboard glass,
standard white plate, original scanning lamp,
reflecting plate, and mirrors, and clean them.
Check to see if the No. 1 mirror/No. 2 mirror
base is not riding over the rail.
Check to find out if the value of
ADJUST>COLOR in service mode is
identical with the value recorded on the label.
Check the contact between the CCD and the
CCD driver PCB.
Set OPTION>BODY>PASCAL in service
mode to ’1’.
Execute ADJUST>CCD>CCD-ADJ in service
mode.
Is the image better?
End.
Execute auto gradation correction
in user mode.
Make a copy of the CA1 Test Sheet.
Is the gray scale
(especially light area)
of the copy good?
End.
Make adjustments in ADJUST>COLOR>ADJ-Y,
ADJ-M, ADJ-C, ADJ-K in service mode.
To make copies darker, increase the setting.
To make copies lighter, decrease the setting.


