Chapter 10: Synchronization
Configuring the Sync Source
phn-3965_006v002
Page 10-4
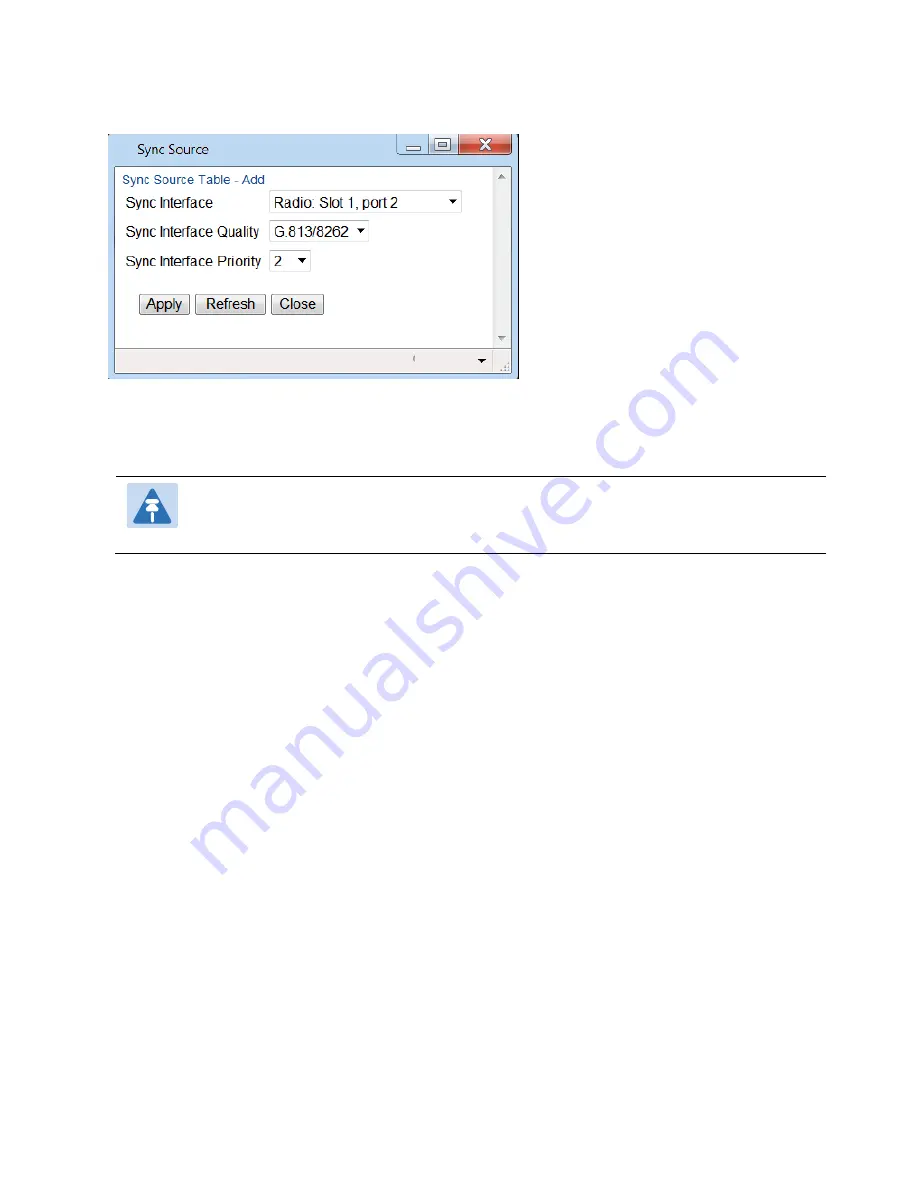
Figure 345
Sync Source
–
Add Page
2
In the
Sync Interface
field, select the interface you want to define as a synchronization source. You can
select from the following interface types:
o
Ethernet interfaces
–
You can use Ethernet interfaces, including Cascading interfaces.
o
Radio interfaces
–
You can use any radio interface.
Note
In order to select an Ethernet interface, you must first specify the media type for this interface. See
Configuring Ethernet Interfaces
3
In the
Sync Interface Quality
field, select the quality level applied to the selected synchronization source.
This enables the system to select the source with the highest quality as the current synchronization source.
o
If the
Sync Interface Quality
is set to
Automatic
, the quality is determined by the received SSMs. If no
valid SSM messages are received or in case of interface failure (such as LOS, LOC, LOF), the quality
becomes
Failure
. SSM must be enabled on the remote interface in order for the interface to receive SSM
messages. For instructions how to enable SSM, see
Configuring the Outgoing Clock and SSM Messages
o
If the
Sync Interface Quality
is set to a fixed value, then the quality status becomes
Failure
upon interface
failure (such as LOS, LOC, LOF).
4
In the
Sync Interface Priority
field, select the priority of this synchronization source relative to other
synchronization sources configured in the unit (1-16). You cannot assign the same priority to more than one
synchronization source. Once a priority value has been assigned, it no longer appears in the
Sync Interface
Priority
dropdown list.
5
Click
Apply
, then
Close
.
Editing a Sync Source
To edit a synchronization source:
1
In the Sync Source page (
), click
Edit
. The Sync Source
–
Edit page opens.
2
Edit the parameters, as defined above. You can edit all the parameters except
Sync Interface
, which is read-
only.
3
Click
Apply
, then
Close
.
Содержание PTP 820 Series
Страница 1: ...User Guide ...
Страница 49: ...Chapter 1 Introduction Configuration Tips phn 3965_006v002 Page 1 3 ...
Страница 57: ...Chapter 1 Introduction Front Panel Description phn 3965_006v002 Page 1 11 Figure 5 SM Card and Cover ...
Страница 114: ...Chapter 2 Getting Started Changing the Management IP Address phn 3965_006v002 Page 2 19 10 Click Apply ...
Страница 162: ...Chapter 3 Configuration Guide System Configurations phn 3965_006v002 Page 3 4 ...
Страница 294: ...Chapter 4 Unit Management Upgrading the Software phn 3965_006v002 Page 4 19 5 Select FTP ...
Страница 357: ...Chapter 5 Radio Configuration Configuring and Viewing Radio PMs and Statistics phn 3965_006v002 Page 5 43 ...
Страница 371: ...Chapter 5 Radio Configuration Configuring and Viewing Radio PMs and Statistics phn 3965_006v002 Page 5 57 ...
Страница 678: ...Chapter 12 Alarm Management and Troubleshooting Performing Diagnostics phn 3965_006v002 Page 12 28 ...
Страница 713: ...Chapter 14 Getting Started CLI Configuring the Activation Key CLI phn 3965_006v002 Page 14 18 ...
Страница 731: ...Chapter 14 Getting Started CLI Operating in FIPS Mode CLI phn 3965_006v002 Page 14 36 ...
Страница 809: ...Chapter 17 Radio Configuration CLI Configuring and Viewing Radio PMs and Statistics CLI phn 3965_006v002 Page 17 20 ...
Страница 867: ...Chapter 18 Ethernet Services and Interfaces CLI Viewing Ethernet PMs and Statistics CLI phn 3965_006v002 Page 18 48 ...
Страница 1002: ...Chapter 22 Synchronization CLI Configuring 1588 Transparent Clock CLI phn 3965_006v002 Page 22 15 ...
Страница 1149: ...phn 3965_006v002 Page V Term Definition WRED Weighted Random Early Detection XPIC Cross Polarization Interference Cancellation ...


