


10
10
3
Operation
3.1
Standard Operation
Check all external connections.
Load the material.
Open the shutoff valve.
!
Attention!
Ensure that the pad is not covered by a label when switching on the printer-applicator system.
Otherwise the vacuum sensor may be calibrated faultily.
Switch on the printer.
i
Note!
If the pad is not in the start position when the printer is switched on an error message appears on the
display.
Press pause button at the printer.
The applicator moves into the start position and is ready for work.
Press the
feed
button on the printer.
A synchronization feed is initiated. The processed labels have to be removed manually. After a few seconds the
printer carries out a short backfeed to position the front edge of the next label at the printing line.
i
Note!
This synchronizing also has to be carried out when the print job has been interrupted with the cancel button.
Synchronizing is not necessary when the print head was not lifted between print jobs. This also applies if
the printer was powered off between print jobs.
Start a print job.
Start the labelling process via PLC interface.
Error messages during labelling process are shown in the display of the printer.
3.2
Cleaning
!
Attention!
Never use solvent and/or abrasive.
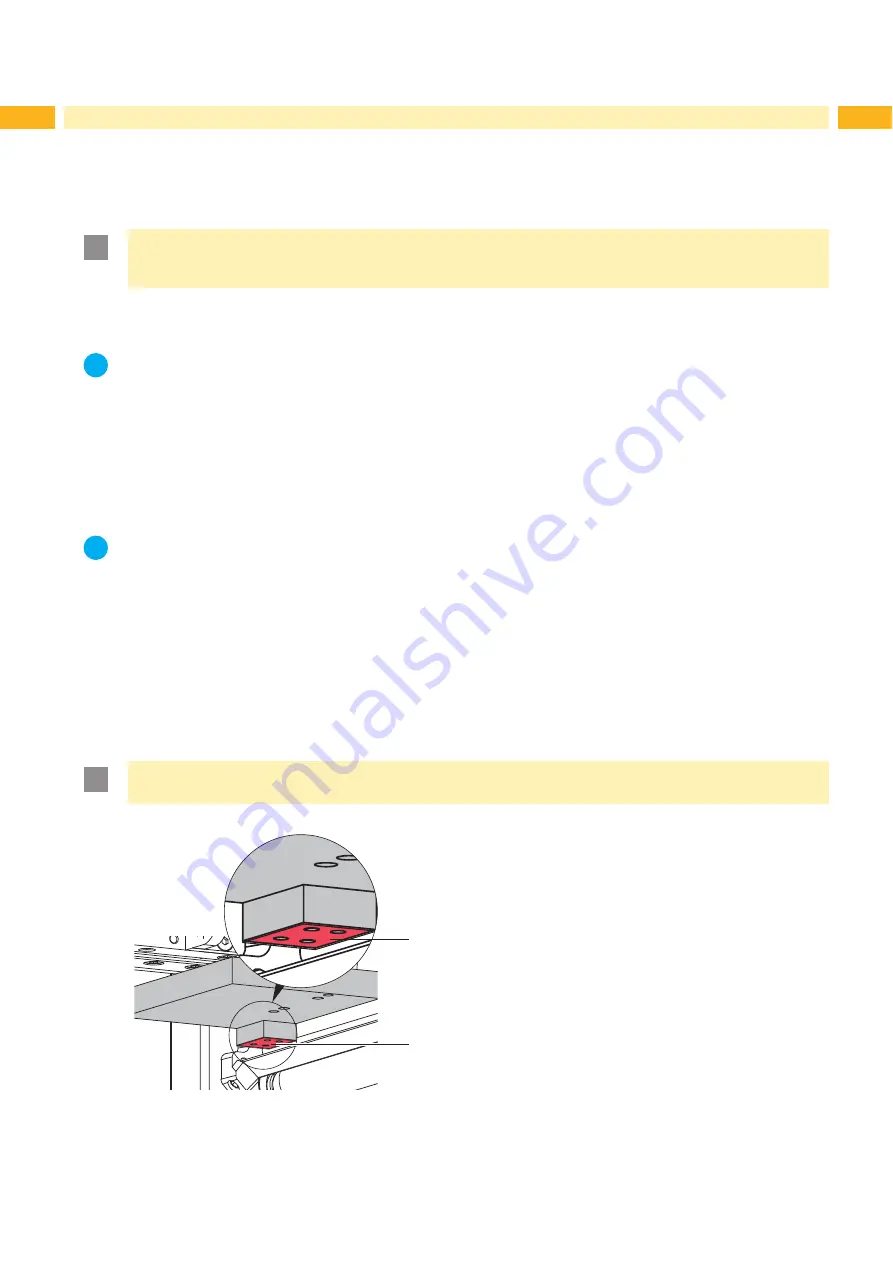
1
1
Clean the outside surfaces with multi purpose cleaner.
Remove dust particles and leftover label pieces with a soft
brush and/or vacuum cleaner.
The slide foil (1) requires regular cleaning as most of the
dirt will accumulate here.
Fig. 6
Cleaning the pad
Содержание 4114 Series
Страница 1: ...Made in Germany 4114 4116 Stroke Applicator Service Manual ...
Страница 40: ...40 40 11 Drawings 11 2 Pneumatic Drawing Type 4114 Fig 41 Pneumatic drawing type 4114 ...
Страница 41: ...41 11 Drawings 11 3 Pneumatic Drawing Type 4116 Fig 42 Pneumatic drawing type 4116 ...
Страница 42: ...42 42 11 Drawings 11 4 Label Position Type 4114L 4116L Fig 43 Label position 4414L 4116L ...
Страница 43: ...43 11 Drawings 11 5 Label Position Type 4114R 4116R Fig 44 Label position 4114R 4116R ...