


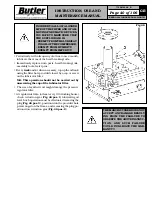


Page 38 of 106
INSTRUCTION, USE AND
MAINTENANCE MANUAL
GB
KENDO.30LIGHT-KENDO.30LIGHTFI
7105-M002-0_B
Fig. 37
Fig. 38
Fig. 36
1
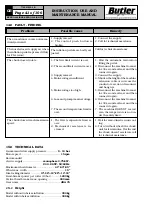
Fig. 39
Fig. 40
1
Fig. 41
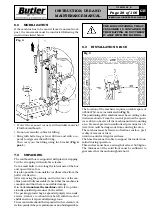
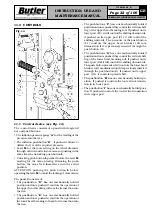
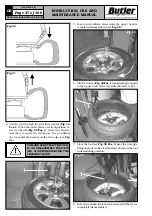
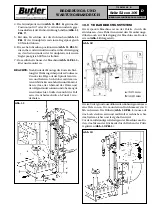
3. Hook the lower bead on the tool then rotate in clock-
wise sense until the complete assembly.
4. Then, position the upper bead on the tool assembly
area (
Fig. 40 Pos. 1
).
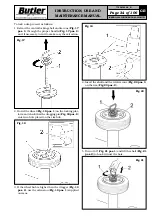
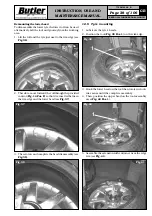
5. Assemble the extension with entrainer near the edge
rim (see
Fig. 41
).
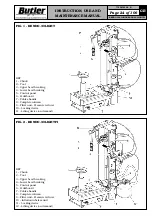
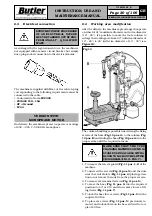
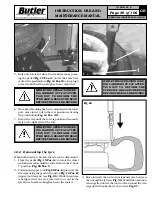
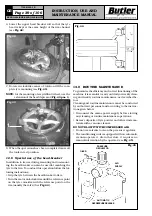
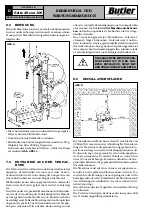
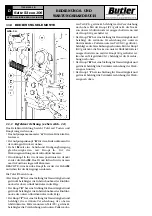
Demounting the lower bead
To disassemble the lower tyre the lower roll can be used
alternatively. Lift the tool and go away from the working
area.
1. Lift the roll and the tyre just next to the rim edge (see
Fig. 36
).
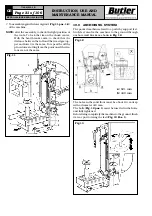
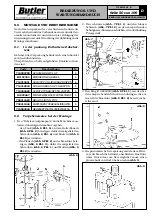
2. Therefore, move forward the roll through the provided
control (
Fig. 14 Pos. E
) so that it is inserted between
the rim edge and the lower bead (see
Fig. 37
).
3. Then, rotate and complete the bead disassembly (see
Fig. 38
).
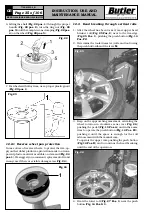
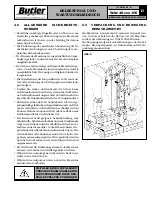
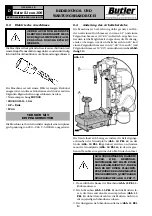
12.5 Tyre mounting
1. Lubricate the tyre’s beads.
2. Position the tool (
Fig. 39 Pos. 1
) on the rim edge.


