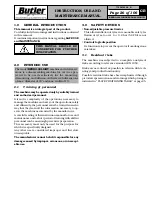


Page 36 of 106
INSTRUCTION, USE AND
MAINTENANCE MANUAL
GB
KENDO.30LIGHT-KENDO.30LIGHTFI
7105-M002-0_B
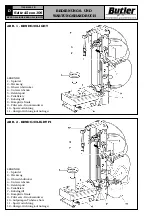
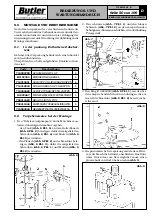
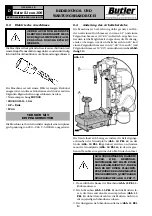
Fig. 27
1
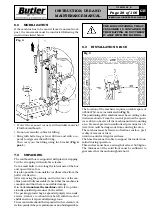
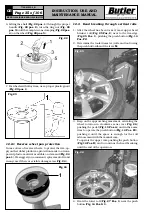
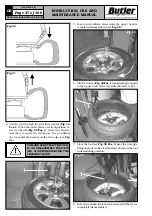
12.4 Demounting the tyre
When both beads are broken, the tyre can be demounted.
1. Press the pedal (
Fig. 15 Pos. A
) to rotate the wheel
in clockwise sense until the valve stem reaches “ hour
1” position (
Fig. 28 Pos. 1
).
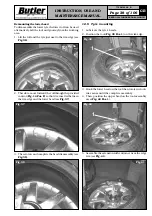
2. Position the upper tool (
Fig. 28 Pos. 2
) just next the
rim edge using the provided control (
Fig. 14 Pos. H
)
(upper tool descent) (see
Fig. 29
). While this phase
is being carried out, stay just next to a zone in the
tyre where bead breaking has been effectuated.
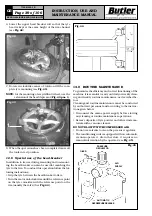
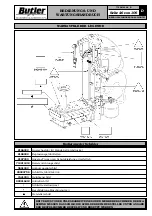
6. Once bead breaking has been completed in the lower
part, move lower roll in the rest position activating
the push button (
Fig. 14 Pos. G2
).
7. Rotate the rim until the valve is positioned immedi-
ately at the right side of the roll.
Fig. 28
1
2
Fig. 29
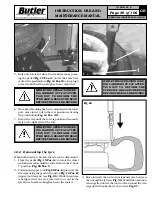
3. Move forward the tool so that it penetrates between
the rim and the tyre(see
Fig. 30
). While this operation
is being effectuated, the tool rotates around the rim
edge until it hooks the tyre bead (see
Fig. 31
).
WHILE THIS OPERATION IS BE-
ING CARRIED OUT PAY ATTEN-
TION NOT TO DEFORM THE
TYRE SIDE. GREASE THE BEAD
BEFORE THE ROLL RE-ENTERS.
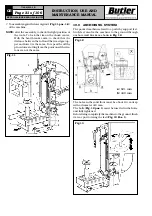
5. Only now rotate the wheel in clockwise sense press-
ing the pedal (
Fig. 15 Pos. A
) and at the same time
activate the pushbutton (
Fig. 14 Pos. G1
), keeping it
pressed until bead breaking has been completed.
WHILE THIS OPERATION IS BE-
ING CARRIED OUT PAY ATTEN-
TION NOT TO DEFORM THE
TYRE SIDE. GREASE THE BEAD
BEFORE THE ROLL RE-ENTERS.
WHILE THIS OPERATION IS BE-
ING CARRIED OUT PAY ATTEN-
TION NOT TO DEFORM THE
TYRE SIDE. GREASE THE BEAD
BEFORE THE ROLL RE-ENTERS.


