73
Supplement
Supple
m
e
n
t
4.
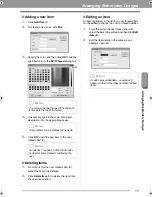
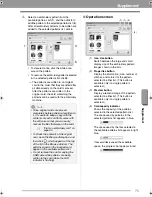
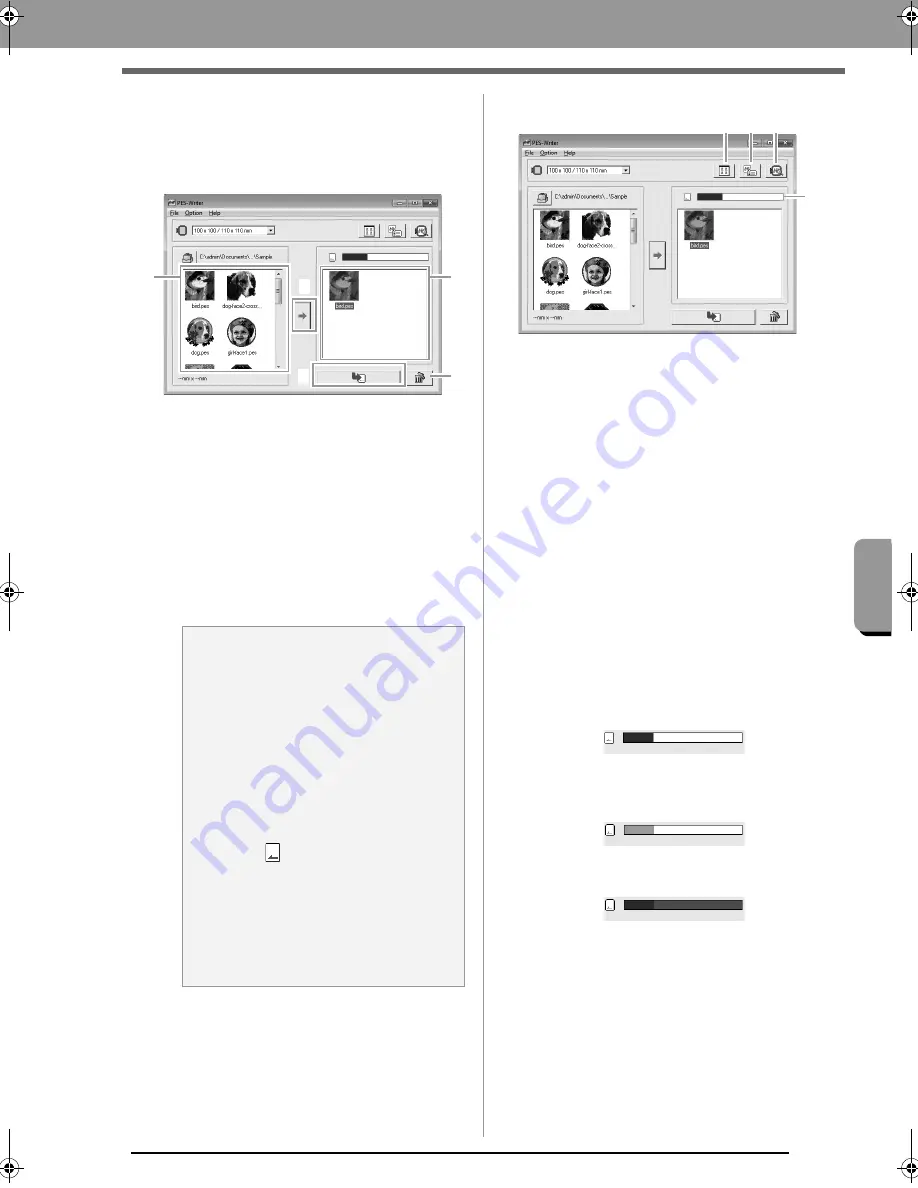
Select an embroidery pattern from the
available patterns list (
1
), and then click
2
to
add the pattern to the selected patterns list (
3
).
After all embroidery patterns to be written are
added to the selected patterns list, click
4
.
• To deselect a file, click the white area
around the pattern.
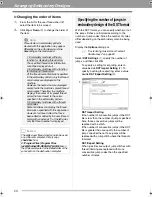
• To remove the embroidery pattern selected
in the selected patterns list, click
5
.
The patterns are written to an original
card in the order that they are listed after
all data already on the card is erased.
After the patterns are written to the
original card, the card containing the
patterns can be used with the embroidery
machine.
■
Operation screen
(1)
Icon size button
Switch between the large and small
display size of the embroidery pattern
images shown in the lists.
(2)
Properties button
Display the information (size, number of
stitches, and colors) for the pattern
selected in either list. (This button is
available only if a single pattern is
selected.)
(3)
Preview button
Display a realistic image of the pattern
selected in either list. (This button is
available only if a single pattern is
selected.)
(4)
Card capacity indicator
Shows the capacity of the patterns
selected in the selected patterns list.
The space used by patterns in the
selected patterns list appears in blue.
The space used by the files selected in
the available patterns list appears in light
blue.
If several files exceed the available
space, the progress bar appears in red.
a
Note:
• Since original cards are erased
completely before patterns are written to
it, it is useful to keep a copy with the
contents of each card that comes with
the software so that you can easily
recover the files that were on the card.
c
“From an embroidery card” on
page 50
• To check the contents of the original
card, open the Browse dialog box, and
then click
, which appears at the top
of the list in the Browse window. The
patterns saved on the inserted card
appear in the available patterns list.
• Do not remove the card or unplug the
USB cable while patterns are being
written to the card (while the LED
indicator is flashing).
3
1
2
4
5
(1) (2) (3)
(4)
XE8656-001.book Page 73 Thursday, June 30, 2011 2:56 PM
Содержание PEDESIGN PLUS
Страница 80: ...English Printed in China XF0606 001 ...

