3 - 10
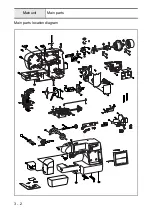
Main parts
Main unit
12
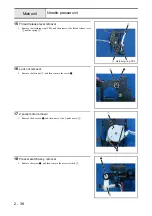
Upper shaft and lower shaft phase matching
1. Rotate the upper shaft
1
until the trench on the upper shaft pulley
2
is at
the front.
2. Turn the lower shaft
3
to the point where the mark on the outer rotary
hook
4
is at the front, the larger feed cam
5
is at the rear, and the hole on
the lower shaft
6
is at the top.
3. Pull the timing belt
7
and hang it over the timing pulley D
8
.
1
7
8
4
6
3
5
3
7
2
13
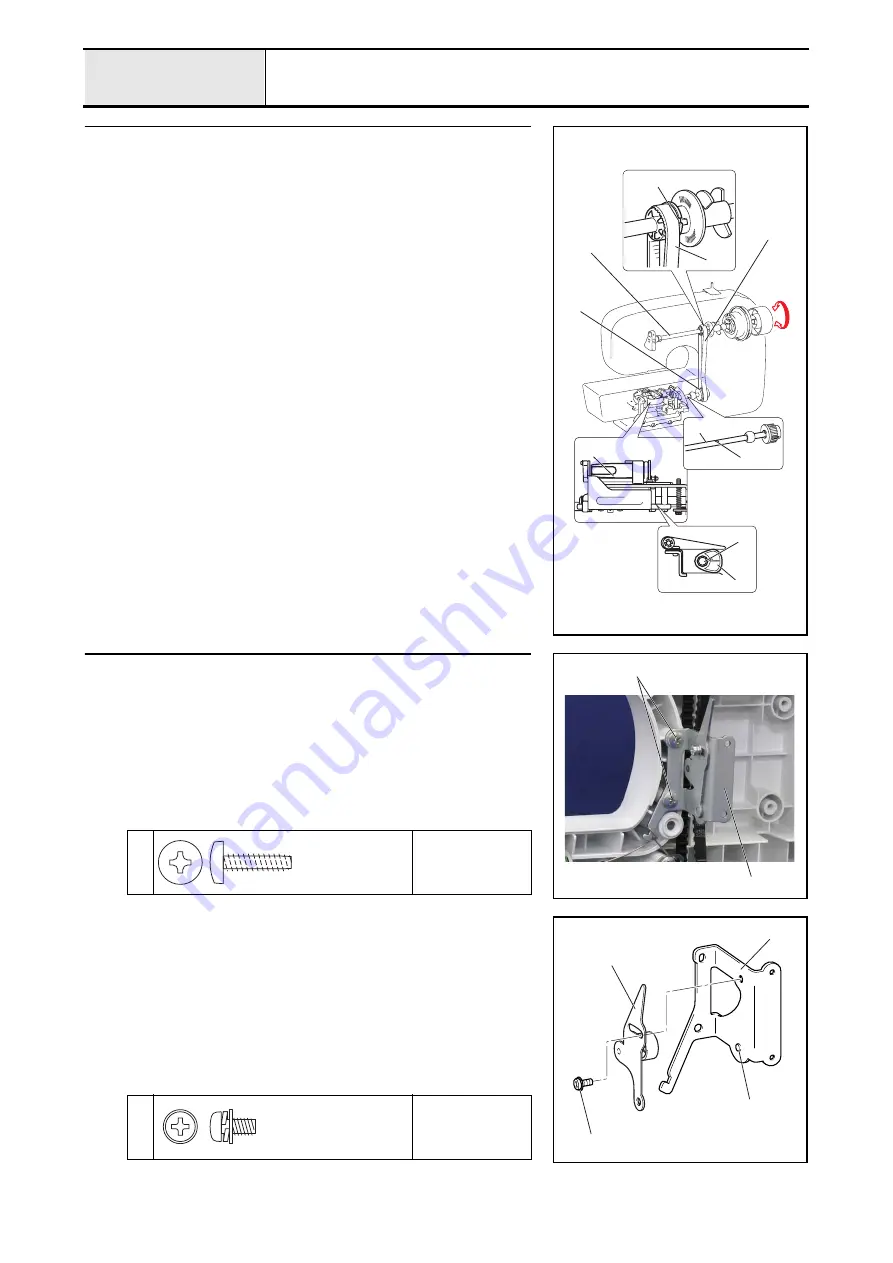
Tension pulley assy. attachment
1. Attach the tension pulley assy.
1
to the rear cover assy. with the 2 screws
1
.
*Key point
• Perform "4 - 3 Timing belt tension.
1
Torque
1.18 — 1.57 N
·
m
1
1
Giza Tite
5X16
13-1
Tension pulley assy. assembly
1. Align the boss
3
on the tension pulley holder
2
with the hole on the
tension pulley assy.
1
, and secure the tension pulley assy. with the screw
1
.
1
Torque
1.18 — 1.57 N
·
m
1
1
2
3
Screw, Pan (S/P washer)
M
4X8
Содержание HS-3000
Страница 1: ......
Страница 2: ......
Страница 3: ......
Страница 9: ...vi ...
Страница 16: ...2 1 2 Disassembly Main parts 2 2 Feed unit 2 22 Needle presser unit 2 30 ...
Страница 17: ...2 2 Main parts Main parts location diagram Main unit ...
Страница 37: ...2 22 Feed unit location diagram Main unit ...
Страница 45: ...2 30 Needle presser unit location diagram Main unit ...
Страница 55: ...3 2 Main parts Main parts location diagram Main unit ...
Страница 77: ...3 24 Main unit Main parts 36 Accessory table attachment 1 Attach the accessory table 1 1 ...
Страница 78: ...3 25 Assembly Feed unit Feed unit location diagram Main unit ...
Страница 90: ...3 37 Assembly Needle presser unit Needle presser unit location diagram Main unit ...
Страница 163: ...7 12 ...
Страница 164: ......

