4 - 14
Adjustment
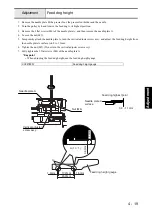
Forward/backward feed
1. Attach the front cover assy..
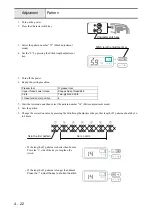
2. Start the test mode.
3. Select the pattern number “05” (Forward and reverse feed mode).
4. Insert a paper between folded broadcloth, and press the
(Start/Stop button) to run the machine in "Forward
and reverse feed mode", checking the forward and backward feed length.
5. Remove the base cover A.
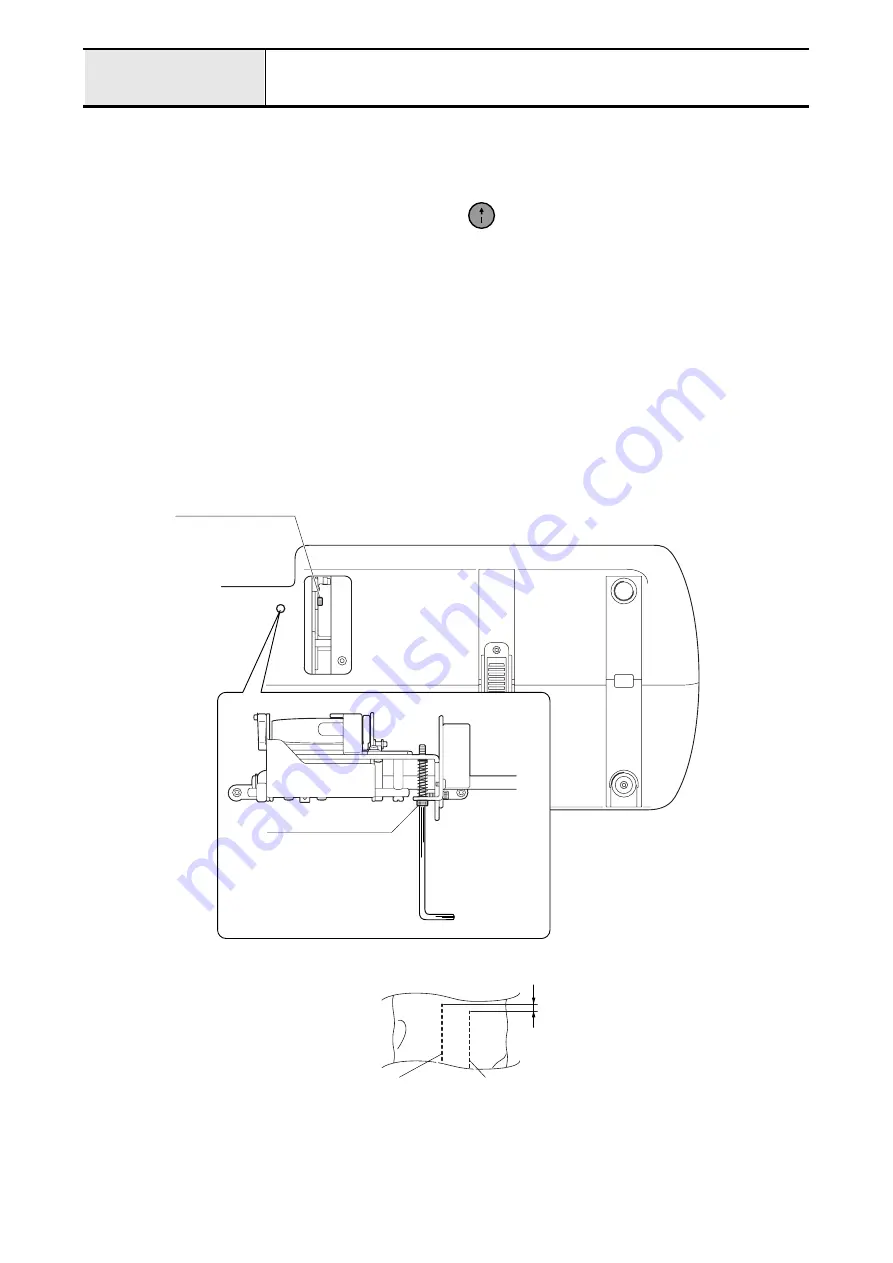
6. Loosen the socket screw (M3 x 8) of the FPM holder assy..
7. Adjust the forward and backward feed length turning the socket screw (M4 x 25) of the FPM holder assy..
*Key point
The forward feed should be 0 to 10 mm longer then the backward feed.
• Tightening the socket screw (M4 x 25) the backward feed shorter.
• Loosening the socket screw (M4 x 25) the backward feed longer.
8. Apply a small amount thread locker to the socket screw (M4 x 25).
9. Tighten the socket screw (M3 x 8) of the FPM holer assy..
10. Attach the base cover A.
Socket
screw (M3 x 8)
Socket
screw (M4 x 25)
0 - 10mm
Forward feed
Backward feed
Содержание HS-3000
Страница 1: ......
Страница 2: ......
Страница 3: ......
Страница 9: ...vi ...
Страница 16: ...2 1 2 Disassembly Main parts 2 2 Feed unit 2 22 Needle presser unit 2 30 ...
Страница 17: ...2 2 Main parts Main parts location diagram Main unit ...
Страница 37: ...2 22 Feed unit location diagram Main unit ...
Страница 45: ...2 30 Needle presser unit location diagram Main unit ...
Страница 55: ...3 2 Main parts Main parts location diagram Main unit ...
Страница 77: ...3 24 Main unit Main parts 36 Accessory table attachment 1 Attach the accessory table 1 1 ...
Страница 78: ...3 25 Assembly Feed unit Feed unit location diagram Main unit ...
Страница 90: ...3 37 Assembly Needle presser unit Needle presser unit location diagram Main unit ...
Страница 163: ...7 12 ...
Страница 164: ......


