5. CORRECT USE
5. RICHTIGE BEDIENUNG
5. UTILISATION CORRECTE
5. USO CORRECTO
HM-8180
28
5-3. Winding the lower thread
5-3. Aufwickeln des Unterfadens
CAUTION/ACHTUNG
Do not touch any of the moving parts or press any objects against the machine while winding the
lower thread, as this may result in personal injury or damage to the machine.
Berühren Sie beim Aufwickeln des Unterfadens keine sich bewegenden Teile und halten Sie auch
keine Gegenstände an solche Teile, weil Sie sich verletzen können und die Nähmaschine beschädigt
werden kann.
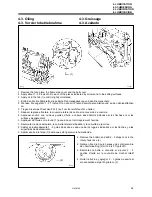
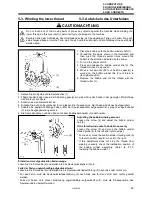
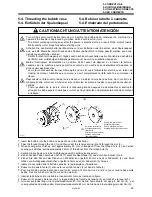
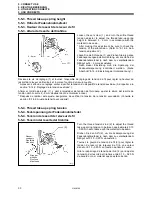
1. Place the bobbin onto the bobbin winder shaft (1).
2. Thread the thread as shown in the illustration and
then wind the thread several times around the
bobbin in the direction indicated by the arrow.
3. Turn on the power switch.
4. Press and release the bobbin winder link (2). The
thread will then be wound on.
5. When a set amount (80% of bobbin capacity) is
wound on, the bobbin winder link (2) will return to
its original position.
6. Remove the bobbin and cut the thread with the
thread cutter (3).
1. Setzen Sie die Spule auf die Spulenachse (1).
2. Fädeln Sie den Faden wie in der Abbildung gezeigt ein, wickeln Sie den Faden in der gezeigten Pfeilrichtung
mehrmals um die Spule.
3. Schalten sie den Netzschalter ein.
4. Drücken Sie auf den Spulenhebel (2) und lassen Sie ihn wieder los. Der Faden wird danach aufgewickelt.
5. Sobald eine bestimmte Menge Faden (80% der Spulenkapazität) aufgewickelt ist, springt der Spulenhebel
(2) in die Ausgangsstellung zurück.
6. Die Spule abnehmen und den Faden mit dem Fadenabschneider (3) abschneiden.
Adjusting the bobbin winding amount
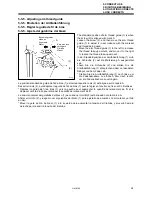
Loosen the screw (4) and adjust the bobbin winder
link (3).
If the thread winds onto the bobbin unevenly
Loosen the screw (5) and move the bobbin winder
thread guide (6) to the left and right to adjust.
* For case A, move the bobbin winder thread guide (6)
to the left, and for case B, move it to the right.
* If this adjustment does not stop the thread from
winding unevenly, check the installation position of
the bobbin winder assembly. (Refer to “3-10.
Installing the bobbin winder”.)
Einstellen der aufgewickelten Fadenmenge
Lösen Sie die Schraube (4) und stellen Sie das Spulenwicklerglied (3) ein.
Falls der Faden ungleichmäßig aufgewickelt wird
Lösen Sie die Schraube (5) und stellen Sie die Spulenwicklerfadenführung (6) nach links oder rechts ein.
* Für den Fall A muß die Spulenwicklerfadenführung (6) nach links und für den Fall B nach rechts gestellt
werden.
* Falls der Faden trotz dieser Einstellung ungleichmäßig aufgewickelt wird, muß die Einbauposition des
Spulenwicklers überprüft werden.
(4)
1276Q
(5)
(6)
A
B
1277Q
(1)
(2)
(3)
1274Q

