•
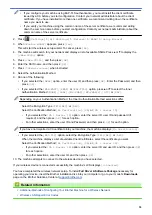
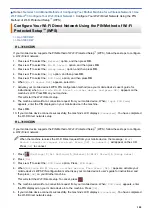
If you configure your machine using EAP-TLS authentication, you must install the client certificate
issued by a CA before you start configuration. Contact your network administrator about the client
certificate. If you have installed more than one certificate, we recommend writing down the certificate
name you want to use.
•
If you verify your machine using the common name of the server certificate, we recommend writing
down the common name before you start configuration. Contact your network administrator about the
common name of the server certificate.
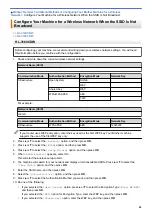
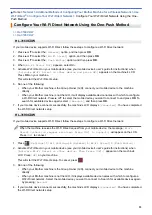
2. Press
[Settings]
>
[All Settings]
>
[Network]
>
[WLAN]
>
[Setup Wizard]
.
3. When
[Enable WLAN?]
appears, press
[Yes]
.
This will start the wireless setup wizard. To cancel, press
[No]
.
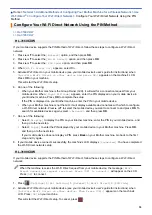
4. The machine will search for your network and display a list of available SSIDs. Press
a
or
b
to display the
[<New SSID>]
option.
5. Press
[<New SSID>]
, and then press
[OK]
.
6. Enter the SSID name, and then press
[OK]
.
7. Press
[Infrastructure]
when instructed.
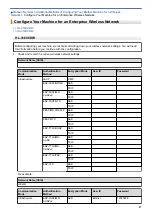
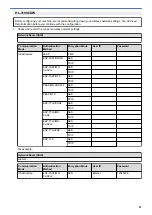
8. Select the Authentication Method.
9. Do one of the following:
•
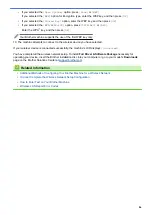
If you selected the
[LEAP]
option, enter the user ID, and then press
[OK]
. Enter the Password, and then
press
[OK]
.
•
If you selected the
[EAP-FAST]
,
[PEAP]
or
[EAP-TTLS]
option, press
a
or
b
to select the Inner
Authentication Method
[NONE]
,
[CHAP]
,
[MS-CHAP]
,
[MS-CHAPv2]
,
[GTC]
or
[PAP]
.
Depending on your Authentication Method, the Inner Authentication Method selections differ.
Select the Encryption Type
[TKIP+AES]
or
[AES]
.
Select the Verification Method
[No Verification]
,
[CA]
or
[CA + Server ID]
.
-
If you selected the
[CA + Server ID]
option, enter the server ID, user ID and password (if
required), and then press
[OK]
for each option.
-
For other selections, enter the user ID and Password, and then press
[OK]
for each option.
If you have not imported a CA certificate into your machine, the machine displays
[No Verification]
.
•
If you selected the
[EAP-TLS]
option, select the Encryption Type
[TKIP+AES]
or
[AES]
.
When the machine displays a list of available Client Certificates, select the certificate you want.
Select the Verification Method
[No Verification]
,
[CA]
or
[CA + Server ID]
.
-
If you selected the
[CA + Server ID]
option, enter the server ID and user ID, and then press
[OK]
for each option.
-
For other selections, enter the user ID, and then press
[OK]
.
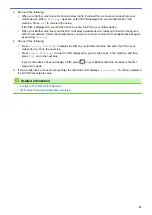
10. The machine attempts to connect to the wireless device you have selected.
If your wireless device is connected successfully, the machine's LCD displays
[Connected]
.
You have completed the wireless network setup. To install
Full Driver & Software Package
necessary for
operating your device, insert the Brother installation disc into your computer or go to your model's
Downloads
page on the Brother Solutions Center at
Related Information
•
Additional Methods of Configuring Your Brother Machine for a Wireless Network
•
Wireless LAN Report Error Codes
90
Содержание HL-3160CDW
Страница 16: ...Related Information Introduction to Your Brother Machine 12 ...
Страница 20: ...5 Press Med 6 Press Related Information Introduction to Your Brother Machine 16 ...
Страница 22: ...Related Information Introduction to Your Brother Machine Uninstall the Brother Software and Drivers Windows 18 ...
Страница 46: ...Related Information Print from Your Computer Windows Print Settings Windows 42 ...
Страница 51: ... Print a Document Windows 47 ...
Страница 100: ...Related Information Configure Your Wi Fi Direct Network Wi Fi Direct Network Configuration Overview 96 ...
Страница 105: ...Related Information Configure Your Wi Fi Direct Network Wi Fi Direct Network Configuration Overview 101 ...
Страница 115: ...Home Security Security Lock the Machine Settings Network Security Features 111 ...
Страница 155: ...Related Information Manage Your Network Machine Securely Using SSL TLS 151 ...
Страница 173: ...Home Mobile AirPrint AirPrint AirPrint Overview Before Using AirPrint macOS Print Using AirPrint 169 ...
Страница 183: ...Home Brother iPrint Scan for Windows and Mac Brother iPrint Scan for Windows and Mac Brother iPrint Scan Overview 179 ...
Страница 197: ...5 Put the paper tray firmly back in the machine Related Information Paper Jams 193 ...
Страница 202: ...Related Information Paper Jams 198 ...
Страница 222: ... Use the Network Connection Repair Tool Windows I Want to Check that My Network Devices are Working Correctly 218 ...
Страница 227: ...Home Troubleshooting Reset Functions Reset Functions Machine Reset Network Reset Factory Reset 223 ...
Страница 275: ...Related Information Routine Maintenance 271 ...
Страница 316: ...Related Information Appendix Replace Supplies 312 ...
Страница 319: ...Visit us on the World Wide Web www brother com CHN ENG Version 0 ...


