26
en | Mounting Installation
AutoDome Easy IP
F01U079609 | 1.0 | 2008.08
Installation Manual
Bosch Security Systems, Inc.
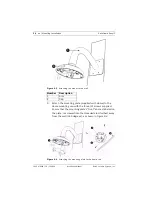
Figure 6.6
Attaching the AutoDome Easy IP to the mounting plate
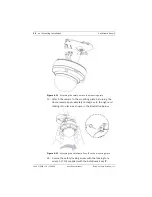
13. Secure the safety locking screw with the locking torx
wrench (T-10) supplied with the AutoDome Easy IP.
14. Pull excess wire back into the mount tube.
15. Confirm that the housing is electrically grounded.
6.2
Installing the Pipe Mount
1.
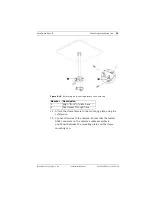
Identify a secure hard surface location for the ceiling pipe
mount (supplied separately).
2.
Use the four (4) holes in the flange as a template to mark
the position where the holes should be drilled to secure
the mount.
3.
Drill the four (4) holes in the installation location (screws
not supplied, use a minimum of 10 mm (.39 in.)).
4.
Drill a fifth hole (maximum of 20 mm) in the center of the
four-hole pattern used to mount the flange. Use this hole
to feed the wires through the mount.
5.
Screw the conduit clamp provided into the mounting
flange.
Содержание VEZ IP Series
Страница 1: ...AutoDome Easy IP VEZ IP Series en Installation Manual ...
Страница 2: ......
Страница 18: ...12 en Safety AutoDome Easy IP F01U079609 1 0 2008 08 Installation Manual Bosch Security Systems Inc ...
Страница 21: ...AutoDome Easy IP Unpacking en 15 Bosch Security Systems Inc Installation Manual F01U079609 1 0 2008 08 ...
Страница 23: ...AutoDome Easy IP Description en 17 Bosch Security Systems Inc Installation Manual F01U079609 1 0 2008 08 ...
Страница 139: ...AutoDome Easy IP Settings Menus en 133 Bosch Security Systems Inc Installation Manual F01U079609 1 0 2008 08 ...
Страница 143: ...AutoDome Easy IP Preventive Maintenance en 137 Bosch Security Systems Inc Installation Manual F01U079609 1 0 2008 07 ...
Страница 152: ...146 en Index AutoDome Easy IP F01U079609 1 0 2008 08 Installation Manual Bosch Security Systems Inc ...

