9
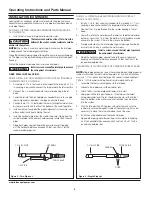
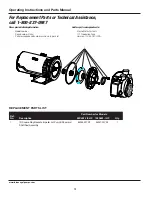
18. Push the bellows side of the shaft seal over the impeller hub, you
can use a little water or dish soap to lubricate the impeller hub to
make assembly easier. (Figure 15) Make sure after assembly the
back carbon and white ceramic surfaces are in contact.
19. Holding the motor shaft with a flat blade screw driver thread the
impeller onto the motor shaft, hand tighten. Lubricate the nose of the
impeller with potable water safe lubricant.
20. Replace the plastic cap over the motor shaft end.
21. Reassemble the diffuser, make sure the arrow indicating the top is
pointed toward the top of the pump, torque the two screws to 30
±10 inch pounds.
22. Using the (4) cap screws reattach the pump housing and base to
the pump body. Torque the screws to 140 ±40 inch pounds.
23. Reattach the plumbing connections, reconnect the power and prime
the pump (See section on priming the pump). After reassembling the
pump check for leaks. If a leak is detected, repair before using the
pump.
SEAL
PLATE
Figure 15 - Motor Shaft
MOTOR
IMPELLER
SEAL
SEAT
SEAL PLATE
SEAL
FACING
MUST
BE CLEAN FOR
PROPER SEAL
www.blueangelpumps.com
CJW Series


